> ## Documentation Index
> Fetch the complete documentation index at: https://support.bolt.new/llms.txt
> Use this file to discover all available pages before exploring further.
# Add your design system
> Add your design system to build projects in Bolt using your company's UI guidelines and components.
When adding your design system, you point Bolt to your design documentation and component library. Bolt reads your design sources and uses them to generate a Storybook inside Bolt.
[Storybook](https://storybook.js.org/) is an open-source tool that catalogs your UI components in one place, separate from the rest of your app. This makes it possible to browse and test components without building your full app. If your team already has a Storybook, you can add it as a [design source](/building/design-system/add-design-system#add-your-design-sources).
Adding a design system is available on paid Team plans. Any member of a paid team can add a design system, and each team can add or [sync](/building/design-system/sync-design-system) a combined total of 10 design systems per week.
If your team is on a free plan, a team admin can upgrade to a paid plan. If you're on a personal plan, [upgrade to a Team plan](https://bolt.new/?showPricing=true) to get started.
## Before you begin
Adding a design system typically takes 45 to 60 minutes depending on the size of your sources, so plan to allow enough time before you need to start building.
If you're adding an NPM package from a private registry, make sure to have your registry URL, auth token, and scopes ready.
## Add a design system
### Open the design system setup
1. Make sure you're logged in to your Team account.
2. On the Bolt homepage, in the design system section, click **Import your design system**.
3. In the **Let's set up your team's design system** dialog, click **Set up myself**.
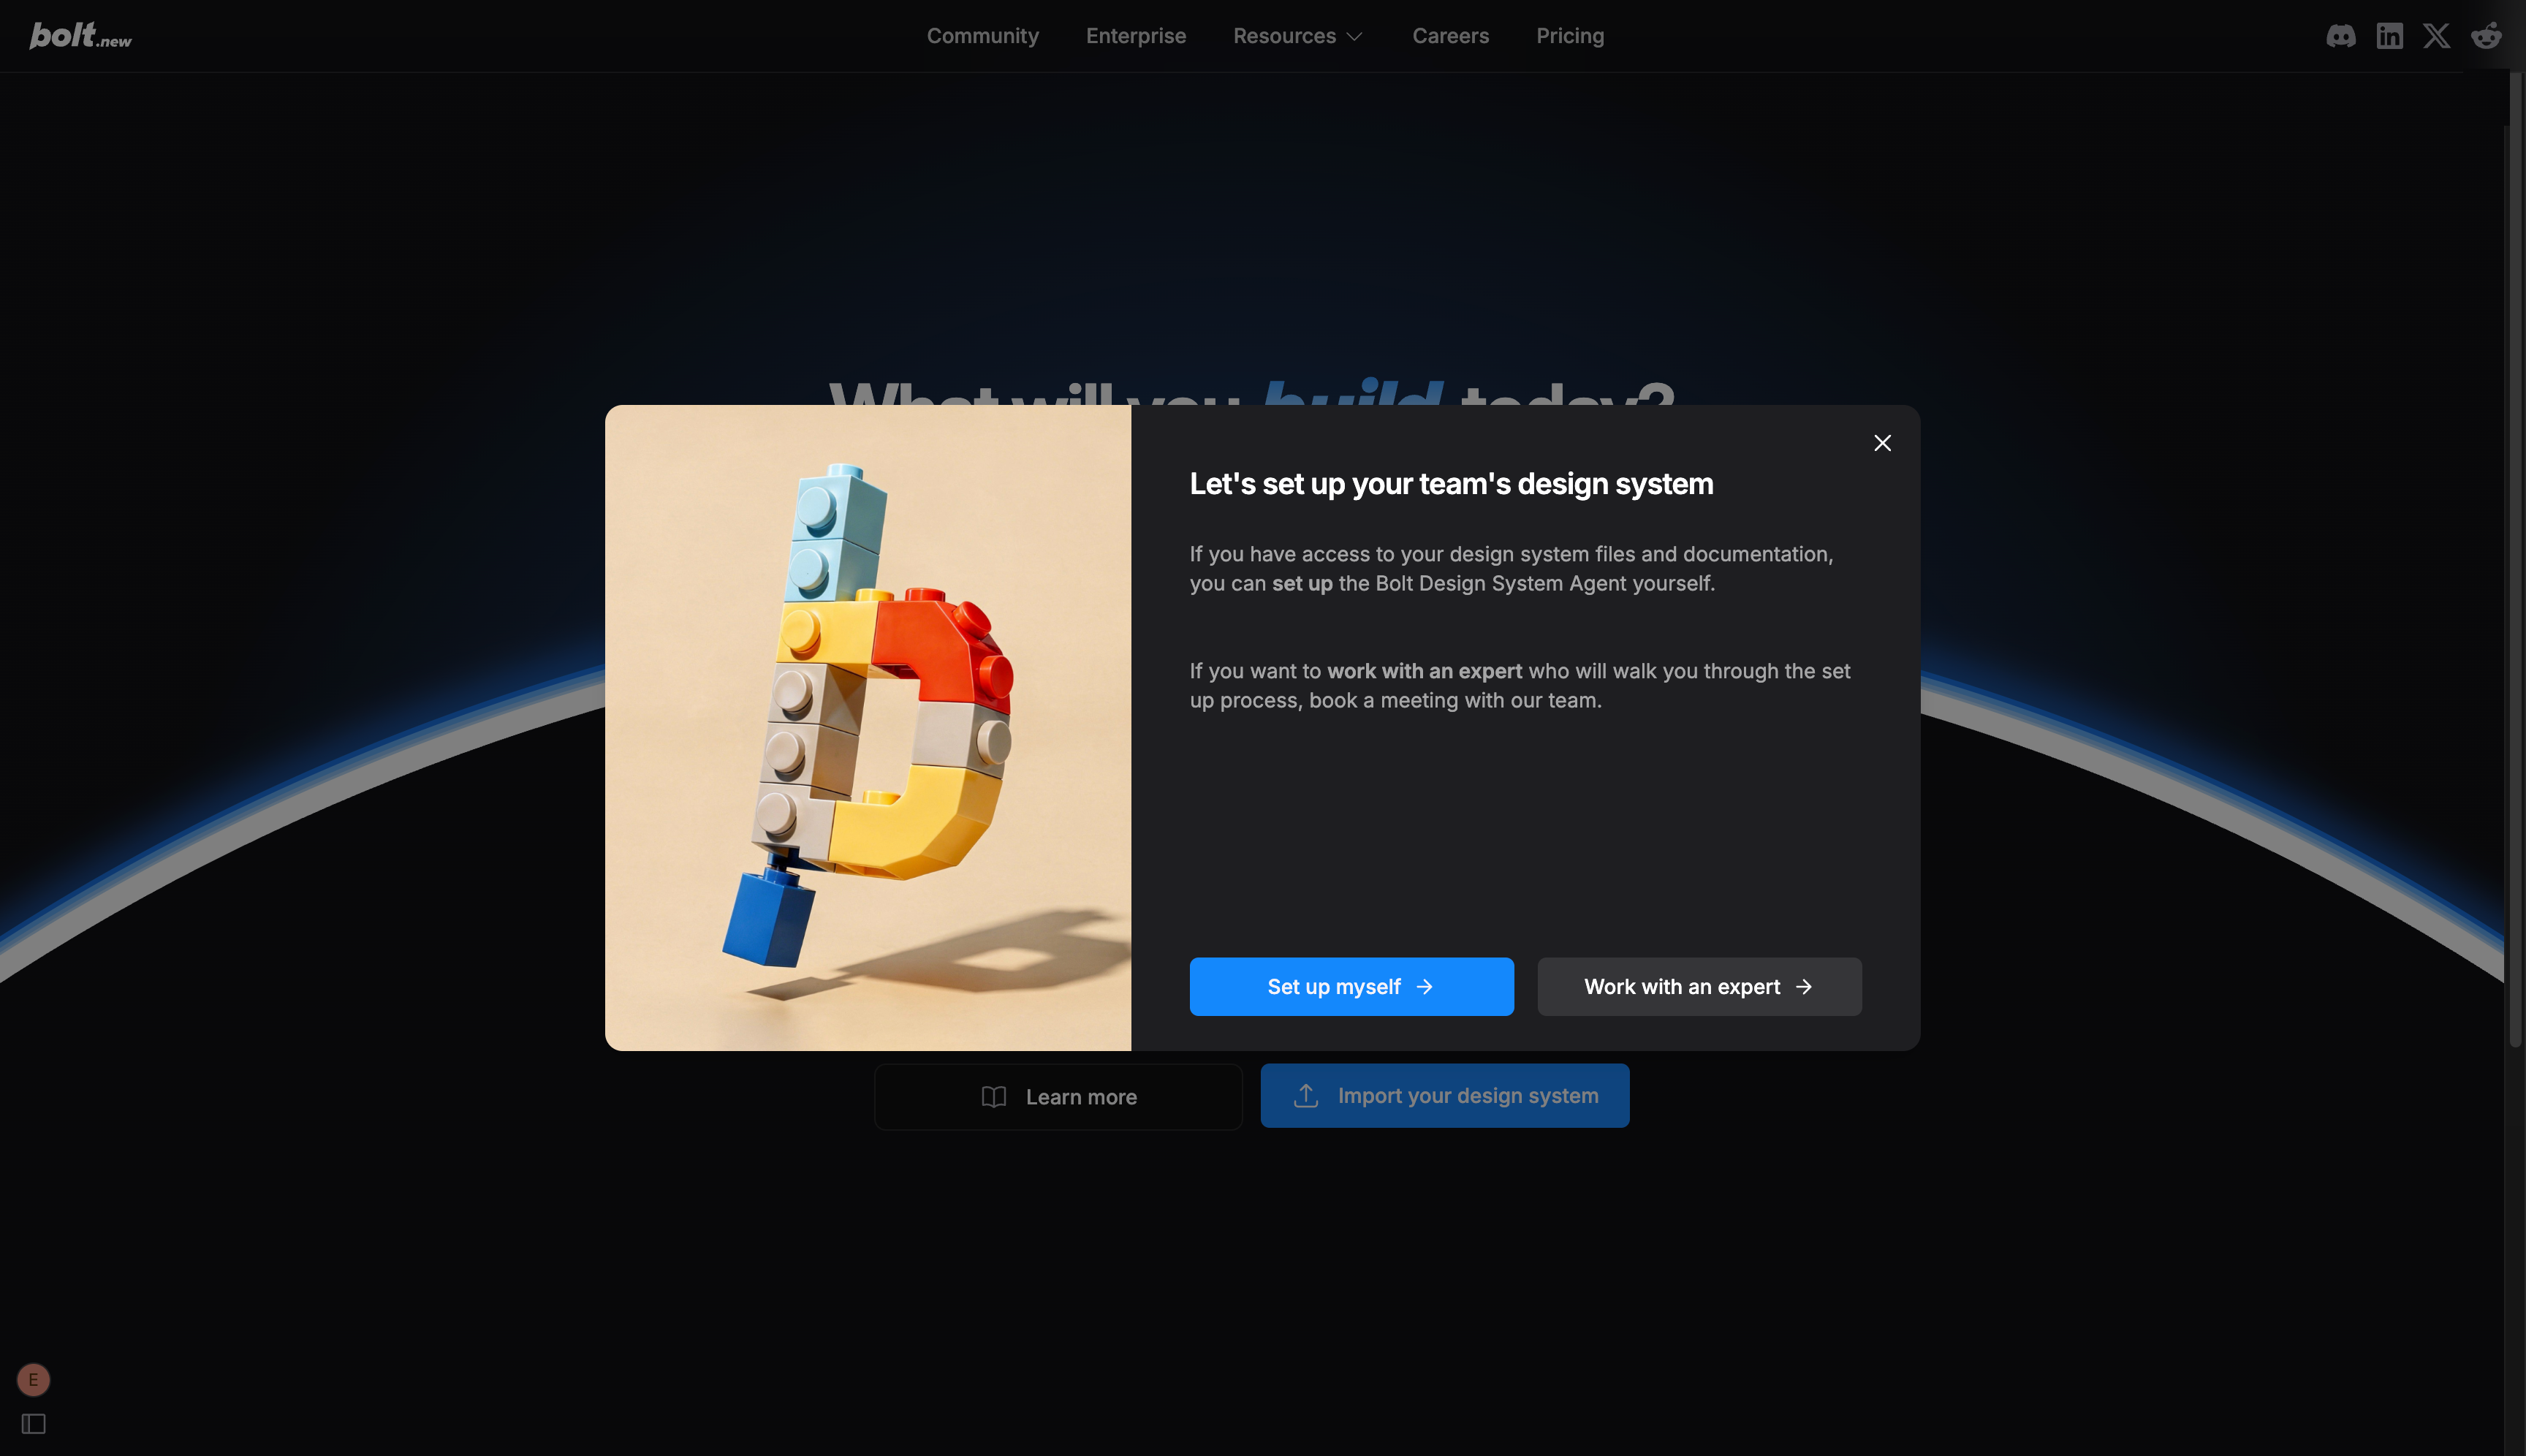 If you'd prefer guided help adding your design system, select **Work with an expert** to connect with a Bolt team member.
### Add your design sources
The more documentation you add, the more precisely Bolt can apply your design system standards. You can add as many sources as needed, in any combination of source types.
Source quality directly affects your results. GitHub repositories and NPM packages often produce the best outcomes while documentation websites alone produce a theme rather than a true design system with reusable components.
Consistent sources are also important: conflicting guidelines, mixed frameworks, or sources from unrelated design systems can all reduce quality.
For detailed guidance, see [Best practices for adding your design system](/building/design-system/best-practices#best-practices-for-adding-your-design-system).
To add your sources, in the **Sources** pane, select each type of source you want to add, then drop your files or add the target URL.
#### Files
Upload up to 10 PDFs, images, or other local files that document your design system, such as brand guidelines or component specs. To upload an entire directory, drop it as a `.zip` file.
#### Websites
Enter the URL of any publicly accessible documentation site, like a hosted design system site or style guide.
If your documentation site isn't publicly accessible, you can build it into a `.zip` file and upload it under **Files** instead.
#### GitHub
Enter the URL of a public GitHub repository that contains your design system code or documentation.
#### Storybook
Enter the URL of your published Storybook instance.
#### NPM
Add your packages and, if you're using a private registry, your registry details.
Any private registries your team has already added will appear here automatically. You don't need to add them again. If you add a new registry, it's saved to your organization for future use.
* **Public registry**
For each package, in the **Packages** section, enter a package name or `npmjs.com` URL. For example, `@shadcn/ui` or `@radix-ui/react-dialog`.
You can also drop a `.tgz` package archive or click **Choose .tgz file** to upload one.
* **Private registry**
To connect an NPM registry that's behind a firewall, book a setup call with a Bolt expert or manually upload your design system resources as files instead.
1. In the **Registries** section, click **Add a private registry**, then enter your registry URL and auth token.
2. Optionally, enter scopes to define Bolt's access to your package files.
3. Add your packages in the **Packages** section. Use this option if your packages require authentication, including public registries with private scopes.
### Add agent instructions
In the left pane, click **Agent Instructions**, then enter any additional information that can help Bolt better understand your sources.
If you'd prefer guided help adding your design system, select **Work with an expert** to connect with a Bolt team member.
### Add your design sources
The more documentation you add, the more precisely Bolt can apply your design system standards. You can add as many sources as needed, in any combination of source types.
Source quality directly affects your results. GitHub repositories and NPM packages often produce the best outcomes while documentation websites alone produce a theme rather than a true design system with reusable components.
Consistent sources are also important: conflicting guidelines, mixed frameworks, or sources from unrelated design systems can all reduce quality.
For detailed guidance, see [Best practices for adding your design system](/building/design-system/best-practices#best-practices-for-adding-your-design-system).
To add your sources, in the **Sources** pane, select each type of source you want to add, then drop your files or add the target URL.
#### Files
Upload up to 10 PDFs, images, or other local files that document your design system, such as brand guidelines or component specs. To upload an entire directory, drop it as a `.zip` file.
#### Websites
Enter the URL of any publicly accessible documentation site, like a hosted design system site or style guide.
If your documentation site isn't publicly accessible, you can build it into a `.zip` file and upload it under **Files** instead.
#### GitHub
Enter the URL of a public GitHub repository that contains your design system code or documentation.
#### Storybook
Enter the URL of your published Storybook instance.
#### NPM
Add your packages and, if you're using a private registry, your registry details.
Any private registries your team has already added will appear here automatically. You don't need to add them again. If you add a new registry, it's saved to your organization for future use.
* **Public registry**
For each package, in the **Packages** section, enter a package name or `npmjs.com` URL. For example, `@shadcn/ui` or `@radix-ui/react-dialog`.
You can also drop a `.tgz` package archive or click **Choose .tgz file** to upload one.
* **Private registry**
To connect an NPM registry that's behind a firewall, book a setup call with a Bolt expert or manually upload your design system resources as files instead.
1. In the **Registries** section, click **Add a private registry**, then enter your registry URL and auth token.
2. Optionally, enter scopes to define Bolt's access to your package files.
3. Add your packages in the **Packages** section. Use this option if your packages require authentication, including public registries with private scopes.
### Add agent instructions
In the left pane, click **Agent Instructions**, then enter any additional information that can help Bolt better understand your sources.
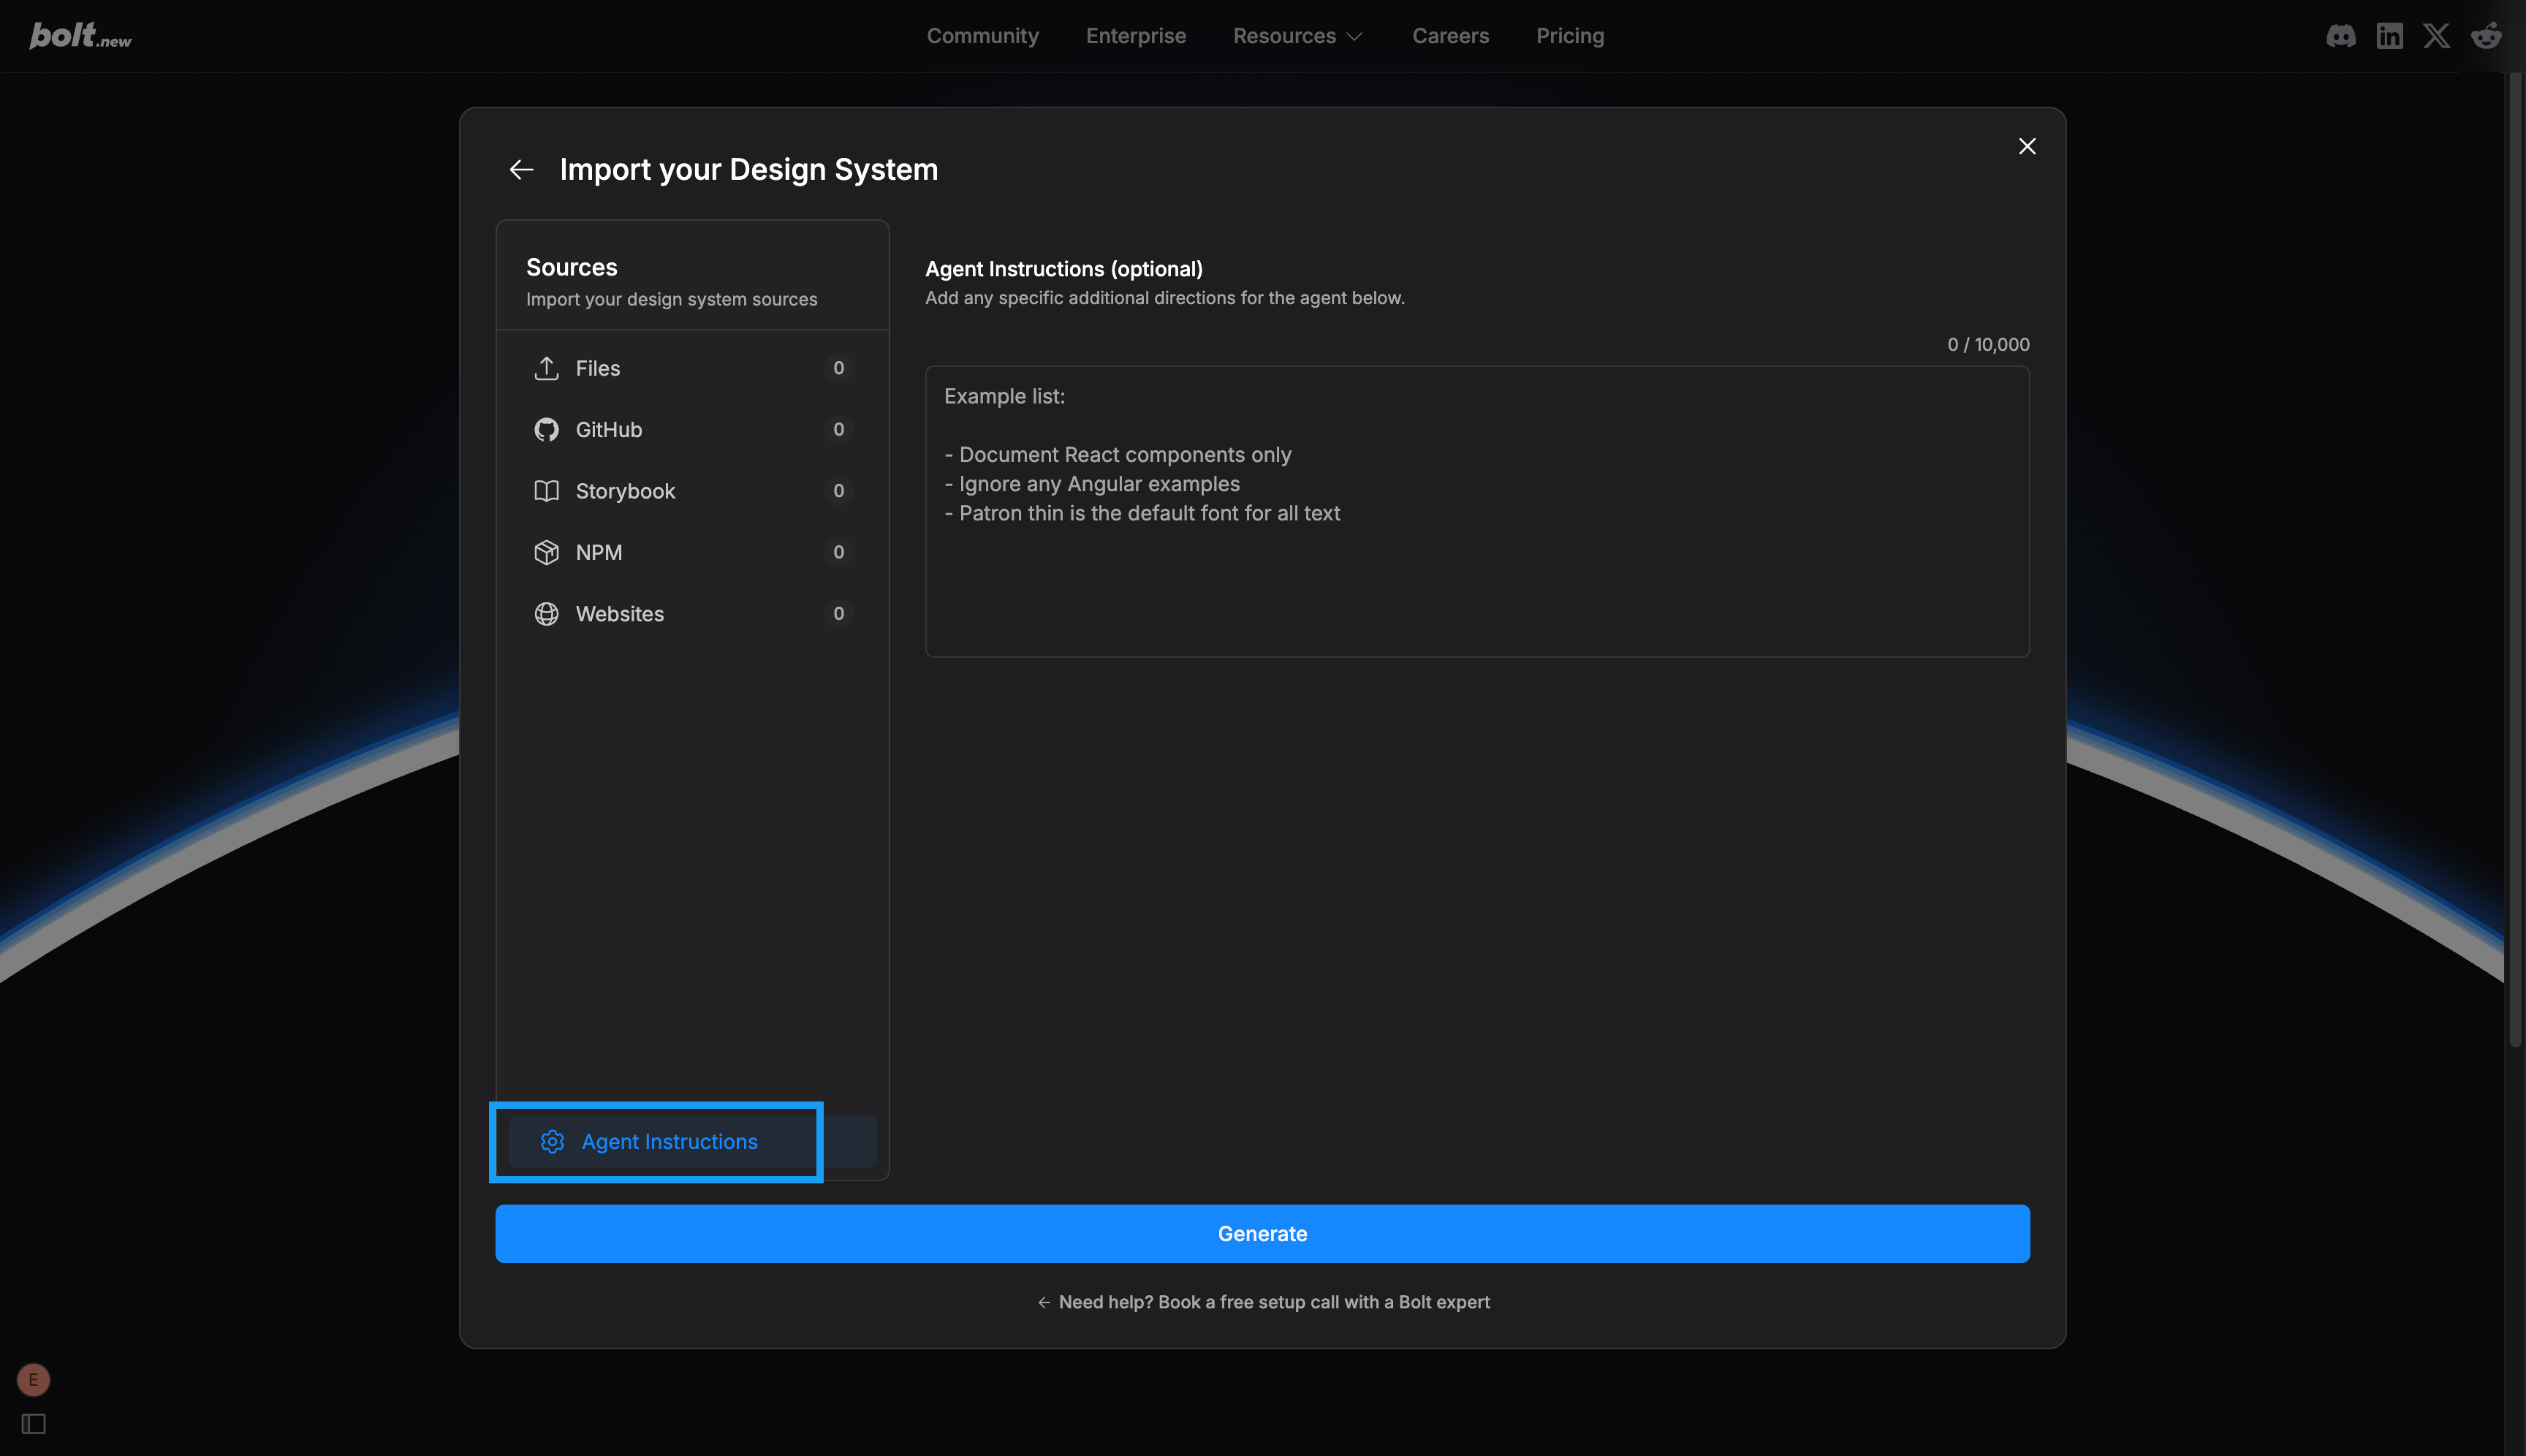 Adding agent instructions is optional, but it can help you get the best results.
Here are some examples of useful instructions:
* "Exclude deprecated components from Bolt."
* "Use only the \[theme name] theme referenced in the documentation."
* "Use only React syntax; ignore Angular examples."
### Generate your design system
When you've added all your sources and agent instructions, click **Generate**.
Bolt begins reading your sources and generating your design system. You'll receive an email when it's ready.
Once you receive the email confirmation, your design system is ready to use. See [View your design system in Bolt](/building/design-system/view-design-system) to learn about your generated Storybook and how to navigate it.
Adding agent instructions is optional, but it can help you get the best results.
Here are some examples of useful instructions:
* "Exclude deprecated components from Bolt."
* "Use only the \[theme name] theme referenced in the documentation."
* "Use only React syntax; ignore Angular examples."
### Generate your design system
When you've added all your sources and agent instructions, click **Generate**.
Bolt begins reading your sources and generating your design system. You'll receive an email when it's ready.
Once you receive the email confirmation, your design system is ready to use. See [View your design system in Bolt](/building/design-system/view-design-system) to learn about your generated Storybook and how to navigate it.