# Accounts
Source: https://support.bolt.new/account-and-subscription/account-management
Manage your Bolt and StackBlitz account.
When you sign up for Bolt, a StackBlitz account is automatically created for you. StackBlitz is Bolt's parent company, and the two share the same account. Account management for both platforms is handled through StackBlitz at stackblitz.com.
## Resend email confirmation
Go to [StackBlitz | Resend confirmation](https://stackblitz.com/users/resend_confirmation) to request a new confirmation email.
## Reset your password
If you've forgotten your password, you can request a password reset: [StackBlitz password reset](https://stackblitz.com/users/reset_password).
If you signed into Bolt using GitHub and have forgotten the password to your GitHub account, you can reset it at [GitHub's password reset](https://github.com/password_reset).
## Change your email address
The email address you use to log in to Bolt is managed through your StackBlitz account. To change the email address used to log in and receive notifications, add the new email you want to use, then delete the old one.
If you log in with GitHub or Google, you need a StackBlitz password before you can change your email address. You can create one using the [StackBlitz password reset](https://stackblitz.com/users/reset_password) workflow.
1. Go to the [StackBlitz sign-in page](https://stackblitz.com/sign_in) and log in.
2. In the left menu, click **Settings**.
3. Click the **Profile** tab.
4. Scroll down to the **Emails** section.
5. Enter your new email address, then click **Add**.
6. Go to your email account and find the StackBlitz confirmation email, then click **Confirm your email**.
7. Return to your StackBlitz profile and refresh the page. You should now see your new email listed.
1. Open a private or incognito browser window and log in to Bolt using your new email address and StackBlitz password.
2. After confirming you can log in, return to your StackBlitz profile.
1. In the **Emails** section, set your new email as **Preferred**.
2. Next to your old email, click the trash can icon to delete it.
## Change your StackBlitz username
When you first create a StackBlitz account, a username is autogenerated for you. If you'd like to change your username, follow the steps below:
1. Go to [stackblitz.com/sign\_in](https://stackblitz.com/sign_in) and log in.
2. In the left menu, click **Settings**.
3. Click the **Profile** tab.
4. Scroll down to the **Change username** section.
5. Click **Edit**.
6. Enter a new username (without spaces).
7. Click **Save**.
## Delete your account
You can't undo this action. Only proceed if you're certain you no longer need access to your account or its projects.
Bolt and StackBlitz share the same account, and you manage deletion through StackBlitz.
To delete your account:
1. Go to [stackblitz.com/sign\_in](https://stackblitz.com/sign_in) and log in.
2. In the left menu, click **Settings**.
3. Click the **Profile** tab.
4. Scroll down to the **Account deletion** section at the bottom of the page.
5. Click **Delete my account**.
6. You'll see one of two options:
* **If you have active subscriptions:** Click **Billing settings** to cancel them first.
See [Cancel a subscription](/account-and-subscription/billing#cancel-a-subscription) to learn more.
* **If you don't have active subscriptions:** Click **Permanently delete my account**.
# Billing
Source: https://support.bolt.new/account-and-subscription/billing
Billing and subscription management.
Learn how to manage billing in Bolt, including upgrading or downgrading, canceling your subscription, applying coupon codes, updating your billing details, and downloading invoices.
Bolt measures usage in tokens. Each plan includes a monthly token allocation, and your subscription determines how many you get. To learn more, see [Tokens](/account-and-subscription/tokens).
## Upgrade your free plan to a paid plan
Follow the steps below to upgrade your subscription from a free plan to a paid plan.
1. Log in to Bolt.
2. On the Bolt homepage, in the sidebar, click your profile icon in the bottom-left, then click **My Subscription**.
3. Use the drop-down menu to select the plan you want.
4. Click **Upgrade**.
5. Fill out your billing and payment info, then click **Subscribe**.
## Upgrade your paid plan to a higher paid plan
Unused and unexpired tokens in your account always roll over when you upgrade. You never lose existing tokens by upgrading. Learn more about [Token rollover](/account-and-subscription/tokens#token-rollover).
Bolt gives you the flexibility to scale your plan up right away if you need more tokens. And if things change, don’t worry — you can always downgrade later without any hassle.
To upgrade your Bolt plan, follow the steps below:
1. Log in to Bolt.
2. On the Bolt homepage, in the sidebar, click your profile icon in the bottom-left, then click **My Subscription**.
3. Click **See all available plans**.
4. Select the plan you want.
5. Review options:
* Toggle annual on or off for yearly pricing at 10% off.
* Enter a promo code if you have one.
6. Click **Confirm upgrade**.
### Upgrade a monthly plan to a higher monthly plan
When you upgrade, your billing cycle stays the same. You are only charged the price difference between your old plan and your new plan.
Any unused tokens from your current plan remain available. You also receive the difference in tokens between your old plan and your new plan, added to your balance immediately.
**Example monthly to monthly upgrade**
* You signed up for the Pro 50 monthly plan on **January 1** for **\$50**.
* By **January 20**, you used **20M tokens**, leaving **6M unused**.
* On **January 20**, you upgraded to the Pro 100 monthly plan for **\$100**.
Here’s what happens at the time of your upgrade:
* You are charged **\$50**, which is the difference between the \$100 plan and the \$50 plan.
* You keep your **6M unused tokens**.
* You receive **29M additional tokens**, which is the difference between the 26M plan and the 55M plan. This brings your token balance to **35M** tokens after upgrade.
* Your next renewal date stays the same: **February 1**.
* Starting on that date, you will be charged **\$100 per month** for the Pro 100 plan and receive **55M tokens each month** on your renewal date.
Tokens that roll over are used first and remain valid until their original expiry. Learn more about [Token rollover](/account-and-subscription/tokens#token-rollover).
### Upgrade a monthly plan to an annual plan
When you switch from a monthly plan to an annual plan, you’re charged immediately for the annual price of your new plan. Any unused tokens from your monthly plan roll over into your new annual plan.
Your annual plan starts on the upgrade date, and your renewal date resets to that same day each year.
**Example monthly to annual upgrade**
You’re on the \$25 Pro 10M monthly plan that started January 1. On January 20, you’ve used 8M tokens and have 2M left. You upgrade to the \$540 Pro 26M annual plan.
* You pay \$540 at the time of upgrade.
* You receive 26M new tokens.
* You keep your 2M unused monthly tokens, giving you 28M total.
Your new renewal date is January 20 each year, at \$540, and you will receive 26M tokens on each future renewal date.
### Upgrade an annual plan
Note that you cannot "upgrade" an annual plan to a monthly plan; you can only upgrade an annual plan to a higher annual plan.
When you upgrade from one annual plan to another, you are charged a prorated amount based on the number of **whole months** remaining in your current billing cycle at the new plan's price.
Your renewal date does not change. When your plan renews, you will be charged the full price of the new plan going forward.
You keep any unused tokens from your current plan. You also receive enough additional tokens to bring you up to the new plan’s full monthly allocation for the month in which you upgrade, plus you get that full allocation again on each monthly anniversary for the rest of your billing cycle.
**Example annual to annual upgrade**
* You signed up for the **Pro 10M annual plan** on **January 1** for **\$216/year**.
* By **June 12**, you have **3.5M unused tokens** remaining.
* On **June 12**, you upgrade to the **Pro 26M annual plan** at **\$540/year**.
Here’s what happens at the time of your upgrade:
* Your renewal date stays **January 1**.
* You keep your **3.5M unused tokens**.
* You receive **16M additional tokens immediately**, meaning you will have **19.5M** total in hand.
* You will receive **26M tokens on each monthly anniversary** (July through December).
* You are charged a prorated amount for the 7 months where you receive the higher allocation:
> **Upgrade cost:** 7 × \[(\$540 ÷ 12) − (\$216 ÷ 12)]\
> \= 7 × (\$45 − \$18)\
> \= **\$189**
On your **next annual renewal date** (January 1 in this example):
* You will be charged the **full annual price** for your new plan (\$540).
* Your monthly token top-ups will continue on the same schedule, with **26M** available each month.
Tokens that roll over are used first and remain valid for two months. Learn more about [Token rollover](/account-and-subscription/tokens#token-rollover).
## Downgrade your plan
Downgrades take effect at the beginning of your next billing cycle.
For example: if you downgrade from Pro \$50 to Pro \$25 on the 1st, and your billing renews on the 10th, the change will show on your account starting the 10th.
Any tokens you receive during mid-cycle upgrades roll over as normal, as long as you maintain a paid subscription. For more information, see [Token rollover ](/account-and-subscription/tokens#token-rollover).
### Cancel a scheduled downgrade
Between the time you choose to cancel and when the cancellation takes effect, you have the option of canceling the downgrade. To cancel a downgrade, follow these steps:
1. Log in to Bolt.
2. On the Bolt homepage, in the sidebar, click your profile icon in the bottom-left, then click **My Subscription**.
3. Click **See all available plans**.
4. Find the plan you were downgrading to, then click the **Cancel downgrade** text that appears below the drop-down.
## How to use a coupon code
Coupon codes can come from different sources. Sometimes Bolt shares them directly through social media or email, and other times they come from our authorized partners.
How you enter your promo code will depend on if you’re signing up for a new subscription from a Free plan or upgrading an existing subscription.
### Upgrade an existing subscription using a promo code
1. Log in to Bolt.
2. On the Bolt homepage, in the sidebar, click your profile icon in the bottom-left, then click **My Subscription**.
3. Click **See all available plans**.
4. Select the plan you want.
5. On the Update Subscription page, in **Promo code**, enter your code.
6. Click **Confirm Upgrade**.
### Upgrade from a free plan to a paid plan using a promo code
1. Log in to Bolt.
2. On the Bolt homepage, in the sidebar, click your profile icon in the bottom-left, then click **My Subscription**.
3. In the **Upgrade to Pro** section, in **Monthly tokens**, select the plan you want. The plan price adjusts according to your monthly token amount.
4. Click **Upgrade**.
The StackBlitz billing portal opens.
5. In the left pane, click **Add promotion code**, then enter your code.
6. Fill out your credit card and billing details.
7. Click **Subscribe**.
## Cancel a subscription
You can cancel at any time.
In Bolt, canceling a paid subscription is the same as downgrading to a free plan. When canceling, Bolt asks you to confirm your downgrade. Follow the prompts to complete your cancellation.
1. Log in to Bolt.
2. On the Bolt homepage, in the sidebar, click your profile icon in the bottom-left, then click **My Subscription**.
3. In the top-right corner, click **Billing details**.
4. Click **Cancel subscription**.
5. In the **Are you sure you want to downgrade?** dialog, click **Proceed with downgrade**.
The StackBlitz billing portal opens.
6. In the top-right corner, click **Cancel subscription**.
Any monthly rollover tokens you had when your plan reverted will be available again after you re-subscribe.
1. Log in to Bolt.
2. On the Bolt homepage, in the sidebar, click your profile icon in the bottom-left, then click **Subscription**.
3. On the Subscription & Tokens page, in the top-right corner, click **Billing details**.
4. Click **View payment method** to open the StackBlitz Billing portal.
5. Update your card information.
6. Return to the Subscription and Tokens page and follow the steps to upgrade your plan, then select the plan you want to subscribe to.
## Update your billing information
If you are on any paid plan (Pro or Teams), you can update your billing information by following these steps:
1. Log in to Bolt.
2. On the Bolt homepage, in the sidebar, click your profile icon in the bottom-left, then click **My Subscription**.
3. In the top-right corner, click **Billing details**.
4. Click **View payment method**.
The StackBlitz billing portal opens.
5. Click **Update information**.
Unfortunately, we can’t change billing details on invoices that have already been paid and processed.
## Delete your payment information
If you have an active plan, you cannot delete your primary payment method because it is in use. You can, however, remove any additional payment methods.
For example, if you subscribed on June 1 for \$25 and canceled on July 20, you would need to wait until the billing cycle ends on July 31 before deleting your payment information.
If you delete an additional payment method that’s being used for a subscription, the subscription will automatically switch to your primary payment method.
To delete your payment information, follow these steps:
1. Log in to Bolt.
2. On the Bolt homepage, in the sidebar, click your profile icon in the bottom-left, then click **My Subscription**.
3. In the top-right corner, click **Billing details**.
4. Click **View payment method**.
The StackBlitz billing portal opens.
5. Scroll down to the Payment Methods section.
An invoice tells you what you owe; a receipt confirms you’ve paid it.
## Incorrect plan information after upgrade
If you upgrade to Pro but still see your account as Personal or Free, try logging out and logging back in again to see if this fixes the issue.
## Discounts
You can save 10% by subscribing to an annual plan.
## Refunds
Bolt subscriptions are non-refundable, as stated in our [Terms of Service](https://stackblitz.com/terms-of-service). If you have questions about your subscription, reach out to [support@bolt.new](mailto:support@bolt.new) using the email address associated with your paid account.
## Manage corporate billing details
Bolt supports adding business billing details on Teams and Enterprise plans.
For Teams and Enterprise plans:
1. Go to the relevant GitHub or StackBlitz team URL:
For a GitHub linked team: `https://stackblitz.com/orgs/github/TEAM_NAME_HERE/billing`
For a StackBlitz only team: `https://stackblitz.com/orgs/custom/TEAM_NAME_HERE/billing`
2. Click **All Invoices** to go to the Stripe billing portal.
3. Click **Update Information** in the Billing Information section.
4. Make your changes.
5. Click **Save**.
# Corporate and commercial
Source: https://support.bolt.new/account-and-subscription/corporate-commercial
Bolt for commercial use.
## Code ownership and using Bolt for commercial purposes
All code that you create with Bolt and StackBlitz is your own code, which you can use for any legal purpose including commercial purposes.
Refer to StackBlitz's [Privacy policy](https://stackblitz.com/privacy-policy) and [Terms of service](https://stackblitz.com/terms-of-service) for more detailed information.
## Manage corporate billing details
Bolt supports adding business billing details on Teams and Enterprise plans.
For Teams and Enterprise plans:
1. Go to the relevant GitHub or StackBlitz team URL:
For a GitHub linked team: `https://stackblitz.com/orgs/github/TEAM_NAME_HERE/billing`
For a StackBlitz only team: `https://stackblitz.com/orgs/custom/TEAM_NAME_HERE/billing`
2. Click **All Invoices** to go to the Stripe billing portal.
3. Click **Update Information** in the Billing Information section.
4. Make your changes.
5. Click **Save**.
## Affiliate programs and other types of sponsorships
Bolt doesn't currently have affiliate or sponsorship programs.
# Teams plans
Source: https://support.bolt.new/account-and-subscription/team-plans
Learn what Teams plans offer and how they support shared work across Bolt.
Teams plans give groups a shared space for building, reviewing, and maintaining projects in Bolt. These plans include tools for organizing members, managing subscriptions, and creating consistent settings across all team projects. They also help teams stay coordinated with shared prompts, package guidance, and integration controls.
## Teams pages
Learn more about specific parts of Teams in the following pages:
* [Plans and Billing](/account-and-subscription/teams/billing-invoices)
* [Managing teams](/account-and-subscription/teams/manage-team)
* [Project controls](/settings/team-settings)
## Switch between personal and team accounts
In a project, click the profile icon in the top left of your screen to switch between your personal and team accounts.
## Purpose of Teams
Teams plans are designed for companies or teams who need to collaborate on Bolt projects. Benefits include:
* Centralized billing.
* Easier project sharing within the team.
* Group controls: the team admin can set access and integration controls for all projects in the team.
## Features and benefits
* **Unified workspace.**
Create your team directly in Bolt or connect your existing GitHub organization.
* **Advanced features.**
Connect private NPM registries. Create a Team prompt to set common conduct and Package prompts for additional instructions on third-party packages.
* **Admin controls.**
Add, upgrade, restrict, or remove members. Manage integrations on the project level. Set visibility limits and sharing permissions.
* **Centralized billing.**
Manage your team's subscription in one place.
# Teams: Plans, billing, tokens, and invoices
Source: https://support.bolt.new/account-and-subscription/teams/billing-invoices
Learn about billing and invoices in Bolt Teams plans.
This section outlines where to find your team’s billing settings, how to subscribe to a Teams plan, and how token allotments work across your team.
It also shows how admins can review usage and add more tokens when needed.
## Manage team billing
* On Bolt: Make sure your team account is selected. Go to **Settings** > **Teams**.
* On StackBlitz:
* If it's a GitHub team: `https://stackblitz.com/orgs/github/TEAM_NAME/billing`
* If it's a StackBlitz team: `https://stackblitz.com/orgs/custom/TEAM_NAME/billing`
## Subscribe to a Teams plan
Only admin users can subscribe to Teams. If you’re an admin of the team, go to **My Subscription**, select the team and choose your Teams plan. This takes you to the Members page to select the members to upgrade and finalize the payment.
## Tokens for team members
The subscription cost for Teams is per team member. Each paid team member receives a monthly token allotment based on the subscription tier. Tokens aren't shared among team members.
If you're on the highest available monthly Teams plan (1200M/\$2000) or any annual subscription plan, you can purchase additional tokens.
### Token balance
Team admins can track the number of tokens each member has spent.
To do so, follow these steps:
1. Log in to your Teams account and open the [Bolt homepage](https://bolt.new).
2. In the sidebar, click your profile icon in the bottom-left, then click **My Subscription**.
Here, a table shows each team member’s token balance. Additionally, you will see when the next refill is coming.
By default, the **Subscription** option is on for each team member. This means they're a paid team member with their own token allocation. If you turn this option off, the team member isn't included in your subscription. They can view team projects but can't send prompts in them.
5. Finalize the payment process.
## Add and upgrade team members
To add a team member:
1. On the Bolt homepage, in the sidebar, click your profile icon, then click **My Subscription**.
2. In the left menu, click **Team**.
3. Under the Members section, enter the username or email of the person you want to invite to your team.
4. Choose their role: **Admin**, **Billing Admin**, or **Member**.
5. Click **Send invite**.
After the new member accepts their invitation, you'll see them as active and "Pending invitation" no longer shows. As the team admin, you need to upgrade them:
1. Click the **Upgrade** button next to the user's details.
2. To upgrade multiple members at once:
1. Click the checkbox next to each member you want to upgrade.
2. At the top of the **Members** page, change their role.
3. Click the three-dot menu, then click **Upgrade to paid**.
3. Finalize the payment process.
## Change a team member's role
1. On the Bolt homepage, in the sidebar, click your account name, then click **Settings**.
2. On your team settings page, under Members, check the box next to the team member's name.
3. Click **Change rights**, then select the role you want to assign them.
## Reuse seats
If you downgrade or remove a team member and add a different one, Bolt can reuse the vacant seat instead of adding a new one to your subscription. This helps your team stay flexible because you can rotate members in and out without unnecessary increases to your subscription.
You can reuse a vacant seat starting in the next billing period. Your billing period starts on the day you subscribed and renews on the same day each month. For monthly plans, this is your renewal date. For annual plans, this monthly interval is called your billing anniversary. For all plans, token allocation refreshes according to this monthly interval.
### Reuse seats on a monthly plan
On a monthly plan, when you downgrade or remove a team member in the middle of a billing period, their seat is considered occupied for the rest of that billing period. It becomes available to reuse on your next renewal date. At that point, a new team member can take over the seat and receive their token allocation.
If no seats are available to reuse, you can add a new member at any time during a billing period. You'll be charged the full amount for the seat, and the team member receives the full monthly token allocation.
When you downgrade or remove a member, they lose access to their token allocation immediately. The seat stays active until the end of the billing period, and your next invoice reflects the reduced number of seats.
### Reuse seats on an annual plan
On an annual plan, if you downgrade or remove a member mid-month, the seat is considered occupied until the next billing anniversary. For example, if your billing anniversary is on the 14th and you downgrade or remove a member on the 30th, a different member could take over that seat on the 14th of the next month.
When you upgrade a member, if an eligible seat is available, Bolt automatically reuses it instead of adding a new one to your subscription. The new member receives their token allocation on your next monthly billing anniversary.
**Example**
Imagine your team has a yearly plan with 5 seats and 10 total members:
* 3 active paid members
* 1 member downgraded in a previous billing period
* 1 member downgraded earlier this billing period
* 5 free members
If your admin upgrades two of the free members:
* **Without seat reuse**: Your plan increases by 2 seats, bringing your total to 7 until your billing year ends.
* **With seat reuse**: Bolt reuses the vacant seat from the previous billing period. Your plan increases by only 1 seat, bringing your total to 6 until your billing year ends.
You can also upgrade one free member right away and the other after your next billing anniversary. At that point, the seat vacated earlier in the billing period becomes available, and you can upgrade the second free member without increasing your total number of seats.
When planning upgrades, it can be useful to keep an eye on your billing anniversary so you know when a new member can take over a vacant seat.
## Export team usage data
You can download a .CSV file with detailed information about your team's plan usage. Choose a time range from 30 days up to 2 years, and select whether to include the following metrics for each member:
* Message count
* Tokens used
* Number of projects created
Deleting a team permanently deletes all projects created within it. This action can't be undone and affects all team members.
1. On the Bolt homepage, in the sidebar, click your account name, then click **My Subscription**.
2. In the left menu, click **Team**.
3. In the top-right corner, click the **gear icon**.
4. Scroll down and click **Delete team**.
5. Enter your team name in the confirmation field, then click **Delete now**.
# Team templates
Source: https://support.bolt.new/account-and-subscription/teams/team-templates
Move faster by skipping repetitive project setup with team templates.
Team templates are available on [**Teams plans**](/account-and-subscription/team-plans) only.
They let teams reuse common project setups, templates, and starting points so everyone can move faster and stay aligned.
If you are not on a Teams plan, team templates will not appear in your workspace.
## What are team templates?
Team templates are reusable projects created and shared within a team on a Teams plan.
Each team template can include files, configuration, and structure that your team wants to use again. When you open one, Bolt creates a new project based on it. The original team template stays unchanged.
Team templates are designed for team workflows and are not available on individual plans.
## Open a team template from the homepage
You can start working from a team template from the Bolt homepage by following the steps below:
Team Admins can view and manage all team templates within your organization. This includes editing and deleting team templates alongside the creators of those projects.
## Edit a team template name or description
You can update an existing team template at any time by following the steps below:
1. Log in to the Bolt homepage with your Teams account.
2. In the sidebar, click your account name, then click **Settings**.
3. Click **Team templates** under your team's workspace settings.
4. Click the **three dots (...)** in the row of the team template you want to edit.
5. Click **Edit team template**.
6. Make your changes, then click **Update team template**.
Updates only affect future projects created from the team template. Existing projects stay the same.
## Delete a team template
If a team template is no longer needed, you can remove it.
1. Log in to the Bolt homepage with your Teams account.
2. In the sidebar, click your account name, then click **Settings**.
3. Click **Team templates** under your team's workspace settings.
4. Click the **three dots (...)** in the row of the team template you want to delete.
5. Click **Delete team template**.
Deleting a team template does not affect projects that were already created from it.
## Tips for using team templates
* Use clear names and descriptions, so teammates know what each team template is for.
* Keep team templates focused. Smaller, purpose-driven templates are easier to reuse.
# Tokens
Source: https://support.bolt.new/account-and-subscription/tokens
Understand tokens, buy more, and token FAQs.
Tokens are small pieces of text. Short, common words like "I", "love", and "cats" are typically one token each, but longer or less common words can be split into several. AI tokens are the basic unit AI uses to read and generate text. This applies to all AI apps, not just Bolt.
Bolt consumes tokens when it reads, thinks about, and builds your project.
### Token limits
Bolt has a limit on how many tokens it can work with in each conversation. This limit includes both your input (like questions or documents) and Bolt's output (like responses or generated code).
### Token costs
When you use Bolt, the cost is typically calculated based on how many tokens get processed, so using fewer tokens means lower costs.
Most of your token usage comes from Bolt reading, understanding, and syncing your project files, so larger projects use more tokens per message.
You can optimize your token usage and get better results by following our best practices in [Prompting effectively](/best-practices/prompting-effectively) and [Maximizing token efficiency](/best-practices/maximizing-token-efficiency).
### Token reset
Your token allowance resets on a regular schedule, but the timing depends on your plan type.
* **For users on a free plan:** tokens reset on the 1st of each calendar month.
* **For users on a paid subscription plan:** tokens reset on the renewal date. Example: If you subscribed to a paid plan on July 15, your tokens will reset on the 15th of every month thereafter.
If you cancel your paid subscription mid-month and have used more than 1 million tokens, you'll need to wait until next month to get free tokens. For example, if you've used 3 million tokens in July and downgrade to the free plan (1 million token limit), you'll need to wait until August 1 to continue working on your projects.
## Buy more tokens
When you need more tokens, the most cost-effective option is to upgrade to a higher-tier plan. You can upgrade your plan by following these steps:
1. Log in to your Bolt account.
2. On the Bolt homepage, in the sidebar, click your profile icon in the bottom-left, then click **My Subscription**.
3. Click **Upgrade plan**.
On this page, you can also view your current token balance, including your rollover tokens.
Free plans have a daily usage limit of 300K tokens. Upgrading to a paid plan removes that limitation.
For details on subscription plans, check out our [Pricing page](https://bolt.new/pricing).
## Token rollover
To view your token usage:
1. Log in to your Bolt account.
2. On the Bolt homepage, in the sidebar, click your profile icon in the bottom-left, then click **My Subscription**.
3. View your current token allocation, including any rollover tokens.
Tokens on the free plan don't roll over. Any tokens that you have accrued are assigned as fixed one-month buckets.
Tokens are consumed on a first-in, first-out basis, meaning the oldest (rollover) buckets are consumed before the newer tokens from your latest billing cycle.
On rollover/renewal, you receive a new allocation, valid for two months.
Example: You are on the Pro 50 plan in July with a renewal date of August 5. On August 5, you get a new allocation of Pro 50 valid until October 5. Any unused tokens from your July 5 allocation will remain available until September 5, as long as you maintain a paid subscription.
If you upgrade a plan in the middle of a billing cycle, the tokens allocated in the upgrade are valid for two months from the start of the billing cycle in which you upgraded, rather than for two months from the day they're granted.
When you cancel your paid plan, you lose access to all allocated tokens (including rollover tokens) when the billing cycle ends. To use your rollover tokens, resubscribe to a paid plan before they expire.
Example: You are on the Pro 50 plan in July with a renewal date of August 5 but then you cancel at the end of the month, either voluntarily or your payment fails. On August 5, you lose access to all token allocations.
When you resubscribe, you'll receive a token allocation based on your new plan, and regain access to any unexpired rollover tokens. In the above example, if you resubscribe before September 5, you can still use your remaining tokens from July, along with your new monthly tokens.
When you downgrade from one paid plan to a lower-tier paid plan, you retain access to any unused tokens from your previous (higher-tier) allocation until they expire, which is up to two months from their original issue date. On your next renewal date, you'll begin receiving tokens based on your new, lower-tier plan.
Example: You're on the Pro 50 plan in July, with a renewal date of August 5. You downgrade to Pro 20 at the end of July.
On August 5, your lower-tier plan begins, and you receive a Pro 20 token allocation (valid until October 5).
Your unused higher-tier tokens from July remain available until September 5.
If you upgrade in the middle of a billing cycle, the tokens from your upgrade are valid for two months from the start of that billing cycle, not two months from the day you upgrade.
Example: Your billing cycle starts July 1 and you upgrade on July 15. The tokens you receive at upgrade are valid until September 1, not September 15.
If you subscribe to an annual plan, tokens are still assigned on a monthly basis, and each monthly allocation follows the same two-month expiration rule.
Example: You are on the Pro 50 plan in July with a renewal date of August 5. On August 5, you get a new allocation of Pro 50 valid until October 5. Any unused tokens from your July 5 allocation will remain available until September 5.
You're billed for the next twelve months as soon as you subscribe to an annual plan.
Check out the [Billing page](/account-and-subscription/billing#discounts) for more details.
Tokens are assigned to each team member and stay linked to the person who accrued them.
# Plan before building with Plan or Discussion Mode
Source: https://support.bolt.new/best-practices/discussion-mode
Chat with Bolt to get help without immediately generating code.
## Overview
Each agent in Bolt has its own chat mode where you can plan and ask questions without making changes to your code.
With **Bolt Agent**, this is called **Plan Mode**, and with the **v1 Agent (legacy)**, it's called **Discussion Mode**. Both modes provide project-specific help, drawing on Bolt’s documentation and other online sources when needed.
As of April 13, 2026, the v1 Agent is no longer available for new projects. After August 3, 2026, remaining projects that use the v1 Agent will be automatically switched to use the Standard agent. Make sure to [switch to Bolt Agent](/building/switch-v1-projects) before that date to save your chat history and choose the agent you want to use.
Using Plan or Discussion Mode lets you explore ideas safely, save tokens by avoiding unnecessary code exchanges, and ensure you get things right before moving into Build Mode.
## Features
### Project context awareness
Every discussion message includes your project codebase for context-aware responses, as well as the most recent messages.
Because Plan and Discussion Modes have the entire context of your projects, there is a wide range of use cases, including:
* Debugging assistance
* Recommendations on tools, libraries and APIs
* Product/project decision-making
* Suggestions on how to improve design
* Suggestions for new features
* Understanding and integrating external APIs
* Generating implementation plans for later execution
* Use the Inspector tool to highlight a component within a page, and discuss potential changes
### Web research
When Bolt answers a question, it can pull in real-time, up-to-date information from trusted web sources instead of just relying on what it was trained on. This helps ensure the answers are accurate, relevant, and not outdated. When a search has been conducted, Bolt displays the sources at the top of the response.
For example:
* If you ask about the latest Stripe API updates, Bolt won't just rely on old knowledge; it will search for the latest documentation and give you a more reliable answer.
* If you ask about a bug in a popular library, it can check forums or support pages for the most recent solutions.
### Quick action buttons
If your question or prompt has an intuitive action associated with it, Bolt will likely generate quick action buttons at the end of its response.
With these buttons, you can take immediate actions such as:
* **Implement this plan** (auto-switches to Build Mode to apply changes)
* **Show an example**
* **Refine this idea**
The quick action buttons are contextual and will vary depending on your project and the topic of discussion.
## How to use Plan Mode
Plan Mode is available when you're using Bolt Agent. It helps you map out steps, reason through complex problems, and build strategies.
While its main strength is structured planning, it can also search the web or explore your codebase if needed.
### Use Plan Mode on the Bolt homepage
You can begin your Bolt project in Plan Mode right from the first prompt. This lets you create and refine a plan through back-and-forth discussion before executing a build, helping you avoid unwanted changes and use fewer tokens overall.
Simply click **Plan** before submitting your prompt to generate a plan for your build.
When you use Plan mode from the homepage, it starts by creating the base structure of your app. After that, it shares a plan in the chatbox. You can review this plan, suggest changes, and continue building step by step.
If you want to create a mobile app, it’s important to mention this directly in your prompt. For example, you might prompt: “Build a mobile app that helps people track their daily habits.”
Plan Mode highlights blue when active. Click it again to turn it off and return to Build mode.
## How to use Discussion Mode
As of April 13, 2026, the v1 Agent is no longer available for new projects. After August 3, 2026, remaining projects that use the v1 Agent will be automatically switched to use the Standard agent. Make sure to [switch to Bolt Agent](/building/switch-v1-projects) before that date to save your chat history and choose the agent you want to use.
Discussion Mode appears when you are using the v1 Agent (legacy). It lets you explore ideas by chatting with Bolt without making changes to your code. Powered by Google Gemini, it is versatile and works well for a wide range of topics. You can use it any time you want to brainstorm or think through ideas.
Follow the steps below to use Discussion Mode in a Bolt project:
Discussion Mode highlights blue when active. Click it again to turn it off and return to Build mode.
# Maximize token efficiency
Source: https://support.bolt.new/best-practices/maximizing-token-efficiency
Optimize token usage to keep your costs down.
## Understand tokens
A token is a small chunk of text, sometimes a full word and sometimes just part of one.
Bolt uses tokens in these ways:
* To understand and process the prompts you send in the chat
* To write your project code
* To look at your code to see what you changed
To learn more about large language models, see [Introduction to LLMs](/building/intro-llms). To learn more about the LLM-powered agents Bolt uses, see [Choose an agent](/building/using-bolt/agents).
## Use buttons instead of prompting where possible
Whenever they're available, use buttons and built-in actions rather than asking Bolt to do the same task for you. For example:
* Use the Publish button instead of prompting Bolt to [publish your site](/cloud/hosting/publish).
* Use the Version History feature instead of prompting Bolt to [revert to a previous version of your project](/building/using-bolt/rollback-backup#restore-using-version-history).
Clicking an on-screen button or action doesn't use tokens, but prompting Bolt does.
## How you can reduce token usage
Every chatbox interaction you have with Bolt costs tokens, which affect your speed, cost, and project size limits.
Bolt is built to keep token usage lean, and ongoing improvements continue to boost efficiency. At the same time, being mindful of how you use tokens is important for keeping projects smooth and cost-effective.
This page lists the top ways to reduce token usage, including the following tips:
* Plan your app
* Use Plan mode
* Undo changes using the Version history feature
* Keep your prompts specific and focused
* Turn on connectors only when you need them
* Avoid repeated automated error fix attempts
* Add functionality incrementally
* Reduce the size of your project
## Choose the right agent for efficient token use
Each Bolt agent uses tokens differently. For tasks of average complexity, the Standard agent gives you accurate results without the additional token cost of deeper reasoning. For more complex tasks, the Max agent uses more tokens to work through the full scope of your task.
Using the Max agent for straightforward tasks may use more tokens than necessary, and using the Standard agent for complex tasks may require more prompts to achieve your goal. To use tokens effectively, choose the agent best suited to your task.
To learn more about each agent's strengths, see [Choose an agent](/building/using-bolt/agents).
## Plan your app
Planning your app before you start building saves time, tokens, and avoids headaches later. Start by deciding what type of app you’re making (website, web app, or mobile app) and who it’s for.
List the key features you want, sketch out a simple design, and think about how users will move through the app.
Examples:
* A **CRM** might need lead capture, contact profiles, and search filters
* A **portfolio site** needs galleries, project descriptions, and contact links
* A **habit tracker** might include a daily checklist, progress charts, and reminders
Once you have a plan, you can write a clear first prompt and build your app step by step. This makes it easier to test changes, catch issues early, and maintain stability as your project grows.
To learn more, see our article on [Planning your app](/building/build-your-first-app).
## Use Plan mode
In Build mode, Bolt updates your code every time you submit a prompt, which uses up tokens.
To avoid unnecessary code changes, [use Plan mode](/best-practices/discussion-mode) when you want to get help, troubleshoot, or discuss plans, but don't want to implement anything immediately.
Plan mode uses fewer tokens than when you build with Bolt agent.
If your project uses v1 Agent (legacy), you'll see Discussion mode instead of Plan mode. v1 Agent and Discussion mode are being retired on August 3, 2026.
## Undo changes using the Version history feature
Use the [Version history](/building/using-bolt/rollback-backup) feature to restore your project to a previous state without consuming tokens. This is similar to an undo button that can take you back to any prior state of your project.
If you've made a change you don't like, rather than prompting Bolt to fix it, you can switch back to a previous version of your project without using tokens.
This can save time and tokens if something goes wrong with your project.
## Keep your prompts specific and focused
When prompting, be clear and specific. Tell the agent to focus on specific files or functions rather than the entire codebase. See [Prompt effectively](/best-practices/prompting-effectively) for more detailed guidance on prompting.
## Turn on connectors only when you need them
[Connectors](/building/using-bolt/connect-mcp) are a powerful way to give Bolt real-world information from your external tools and data sources. However, adding information to Bolt's context increases token consumption. We recommend turning on connectors for a project only when you need them. To learn more, see [Best practices for using connectors](/building/using-bolt/connect-mcp#best-practices-for-using-connectors).
## Avoid repeated automated error fix attempts
When an error occurs, Bolt gives you the option to try an automatic fix. Sometimes clicking it a second time will resolve the issue, but remember that each attempt uses tokens. Avoid clicking **Attempt fix** over and over, hoping for things to eventually work out.
If Bolt can’t resolve the issue with automatic fixes, research the errors you’re getting and step in manually.
You can also switch to Discussion mode to ask focused questions, explore solutions, and confirm a plan before the next fix.
## Add error handling to your project
If you find yourself stuck in an error loop, a useful strategy is to prompt Bolt to enhance error handling and implement detailed logging throughout the problematic area.
When prompted to, Bolt excels at inserting robust error logs, even at a granular level, such as between functions or key steps. These logs provide valuable feedback that the AI can use to better understand the root cause of the issue.
This additional logging also provides more precise information when the error occurs again. With this detailed feedback, Bolt can make more accurate adjustments to fix the issue.
## Add functionality incrementally
Before you focus on advanced functionality, make sure the basics of your app are in place.
* **Create your core pages:** For example, a homepage, a dashboard, and a basic contact or help page
* **Set up navigation:** Make sure users can move between pages smoothly, like jumping from a leads page to a customer profile in a CRM
* **Keep the design consistent:** Use the same colors, fonts, and layout so the app feels professional and easy to use
Once you have that solid foundation, add new features one at a time.
* Start small, such as adding a form to capture leads or customer data
* Next, add functionality to store and display those records, like a simple customer list or profile view
* Then layer on search, filters, or analytics so users can find data quickly
* Test after each new piece to catch problems early and avoid breaking what already works
This step-by-step approach makes it easier to test changes, fix issues as they arise, and maintain your app's stability as it grows. Think of it like building with blocks: get the base right, then stack on new pieces carefully so everything stays strong.
## Clear context
Clearing the context resets Bolt’s understanding of your project. With a smaller context, your requests then use fewer tokens. However, when you do this, Bolt forgets:
* Your recent conversation history
* Its understanding of how your codebase has changed over time
Bolt will still have access to your codebase and files, but it will evaluate them as if it were seeing them for the first time.
Breaking your project into multiple smaller components is best for users who are experienced with version control and comfortable managing multiple code bases.
### Clean up unused files
Bolt uses a tool called Knip to perform a cleanup. You can run this when prompted by Bolt, or run it manually at any time.
Before proceeding, back up your project using one or both of these methods:
* In the top left of your screen, click the **project title**, then click **Export** > **Download**, **or**
* In the top left of your screen, click the **project title**, then click **Duplicate**.
**Automatic cleanup when prompted**
If your Bolt project exceeds the context window, you’ll see a message in chat: **Project size exceeded**. The context window is the maximum amount of information Bolt can process at once. Paid plans offer larger windows, allowing bigger projects before reaching this limit.
Click **Remove unused files** to run the cleanup.
**Manually run the cleanup**
In the Bolt terminal, run the following command:
`npx knip --production --fix --allow-remove-files`
Check the output in the terminal to see if the command ran successfully. This command removes unnecessary files from the codebase, which reduces the project size.
### Split the project
An advanced technique is to split a large app into smaller parts, then connect them later outside of Bolt. A common approach is to keep the backend and frontend as separate projects. If you are new to development, proceed carefully or get help.
If you decide to try this, keep in mind:
* Plan what each part is responsible for.
* Decide how the parts will talk to each other, such as through an API.
* Keep each project in its own repository or folder.
* Write down how to set up and run each part.
## Use the `.bolt/ignore` file with v1 agent (legacy)
The `.bolt/ignore` file only works with v1 agent (legacy), which will be retired on August 3, 2026. It doesn't work with Bolt Agent.
In the `.bolt/ignore` file, list any files or folders that Bolt should exclude from the AI context window.
1. Log in to your Bolt project.
2. Click the **code icon (\<>)** in the top center of your screen to switch to Code view.
3. Either:
* In the `.bolt` directory, click `ignore` to open the file in the editor.
* If there isn't an `ignore` file, right-click the `.bolt` directory, then click **New File...**. Name the file `ignore`.
4. List the files you want Bolt to ignore. Provide the full path to the files, including directories. You can use `*` as a wildcard. For example: to ignore all files in a directory called `test`, write `test/*` in your `ignore` file. These files are now completely invisible to the AI, which frees up space in the context window.
Hiding files from Bolt can have unintended consequences, as Bolt is no longer aware of your entire project. This approach is powerful, but is only recommended for advanced users who can make informed decisions about what can safely be excluded, and can understand and resolve issues that may arise from this approach.
# Prompt effectively
Source: https://support.bolt.new/best-practices/prompting-effectively
Tips for writing better prompts.
When building with Bolt, the quality of your results will often depend less on how well you know code and more on how clearly and effectively you can express your ideas through prompts.
Learning to prompt well is like learning a new language: the better you get at it, the more powerful and precise your builds will become. \
\
The prompting techniques video below is a great place to get started!
prompt , and understand the steps involved in building an application.
## The lifecycle of an application
```mermaid theme={"system"}
flowchart LR
A(Design and plan) --> B(Start building: \n first prompt) --> C{Iterate: \n more prompting} --> D(Deploy) --> C
style A fill:#D8F1FF,stroke:#154E93,color:black;
style B fill:#D8F1FF,stroke:#154E93,color:black;
style C fill:#D8F1FF,stroke:#154E93,color:black;
style D fill:#D8F1FF,stroke:#154E93,color:black;
```
## Step 1: Design and plan
Before you start building, you need to know what you're building and why.
Bolt provides multiple ways to add your designs:
* Describe them in the prompt.
* [Attach files](/building/using-bolt/interacting-ai#upload-files) to the conversation.
* [Import from Figma](/integrations/figma).
Although you can start with an open-ended prompt, such as `Hey Bolt, please build a todo list app`, you'll have more success if you design and plan first. Try to come up with answers to the following questions.
**What do you want to build?**
In general terms, what are you creating? For example: a todo list application, or a portfolio website, or a mobile habit tracker app.
**Who is it for?**
Your user should be at the center of your design choices. Think about what they need and how they'll use your application.
**What features does it have?**
List out the features: the things users can do. For example, if building a to-do list app, your feature list might include:
> * Create new todos
> * Edit existing todos
> * Delete todos
> * Schedule the time and date for a todo
**What look and feel do you want?**
Give Bolt guidance on the aesthetic you want for your application. You can describe it, or [attach images](/building/using-bolt/interacting-ai#upload-files) for inspiration.
**How will users access it?**
It’s important to make this decision at the start, so that Bolt can structure your application to work with the platforms you want to publish to.
Think about the format:
* Website: the user accesses this in their browser. It's mostly content and information. For example: blogs, news sites, portfolios, galleries, and so on.
* Web application: the user accesses this in their browser. It's interactive, allowing users to add their own data. It's a tool, not just a content site. For example: Bolt is a web application!
* Mobile application: the user installs an app on their phone or tablet.
Then you'll prompt Bolt to build for the format you want:
* If users will access your application in their browser, the easiest way is to publish and host using [Bolt's built-in hosting](/cloud/hosting).
* If you want to build a mobile app, Bolt integrates with [Expo](/integrations/expo), which allows you to build your application once, then package it up for multiple platforms.
**An example answer**
> I want to build a todo list app. It's for people who love timeblocking and the pomodoro productivity method. Its features should include: adding and scheduling todos, and a pomodoro timer. It should have a modern, clean, but colorful aesthetic. Users should be able to add, edit, and delete todos. Users should be able to schedule the time and date for their todos. Users should be able to view both their unscheduled task list, and a daily schedule with any scheduled tasks. Users will access the application in their browser, so make sure it's suitable for hosting on Netlify.
## Step 2: Your first prompt
Writing good prompts is key to success with AI tools.
For detailed guidance, there's a full best practices article on how to [prompt effectively](/best-practices/prompting-effectively). It's recommended to read this in full. You may also want to check out [Intro to LLMs](/building/intro-llms) for a quick introduction to AI terminology and concepts.
If you built up answers to the questions above, you can use those as the basis for your first prompt. Before you start, use Bolt to improve your prompt:
Create a web-based task management application optimized for time-blocking and Pomodoro technique enthusiasts. The application should be built using modern web technologies (React/Vue.js) and include the following core features:
Core Functionality:
* Task Management System
* Add, edit, and delete tasks
* Mark tasks as complete/incomplete
* Add descriptions, priority levels, and categories to tasks
* Drag-and-drop functionality for task reordering
* Scheduling Features
* Schedule tasks with specific dates and time blocks
* Visual calendar interface for time blocking
* Split view showing both unscheduled task list and daily schedule
* Ability to reschedule tasks via drag-and-drop
* Pomodoro Timer Integration
* 25-minute work sessions with 5-minute breaks
* Customizable timer durations
* Visual and audio notifications
* Track completed Pomodoro sessions per task
Technical Requirements:
* Single Page Application (SPA) architecture
* Responsive design for all screen sizes
* Local storage for data persistence
* Static site compatible for Netlify hosting
* Progressive Web App capabilities
Design Guidelines:
* Modern, minimalist interface
* Vibrant but professional color palette
* Clear visual hierarchy
* Intuitive navigation
* Smooth animations for interactions
* High contrast for accessibility
Optional Enhancements:
* Dark/light mode toggle
* Keyboard shortcuts
* Task statistics and productivity insights
* Export/import task data
* Integration with calendar applications
Once you enhance your prompt, read through the new prompt to make sure it still does what you want.
## Step 3: Iterate
After Bolt generates your application from your first prompt, you'll probably want to make changes:
* Adding more features.
* Tweaking behavior or appearance.
* Fixing bugs.
Do one thing at a time. Don't try to add multiple features in one go. Remember the guidance in [prompt effectively](/best-practices/prompting-effectively).
## Step 4: Publish
After building your application, the next step is to make it available to users. This is where publishing and hosting come in.
The easiest way to publish your app is to use [Bolt hosting](/cloud/hosting), but you also have other options. You can choose to:
* Use Bolt's Netlify integration: this connects Bolt to Netlify, enabling one-click publishing from within Bolt. Follow the [Netlify integration](/integrations/netlify) guide to set this up and to learn more about building for Netlify.
* For mobile applications, build with Expo and publish to the app stores. Follow the [Expo integration](/integrations/expo) guide.
* Connect to GitHub and set up publishing from GitHub using other CI/CD tools: this is a common devops pattern. The [GitHub integration](/integrations/git) guide walks you through connecting Bolt and GitHub. You'll then need to set up your own build and publishing tools.
* [Download your project](/building/using-bolt/projects-files#download-projects), and use any publishing option you prefer.
If you're new to building applications and unsure which option to choose, Bolt's built-in hosting is usually the best option.
Now that you're ready to use Bolt hosting or you’ve successfully connected to Netlify, Expo, or GitHub by following the instructions above, the final step is to publish your application.
In the top-right corner, click the **Publish** button to open a dropdown menu with the following options:
1. A URL to your published site, which you can copy and share as needed.
2. The timestamp of the most recent publish.
3. Share buttons for X (formerly Twitter), LinkedIn, and Reddit.
# Add your design system
Source: https://support.bolt.new/building/design-system/add-design-system
Add your design system to build projects in Bolt using your company's UI guidelines and components.
When adding your design system, you point Bolt to your design documentation and component library. Bolt reads your design sources and uses them to generate a Storybook inside Bolt.
[Storybook](https://storybook.js.org/) is an open-source tool that catalogs your UI components in one place, separate from the rest of your app. This makes it possible to browse and test components without building your full app. If your team already has a Storybook, you can add it as a [design source](/building/design-system/add-design-system#add-your-design-sources).
Adding a design system is available on paid Team plans. Any member of a paid team can add a design system, and each team can add or [sync](/building/design-system/sync-design-system) a combined total of 10 design systems per week.
If your team is on a free plan, a team admin can upgrade to a paid plan. If you're on a personal plan, [upgrade to a Team plan](https://bolt.new/?showPricing=true) to get started.
## Before you begin
Adding a design system typically takes 45 to 60 minutes depending on the size of your sources, so plan to allow enough time before you need to start building.
If you're adding an NPM package from a private registry, make sure to have your registry URL, auth token, and scopes ready.
## Add a design system
### Open the design system setup
1. Make sure you're logged in to your Team account.
2. On the Bolt homepage, in the design system section, click **Import your design system**.
3. In the **Let's set up your team's design system** dialog, click **Set up myself**.
If you'd prefer guided help adding your design system, select **Work with an expert** to connect with a Bolt team member.
### Add your design sources
The more documentation you add, the more precisely Bolt can apply your design system standards. You can add as many sources as needed, in any combination of source types.
Source quality directly affects your results. GitHub repositories and NPM packages often produce the best outcomes while documentation websites alone produce a theme rather than a true design system with reusable components.
Consistent sources are also important: conflicting guidelines, mixed frameworks, or sources from unrelated design systems can all reduce quality.
For detailed guidance, see [Best practices for adding your design system](/building/design-system/best-practices#best-practices-for-adding-your-design-system).
If your documentation site isn't publicly accessible, you can build it into a `.zip` file and upload it under **Files** instead.
#### GitHub
Enter the URL of a public GitHub repository that contains your design system code or documentation.
#### Storybook
Enter the URL of your published Storybook instance.
#### NPM
Add your packages and, if you're using a private registry, your registry details.
Any private registries your team has already added will appear here automatically. You don't need to add them again. If you add a new registry, it's saved to your organization for future use.
* **Public registry**
For each package, in the **Packages** section, enter a package name or `npmjs.com` URL. For example, `@shadcn/ui` or `@radix-ui/react-dialog`.
You can also drop a `.tgz` package archive or click **Choose .tgz file** to upload one.
* **Private registry**
To connect an NPM registry that's behind a firewall, book a setup call with a Bolt expert or manually upload your design system resources as files instead.
1. In the **Registries** section, click **Add a private registry**, then enter your registry URL and auth token.
2. Optionally, enter scopes to define Bolt's access to your package files.
3. Add your packages in the **Packages** section. Use this option if your packages require authentication, including public registries with private scopes.
### Add agent instructions
In the left pane, click **Agent Instructions**, then enter any additional information that can help Bolt better understand your sources.
For the best results, combine a GitHub repository or NPM package with a documentation source like a design system website or `llms.txt` file.
The code source gives Bolt your actual components; the documentation gives it the context to use them correctly. If you only have one type of source available, a GitHub repo or NPM package on its own will produce better results than documentation alone.
### Make sure your sources agree
Bolt works best when your sources all have consistent information. Here are a few things to avoid:
* **Conflicting guidelines**: If different sources have different guidelines for the same thing (like specifying two different fonts), Bolt may not be able to generate a consistent design system.
* **Mixed technology**: If your sources contain components in multiple frameworks, like React and Angular, Bolt may be confused about which to use. In this case, add agent instructions that tell Bolt which framework to build with.
* **Unrelated design systems**: Each Bolt design system should represent one coherent system. Mixing sources from unrelated design systems could produce inconsistent results.
### Include complete documentation on your design system foundations
Bolt references the documentation that defines your design system standards every time it builds. This includes core elements like typography, colors, spacing, and theming. Make sure your sources thoroughly document these standards so that Bolt applies them accurately.
### Use agent instructions to handle complexity
Use agent instructions to give Bolt context that isn't captured in your sources, or to help it navigate sources that are complex or unclear. Here are a few good ways to use agent instructions:
* Exclude deprecated components
* Focus on one theme if your sources include several
* Identify the correct framework to use
Giving Bolt specific instructions up front can improve the quality of its output. Consider auditing your sources before creating a design system so that you can flag any clarifying instructions you need to give the agent.
## Improve results by resyncing rather than starting over
[Syncing](/building/design-system/sync-design-system) only processes what's changed, so it's faster than adding a new design system. If your design system didn't produce the results you expected, we recommend you refine your agent instructions and then sync.
Here's the approach that works best:
1. Review what Bolt generated and identify what's missing or incorrect.
2. Update your sources if needed, or add agent instructions to address the issue.
3. Sync your design system.
## Pick the right agent
For best results, [use the Max agent](/building/using-bolt/interacting-ai#switch-between-bolt-agents-and-models) when building with your design system. The Max agent follows complex instructions more consistently and applies your design system standards more precisely than the Standard agent. To learn more, see [Choose an agent](/building/using-bolt/agents).
## Prompt effectively when building
How you prompt Bolt when [building with a design system](/building/design-system/use-design-system) affects both the accuracy of your results and how efficiently Bolt uses tokens.
### Reference components by name
When you know the name of a component in your design system, use it directly in your prompts. "Add a PrimaryButton in the header" gives Bolt more to work with than "Add a button in the header."
If you're not sure what's available or what something is called, browse your design system in Bolt before prompting. To learn more about navigating your design system, see [View your design system in Bolt](/building/design-system/view-design-system).
### Be specific about what to change
When you prompt with precise instructions, Bolt can more accurately apply your standards to the targeted components. Bolt also has to read through less of your project code, which helps token efficiency.
This is especially important when you update components after a sync or version switch. Instead of "Update my project to the latest design system," try "Update all uses of the PrimaryButton to the new style, but leave the layout the same."
Broad instructions require Bolt to read more of your project to understand what applies, which makes results less predictable.
If you need to fully update a project after syncing or switching to a new version, see [Update components in an existing project](/building/design-system/sync-design-system#update-components-in-an-existing-project) for an example prompt to help with this kind of large-scale update.
## Why doesn't my output match my design system?
If Bolt isn't producing results that match your design system, the most common causes are:
* **Incomplete or low-quality sources**: Your sources may not include enough component code or documentation for Bolt to generate a consistent design system. Review your sources against the [source quality guidelines](#use-the-best-sources-you-have).
* **Inconsistent sources**: Your sources may contain conflicting guidelines, mixed technology, or unclear agent instructions. Review the [source consistency guidelines](#make-sure-your-sources-agree) and add agent instructions to address any issues.
* **Model selection**: If you're not using the Max agent, [switching to it](/building/using-bolt/interacting-ai#switch-between-bolt-agents-and-models) may improve your results. The Max agent follows complex instructions more consistently and applies design system standards more precisely than the Standard agent.
* **Prompts that are too broad**: Your prompts may be too generic, which doesn't give Bolt enough context to know which components or standards to apply. Try referencing specific component names or describing exactly what you want to change.
* **Outdated design system**: Your sources may have changed since you last synced, so Bolt may be working from an older version than you expect.
After addressing any source or instruction issues, [sync your design system](/building/design-system/sync-design-system) to generate a new version.
# Introduction to design systems
Source: https://support.bolt.new/building/design-system/introduction
Learn how design systems in Bolt help your team build high-fidelity, on-brand prototypes and user interfaces from your own components.
A design system gives Bolt a set of visual rules to follow when creating prototypes or user interfaces for your projects. These rules can include guidelines like colors, typography, spacing, and component styles.
When you use a design system, Bolt generates UI code that's ready to use because it's built from your actual components, not stand-in code you'd have to replace later. This helps keep UIs consistent and on-brand without extra manual effort.
Bolt compiles your design system from your own sources, like your component library and design system website. Your design system is defined by those sources. When they change, you can [sync Bolt](/building/design-system/sync-design-system) to reflect the latest version.
To learn more about the types of documentation you can upload when you add a design system, see [Add your design sources](/building/design-system/add-design-system#add-your-design-sources).
## Preview a design system
Bolt includes pre-loaded design systems you can explore before adding your own. When you preview one, you can get a sense of the output quality when Bolt builds from real components instead of generic ones.
The design system section is only visible on the Bolt homepage when you're logged out.
The design system section is only visible on the Bolt homepage when you're logged out.
Your team can add and sync a combined total of 10 design systems per week. If you're iterating on your design system, resyncing counts toward this limit. We recommend [adding agent instructions](/building/design-system/add-design-system#add-agent-instructions) to get the best results from each sync. To learn more, see [Improve results by resyncing rather than starting over](/building/design-system/best-practices#improve-results-by-resyncing-rather-than-starting-over).
Switching to a previous revision affects all projects that use this design system. You can't switch revisions for individual projects.
1. Make sure you're logged in to your Team account.
2. On the Bolt homepage, in the sidebar, click your account name, then click **Settings**.
3. Under your team's workspace settings, click **Design systems**.
4. Select a design system.
5. In the top-right corner, click the revision dropdown, then select the revision you want to switch to.
## Update components in an existing project
After syncing your design system or switching to a previous version, your existing projects don't change automatically. To apply updates to a project, open it and prompt Bolt to update the specific components you want to change.
After updating your existing components, any further work in the project uses the new version automatically.
### Update specific components
To optimize token usage, be as specific as possible when prompting Bolt to update components after syncing or switching versions. When you precisely describe what to change, Bolt needs to read through less of your project code, which keeps token usage lower.
For example, instead of "Update my project to the latest design system," try "Update all uses of the PrimaryButton to the new style, but leave the layout the same."
### Update your entire project
To update your entire project to use a new version of your design system, use a detailed prompt that helps Bolt understand the scope of the updates you want.
You can use this prompt as an example to help you get started:
```
Audit the entire project against the active design system. The design system was recently updated with a new revision. Review all components, pages, and layouts in the project and:
1. Read the design system to get the latest tokens, components, and guidelines
2. Scan every component and page file for:
- Hardcoded colors, spacing, font sizes, or other raw values that should use design system tokens
- Standard HTML elements (for example, ) that should use design system components instead
- Deprecated component APIs or renamed props from the previous revision
- Missing or incorrect utility classes
3. Update all files to align with the current design system revision
Do not skip any files. Be thorough.
```
# Use your design system to build with Bolt
Source: https://support.bolt.new/building/design-system/use-design-system
Start a project with your design system so Bolt builds with your real components from the first prompt.
When you select a design system for a project, Bolt builds with your real components from the start. Every prototype and UI it generates follows your brand guidelines and uses your actual component library rather than generic placeholder code.
## Start a project with a design system
1. On the Bolt homepage, in the chat toolbar, click **Design System**.
2. From the list, select a design system.
Your own design systems appear here if your team has added any. Otherwise, you'll see pre-loaded design systems.
3. Enter your prompt and click **Build now**.
Bolt uses your design system as a reference for every UI decision it makes in the project. The components, spacing, typography, and color all follow your standards.
## Attach or detach a design system from an existing project
To attach, detach, or switch the design system associated with an existing project, modify the **Design system** setting in your general project settings.
) that should use design system components instead
- Missing or incorrect utility classes
3. Update all files to align with the design system
Do not skip any files. Be thorough.
```
## Pick the right agent
For best results, [use the Max agent](/building/using-bolt/interacting-ai#switch-between-bolt-agents-and-models) when building with your design system. The Max agent follows complex instructions more consistently and applies your design system standards more precisely than the Standard agent. To learn more, see [Choose an agent](/building/using-bolt/agents#compare-models).
## Prompt effectively with a design system
To get the best results when building with your design system:
* If you're familiar with your design system components, reference them by name directly in your prompts. For example, "Add a PrimaryButton in the header" gives Bolt more to work with than "Add a button in the header." See [View your design system in Bolt](/building/design-system/view-design-system) to learn how to browse your components.
* Be specific about what to update and what to leave alone. For example, "Add a navigation bar to the header using the NavBar component, but don't change the existing layout or button styles" is more reliable than "Add a navigation bar."
For more detailed guidance on prompting with a design system, see our [best practices](/building/design-system/best-practices#prompt-effectively-when-building).
## Duplicate a project with a design system
If you have a design system connected to your project, and you [duplicate that project](/building/using-bolt/projects-files#how-to-duplicate-a-project), the duplicated project uses the same design system. You can use duplication as a starting point for new work without losing your design system connection, but you can't use it to try a different design system on the same project.
## Build from your Figma designs
When you import a Figma frame while building with a design system, Bolt's design system agent processes the frame and recreates it using your real design system components.
For instructions, see [Build from a Figma frame using your design system](/integrations/figma#build-from-a-figma-frame-using-your-design-system).
# View your design system in Bolt
Source: https://support.bolt.new/building/design-system/view-design-system
Browse your generated design system, find components, and manage your design system settings.
After Bolt finishes generating your design system, you can find it in your team's workspace settings, on the **Design systems** tab.
To navigate to a design system:
1. Make sure you're logged in to your Team account.
2. On the Bolt homepage, in the sidebar, click your account name, then click **Settings**.
3. Under your team's workspace settings, click **Design systems**.
From here you can select a design system to browse the generated Storybook, which catalogs the components Bolt compiled from your sources.
## Browse your design system
Browsing the Storybook is useful for discovering components you can use, seeing them in light and dark mode, and viewing them in different states.
Remember that since the Storybook is generated from your sources, you can't edit it directly. To learn how to update your design system, see [Sync your design system with Bolt](/building/design-system/sync-design-system).
Deleting a design system can't be undone. If you need to build with the design system again, you'd need to re-add it.
To delete a design system:
* In the top-right corner of the design system page, click the three-dot menu, then click **Delete**.
# Intro to Bolt
Source: https://support.bolt.new/building/intro-bolt
Learn what Bolt is, what you can build, and how to take your idea from prompt to published app.
[Bolt](https://bolt.new) is an AI-powered builder for websites, web apps, and mobile apps.
Type your idea into the chat, click **Build now**, and Bolt transforms your idea into a working product.
With a single prompt, you can build:
* **Websites** like landing pages, personal and corporate websites, e-commerce shops, and more
* **Web apps** such as project management tools, job boards, CRMs, SaaS platforms, booking platforms, and beyond
* **Mobile apps** including games, productivity tools, social apps, workout planners, and whatever you imagine next
Bolt builds full-stack web applications using a wide range of JavaScript-based web frameworks. To build mobile apps, you use the [Expo integration](/integrations/expo).
## Who is Bolt for?
Bolt is for everyone.
Whether you've never written a line of code or you're a full-stack developer, Bolt helps you build more and build faster.
**New to coding?** Bolt removes the technical roadblocks. Describe what you want, and Bolt creates it for you. Then, make changes by chatting with Bolt. No coding knowledge required: bring your ideas and feedback, and Bolt does the rest.
**Experienced developer?** Bolt gives you speed, flexibility, and full control. Choose your languages and frameworks, connect to source control, and edit your code directly in [code view](/building/using-bolt/code-view). Or don't. If you have a technical background, that's the beauty of Bolt: code when you want, prompt when you want.
Bolt solves a different problem for each kind of builder:
* **Product managers**: Go from insight to working prototype and test ideas with your team.
* **Entrepreneurs**: Build a full business, from your company website to a complete product.
* **Marketers**: Build high-performing campaign pages, with SEO and hosting included.
* **Agencies**: Work faster and deliver more client projects without growing your team.
* **Students and builders**: Turn class work or side projects into fully working apps.
## What makes Bolt different
Here's what makes Bolt a unique solution:
* **Everything in one place**: [Bolt Cloud](#bolt-cloud) gives you databases, hosting, and domains in one project, with no separate services or external accounts to set up.
* **Your choice of AI agent**: [Pick the agent](#build-with-your-preferred-agent) that powers your builds, based on the type of work you're doing.
* **You own your code.** The code you create is yours to use for any legal purpose, including [commercial projects](/account-and-subscription/corporate-commercial).
* **Nothing to install**: Bolt runs in your browser and [sets up your development environment for you](#bolt-and-stackblitz), so there's no local setup to manage.
## Ways to start a project
You can start a new project from scratch or bring in work you already have:
* **Describe your idea.** Type what you want to build into the chat, then click **Build now**. Bolt turns your prompt into a working project.
* **Import a Figma design.** Turn a Figma frame into a working project. To learn more, see [Import designs from Figma](/integrations/figma).
* **Import designs from Google Stitch.** Export your Google Stitch designs to Bolt and build them into a fully functional app. To learn more, see [Use Google Stitch designs in Bolt](/integrations/google-stitch).
* **Import a GitHub repository.** Load an existing repository as a Bolt project. To learn more, see [Import an existing repository](/integrations/git).
* **Import from Lovable.** Bring a Lovable project into Bolt. To learn more, see [Import from Lovable](/integrations/lovable-import).
## Build with your preferred agent
Bolt is powered by large language models (LLMs), which are advanced generative AI systems that turn your natural language prompts into working code. Bolt gives you the choice of which AI agent powers your builds, so you can work in the way that suits you best.
If you're new to the concept of large language models, learn more about how they work in [Introduction to LLMs](/building/intro-llms).
Bolt offers different agents to choose from, and each has different strengths. To learn more, see [Choose an agent](/building/using-bolt/agents).
## Connect tools
Bolt works with external tools to extend what your app can do:
* [Expo](/integrations/expo) to build and ship mobile apps
* [Stripe](/integrations/stripe) to handle payments
* [GitHub](/integrations/git) for version control, backups, and collaboration
* [Google SSO](/integrations/google-sso) for user authentication
* [MCP servers](/building/using-bolt/connect-mcp) to connect other tools and data you need
## Collaborate with others
You can build on your own or share your project and work with others. On every project, you can:
* Invite collaborators and manage their access
* Find and access shared projects from the projects dashboard
* Work together in real time using multiplayer mode
* Share integrations like databases and GitHub
For details, see [Collaborate with others](/building/using-bolt/collaborate).
With a Teams plan, you can also share prompts, create team templates, and apply Team-level controls. Learn more about [Teams plans](/account-and-subscription/team-plans).
## Bolt Cloud
Bolt Cloud provides a complete solution for launching and running your app.
Instead of managing separate services for databases, hosting, and domains, you can handle everything inside Bolt. This keeps your workflow focused on building your product rather than setting up infrastructure.
### Databases
When your app needs a database, Bolt automatically creates one for you.
You can explore and edit data in a table view, review activity logs, edge functions, and secrets, and manage users and authentication without leaving your project. If you prefer, you can also claim your database and connect it to Supabase. Learn more about [databases](/cloud/database).
### Hosting
Publish your project to the web so you can share your work right away. Every project comes with a free `bolt.host` subdomain. Paid users can connect custom domains and access more publishing options. There's nothing extra to configure and no external accounts to maintain. Learn more about [hosting](/cloud/hosting).
### Domains
You can manage your domains directly inside Bolt. Connect a custom domain, adjust settings, and see everything in one place. This provides a streamlined way to manage your app's web presence without switching between providers. Learn more about [domains](/cloud/domains).
## Bolt and StackBlitz
Bolt is developed by StackBlitz, the team behind [WebContainers](https://webcontainers.io), the technology that first made it possible to run Node.js directly in your browser. Bolt runs on WebContainers, so you don't have to install anything or set up a local environment before you start building.
Bolt links with StackBlitz for account and project management, and some account actions, like resetting your email, are done through StackBlitz. To learn more, see [Accounts and subscriptions](/account-and-subscription/).
## Security and compliance
Bolt is SOC 2 Type II compliant. To learn more about our compliance report, visit the [Enterprise page](https://bolt.new/enterprise/) and contact our sales team.
## Pricing
View the [Pricing page](https://bolt.new/?showPricing=true) on the Bolt website.
Pricing is based on tokens and token usage. Learn more about [Tokens](/account-and-subscription/tokens) and [Maximizing token efficiency](/best-practices/maximizing-token-efficiency).
# Introduction to LLMs
Source: https://support.bolt.new/building/intro-llms
Understand AI and LLMs.
If you’re new to AI, this guide will help you understand what powers Bolt and how to get the most out of it. We’ll cover what LLMs are, how they work in Bolt, and some tips to save costs and improve results.
## What is an LLM?
LLM stands for Large Language Model, and you can think of it as predictive text on steroids. Instead of just guessing the next word like your phone does, it can generate entire answers, explanations, and even working code.
This is why it is often called *generative AI* technology, because it does not simply repeat what it has seen. It creates something new each time based on what you ask.
In Bolt, this generative power is what turns your requests into code, designs, or solutions behind the scenes.
## How Bolt Uses LLMs
When you give Bolt a request, it sends that request to a powerful underlying LLM, which is the brain behind the scenes. The LLM breaks your words into tokens, analyzes what you are asking, and predicts the best possible code or answer based on everything it has learned during training. This is what makes the result feel so natural and useful.
For example, if you prompt Bolt to “Create a star icon next to names so users can save favorites,” Bolt does more than just paste in an existing solution. It actually generates brand-new code that solves your specific problem.
If you add extra details, like the way you want the function to handle errors, the LLM takes those into account and produces a solution that is even closer to what you need.
This process is what allows you to go from a plain English request (a prompt) to working, customized code in just seconds.
Your data is safe: Bolt never uses your project data to train AI agents.
## Prompts
A prompt is simply the message you send to Bolt, usually in the form of a question or an instruction. Think of it as telling the AI what you want it to do. This could be something simple like “Change my website color scheme to a dark theme” or something more complex like a detailed request to build a project management application.
Learning to write good prompts is one of the most important skills for getting great results. This is not just a Bolt-specific trick, it is quickly becoming part of a new wave of tech skills known as *prompting* or *prompt engineering*. The clearer and more specific your prompt, the better Bolt can understand your intent and give you a high-quality answer.
Strong prompting skills can save you time, reduce costs, and improve the accuracy of the code or content you get back.
If you are new to this, start by writing short, direct prompts and then experiment with adding more context or examples to fine-tune the results.
For tips on writing better prompts, check out our [Prompt effectively ](/best-practices/prompting-effectively) guide.
## Context
Think of context like Bolt's short-term memory. It includes the following:
* Your recent conversation history with Bolt
* Bolt's understanding of your codebase and the changes it's made
Bolt uses a large context window, which means it can keep track of a lot at once. But it can’t remember everything forever.
## Tokens
LLMs process text as **tokens**, which are small pieces of words.
Example:
“I love cats!” becomes four tokens: `I`, `love`, `cats`, `!`
Every message uses tokens, and there is a limit to how many can be processed at one time. Because token usage affects costs, keeping your prompts focused can save money.
If you’d like to learn more about tokens in general, check out this [Nvidia article on tokens](https://blogs.nvidia.com/blog/ai-tokens-explained/).
## Accuracy and Limitations
LLMs can produce inaccurate or outdated outputs. There are a couple of reasons for this:
* Training set age: LLMs are trained on massive amounts of data, but they can’t know anything that occurs after their training finishes. When building software, it’s important to be aware that the LLM may not know about the latest version of all the tools and frameworks you’re using.
* Hallucination: LLMs are predictive, not deterministic. They can produce different results even with the same prompt. Sometimes, they generate false information.
It’s important to keep this in mind when building, and always test your applications carefully.
## Next Steps
* Practice writing clear, specific prompts
* Use summaries to keep your context window focused
* Check out our guides for [Prompting effectively](/best-practices/prompting-effectively) and [Maximizing token efficiency](/best-practices/maximizing-token-efficiency)
# Bolt QuickStart guide
Source: https://support.bolt.new/building/quickstart
Build your first website or app with Bolt: no code required.
In this step-by-step guide, you’ll learn how to build, edit, and publish an example **Pet Name Picker** web app.
You can follow along in your own browser window, or use the prompts as a springboard for your own ideas.
Following this walkthrough will use just under 300K tokens, which is the daily limit of Bolt's free plan. If you’d prefer not to use tokens while you learn, you can simply read along and watch the example videos.
If you're already familiar with how to build an app in Bolt, you can skip this guide and read our article on [Planning your app](/building/build-your-first-app).
## What you’ll need
* A Chrome or Chromium browser (Opera, Brave, Edge, Vivaldi, etc.)
* 10–15 minutes
Note that Bolt will build your app a bit differently from what you see in this guide. You'll be able to follow along step by step, but your individual results will vary slightly.
## Part 1: Build your app with your first prompt
You're about to see Bolt in action for the first time. Follow these steps and you'll have a working app in just a few minutes!
prompt : \
`Build a pet name picker app with dropdowns that allow people to choose animal types (e.g. dog, cat, bird, lizard, etc.) and name categories (e.g. cute, celebrity puns, movie inspired, etc.) Create user email sign up and log in functionality and the ability to save favorite names when logged in.`
3. Click the blue and white arrow to submit.
4. Sign in or sign up (Google, GitHub, or email: no credit card required). *You won't see this step if you're already logged in*.
5. Complete the survey.
6. Wait approximately five minutes while Bolt creates your app.
Because your prompt includes features such as sign-up, login, and favorites, Bolt needs to set up databases, which takes a bit more time. Apps without database features usually build faster.
7. Try it out in the Preview window. Pick an animal, pick a category, and generate a name.
Congrats! You just built your first Bolt web app!
## Understanding tokens
Bolt uses large language model (LLM) technology to process your prompts and build your site. You don’t need to know the technical details, but it's helpful to know that LLMs work on a token system, and Bolt’s free and paid plans are based on them.
Think of tokens as a measurement of Bolt’s efforts. Bolt “uses” tokens when it:
* reads
* thinks
* builds
The bigger and the more complex your website or app, the more tokens it will take to build it. The next step we'll take in this guide is to determine how many tokens we used to build the first iteration of our app.
## Part 2: Check token usage and turn on token display in chat
Check how many tokens your initial build used, and turn on the option to display token usage in chat. This helps you see how many tokens each of your prompts uses.
In the example video above, there are 96K tokens remaining, meaning the build used 204K. (Free accounts offer 1 million tokens monthly with a 300K per day limit.)
4. In the left menu under Account, click **General**.
5. Turn on **Display token usage in chat**.
6. Look above your chatbox to view your remaining tokens, which should match what you saw when looking at your subscription information.
## Part 3: Try out your app by signing up and saving favorites
Now that your app is built and you have a handle on how tokens work, take a moment to explore what you’ve created.
Start by testing the sign-up feature. Use some sample information to create an account and make sure everything works as expected. Once you’re signed in, try saving a few favorites to see how your app handles user data.
If your favorites aren't showing immediately, try logging out and back in; that should fix the issue.
## Part 4: View your database info
One of the reasons Bolt is so powerful is that it includes built-in database creation and management. Many web app builders require you to set up a third-party database and connect it manually, but Bolt handles this for you automatically as part of Bolt Cloud.
From your first prompt, Bolt recognized that your app needed databases and created them for you: one for storing user favorites and another for managing authentication data. In this section, you’ll see how to view that information.
1. Click the **database icon** in the top center of your screen.
2. Click the **favorites** table.
3. Notice how the names you've favorited appear as database entries. This is how Bolt manages the favorites feature: with a database that associates the name, animal type, and category with a user ID.
Now that you’ve seen the information saved in your favorites database, take a moment to explore User Management to see how Bolt handles user sign-ups.
1. Click the **gear icon** in the top center of your screen, then click **All project settings.**
2. Click **User Management**.
3. Notice the chart that shows user sign-ups, along with the database table below it that lists information for each registered user.
Note that the `user_id` under User Management will match the `user_id` in your Database favorites table.
## Part 5: Use the selector tool to change your app title
Now let’s use the selector tool to update your app’s title.
By default, your app was automatically named *Pet Name Picker*. Let’s change it to *PetPick* to give it a more personalized touch.
**Nice work!** Now you have an understanding of how to change your site after it's been created, as well as how many tokens it takes to perform an example update.
## Part 6: Use Version History to restore an automatic backup
No matter how experienced you are, things don’t always go as planned. At some point, you may make changes to your site that you want to undo.
When that happens, the easiest solution is to restore a previous version of your build. In this example, you’ll restore the site to its original color scheme by following the steps below.
Did you notice your token balance didn't change? Restoring your site to a previous version doesn't use tokens!
## Part 7: Use code view to make changes
While you can do almost everything you need through prompting, it’s helpful to understand how code view works. Code view lets you make changes directly in your app’s code without using any tokens.
If you’re new to coding, limit your edits to text and labels at first. It’s easy to break things when working directly in code, and version history doesn’t cover those changes. If something goes wrong, you’ll need to prompt Bolt to help you fix it.
You just made code changes that didn't require any tokens!
## **Part 8: Publish your project**
Now you’re ready to share your app with others! Follow the steps below to publish it using Bolt’s built-in hosting.
Awesome! You just published your Bolt web app!
## Next Steps
Nice work, you're part of the Bolt builder community!
Now it's time to start building expertise and learning how to bring your ideas to life as accurately and efficiently as possible.
For your next project, you can start by learning how to [Plan your app](/building/build-your-first-app).
Once you've got the foundations of your first prompt down, you can then work on learning to [prompt effectively](/best-practices/prompting-effectively) and [use Plan mode](/best-practices/discussion-mode) effectively.
Also be sure to check out one of the Help Center's most popular articles on [Maximizing token efficiency](/best-practices/maximizing-token-efficiency).
## Troubleshooting
If you get stuck, check out [Troubleshooting Bolt issues](/troubleshooting/issues) for steps to resolve common problems.
## You’ve Got This
Starting out is often the toughest part, and now you're already ahead. Keep moving, stay curious, and remember: progress beats perfection every time!
# Switch your v1 projects to Bolt Agent
Source: https://support.bolt.new/building/switch-v1-projects
Switch your v1 projects to Bolt Agent before August 3, 2026.
Bolt is retiring the v1 agent on August 3, 2026. After that date, your v1 projects will automatically switch to Bolt's Standard agent.
Bolt's agents are faster, handle large projects better, and give you the option of using the Standard or Max agent. Bolt Agent is significantly more capable than the v1 agent, so it produces more complete results and makes fewer errors that could require rework.
If you have projects that use the v1 agent, switch each one to Bolt Agent before that date.
Here's the timeline for retiring the v1 agent:
**April 13, 2026:** You're no longer able to choose the v1 agent when you start a new project.
**August 3, 2026:** You won't be able to access your v1 agent projects or published sites built from them. Switch your v1 projects to Bolt Agent beforehand to keep access to them.
## Switch your v1 projects
You need to switch v1 projects individually, so repeat these steps for each v1 project you have.
Switching to Bolt Agent clears your project's chat history. This doesn't affect your files or code, but the conversation history doesn't carry over. Before switching, save any instructions or other context you want to keep. You can add it to your project knowledge so Bolt Agent can access it across projects.
To switch a v1 project to Bolt Agent:
1. Open the project in Bolt.
2. In the bottom-left corner of the chatbox, click the **v1 Agent**.
3. Select the agent you want to use.
4. In the **Confirm agent change** dialog, click **Switch to \[agent name]**.
If you're on a free plan, you'll only be able to switch to the Standard agent.
## What you gain with Bolt Agent
Bolt Agent is a significant step up from the v1 agent. It produces more complete results and makes fewer errors that could require rework.
Switching to Bolt Agent also gives you capabilities that aren't available with the v1 agent:
* **Database management**: Bolt Agent can create and edit [Bolt Databases](/cloud/database) and connect your project to Supabase directly from the chat. You don't need to set up or configure your database separately — the agent handles it as part of your build.
* **Agent selection**: The v1 agent uses a fixed model. With Bolt Agent, you can choose between the Standard agent for tasks of average difficulty and the Max agent for more complex tasks.
* **Plan Mode**: In [Plan Mode](/best-practices/discussion-mode#how-to-use-plan-mode), work through a detailed build strategy with the agent before it starts writing code. For more information about Plan Mode, see [the FAQ below](#i-used-discussion-mode-with-v1-what-do-i-use-instead).
## Frequently asked questions
### When will my v1 projects stop working?
Your existing v1 projects will continue to work normally until August 3, 2026. After that date, they will automatically switch to Bolt Agent.
### Will switching to a new agent break my project or site?
Your projects, and any sites that run on them, will continue working as expected after you switch agents. Your files, code, and live sites won't be impacted. Only your chat history doesn't carry over when you switch agents.
### What happens to my chat history when I switch?
Switching to Bolt Agent clears your project's chat history. If you have important context in your v1 chat, copy it to **Project Knowledge** before switching so Bolt Agent can reference it going forward.
### I used Discussion Mode with v1. What do I use instead?
Bolt Agent uses [Plan Mode](/best-practices/discussion-mode#how-to-use-plan-mode) instead of Discussion Mode. Plan Mode is designed for building out detailed strategies before Bolt writes any code. Because Bolt Agent is more capable than the v1 agent, you can also plan by chatting with Bolt Agent directly. If you want to think something through while chatting and don't want Bolt to build right away, tell the agent: "Don't make any changes."
# Choose an agent
Source: https://support.bolt.new/building/using-bolt/agents
Learn about the agents you can use to build your Bolt projects.
Bolt uses an AI agent to plan your project, write code, and troubleshoot as you build. Bolt offers two agents, Standard and Max, powered by large language models.
You choose the agent that matches your work, and Bolt handles model selection behind the scenes. As new models become available, Bolt can update how agents perform without changing your workflow.
To learn more about the technology behind Bolt's agents, see [Introduction to LLMs](/building/intro-llms).
## Agents
Choose the agent that's best suited to what you're building.
Only Standard is available on the free plan. To use Max, [upgrade to a paid plan](/account-and-subscription/billing#upgrade-your-free-plan-to-a-paid-plan).
### Standard
Balanced for everyday building.
Standard is fast and token-efficient, which makes it a good default for most development work. It performs best when the task is well defined.
Best for:
* Small or medium-scale applications
* UI updates
* General development
* Clear, well-defined tasks
### Max
Maximum reasoning for complex tasks.
Max thinks more about each step, which makes a difference when the task involves working through large codebases with complex dependencies or solving problems without an obvious solution. Max is also more responsive to detailed prompts: if you describe a specific problem and ask it to think carefully, it uses deeper reasoning in that area.
For tasks where Standard already performs well, Max may not show a noticeable difference.
Best for:
* Large-scale applications
* Complex or interconnected features
* Refactoring existing code
* Open-ended tasks
The best way to find what works for your projects is to experiment. Try both agents on the kinds of tasks you do most and see which one gives you the results you want.
## Switch agents
You can switch agents in two places: from the Bolt homepage when starting a build, or inside a project while working. For each project, Bolt remembers your selection and automatically uses the same agent the next time you open the project.
If you want all new projects to use a specific agent, you can [set a default agent in your account settings](/settings/account-settings#general-account-settings). Bolt then automatically selects that agent when you start a new project.
### Switch agents on the homepage
Hover over an agent's name to see more details about it.
## Use an agents.md file
Bolt supports importing an `agents.md` file directly into projects. When an `agents.md` file is present, it's detected and used automatically, with no additional setup required.
To upload a file:
1. Open your project.
2. Click the **plus icon** in the chatbox.
3. Click **Attach file**, and choose your file.
Using an `agents.md` file is especially helpful for users who rely on Project Knowledge settings. Instead of adding content manually through the UI, you manage project context in Markdown files. This makes it easier to include links, organize information across multiple files, and maintain project knowledge in a more flexible and scalable way.
The `agents.md` file acts as the entry point for agent instructions. While it can reference other files, such as text or additional Markdown files, the primary instructions must live in `agents.md` itself. The file name is required and can't be changed. Agents only look for instructions starting from `agents.md`, then follow any links or references you include from there.
## How Bolt handles context
Bolt agents support large context windows. However, to keep performance smooth, Bolt limits the active history to recent messages. This helps reduce token usage and keeps building responsive.
If a detail from earlier becomes important again, briefly restate it to bring it back into context. For any ongoing context or instructions that are important, add them to either your Project Knowledge, Account Knowledge, or, if applicable, Teams Knowledge.
## Projects using v1 Agent (legacy)
As of April 13, 2026, you can no longer select **v1 Agent (legacy)** when starting a new project. The v1 agent will be retired on August 3, 2026, and any remaining projects that use it will be automatically switched to the default Bolt agent.
If you have existing projects that still use the v1 agent, they continue to work for now. You can still edit, build, and publish as usual until August 3, 2026.
However, the v1 agent doesn't support several features available with Bolt agents, including Plan Mode and the ability to create Bolt Databases. It also tends to produce less complete results and require more rework.
To get the best results from Bolt, you can manually switch your projects to a Bolt agent. Switching agents clears your project's chat history, so save anything you want to keep before transferring, and add any ongoing instructions to **Project Knowledge** afterward.
For step-by-step instructions and more details about the transition, see [Switch your v1 projects to a Bolt agent](/building/switch-v1-projects).
# Use Code View
Source: https://support.bolt.new/building/using-bolt/code-view
Learn more about Bolt's workspace for exploring and editing your project’s files directly.
Code View allows you to view the raw code behind your project. It lets you open files, make changes, and understand how everything fits together behind the scenes. This view is especially helpful when you already know what you want to adjust or when you want to see the exact code powering your app.
Although Code View is generally intended for more technical users, the interface is shaped to feel approachable for anyone who wants to dig deeper. This creates a supportive space for learning, experimenting, and refining your project at your own pace.
## Create, edit, and delete files
By default, your Bolt project shows your chat and a preview of the app you're building. If you want to edit your project files directly, you can switch from **Preview** to **Code** view. This is useful if you:
* Know exactly what needs changing, and want to make quick edits yourself rather than asking in Plan mode.
* Need to troubleshoot.
* Want to explore your code and content.
To work with files in your Bolt project, switch to **Code** view using the **Code Preview icon (\<>)**. From here, you can open, edit, create, and delete files.
Users you invite Team members have automatic access (Teams plans) Anyone on the web (public sites) Only users you invite (private sites)
Project thumbnail images generate when you prompt Bolt. If you don't see a thumbnail for a project, it will appear the next time you prompt Bolt in that project.
## Work together in real time
When your project visibility is set to public, collaborators can work together in multiplayer mode. This lets you prompt and edit in the same project at the same time. Every project has a single shared chat thread.
To prevent conflicting edits, Bolt processes one prompt at a time. Other collaborators can't submit prompts while Bolt is processing an update, but you can see when someone else is typing, so you know when to wait.
When collaborators prompt in a project, Bolt uses tokens from the prompter's account rather than from the project owner's.
## Share integrations
Shared projects give collaborators access to the project's data, but control over certain integrations stays with the project owner.
If your project has a [database](/cloud/database), collaborators can view the same data and make changes to the structure. Any collaborator can bring designs into Bolt using [Figma](/integrations/figma) or [Google Stitch](/integrations/google-stitch). If you're on a paid team plan, your team members can add and use [design systems](/building/design-system/introduction).
The [GitHub integration](/integrations/git) works differently. Only the project owner can connect and manage it, so if you're a collaborator, the GitHub button isn't available to you. When you make changes to the project, Bolt doesn't automatically push them to the repository. Instead, your changes sync to GitHub the next time the project owner opens the project. This ensures changes aren't pushed to the repository before the owner has a chance to see them. If the project owner isn't online while you're working in the project, you may see this message: `This project is linked to a private GitHub repo owned by the creator. Your changes won't sync to GitHub until the creator returns to the project.`
Similarly, only the project owner can [connect MCP servers](/building/using-bolt/connect-mcp) and prompt Bolt to use those connectors.
# Connect to an MCP server
Source: https://support.bolt.new/building/using-bolt/connect-mcp
Connect to an MCP server to give Bolt context from your external tools and data.
A Model Context Protocol (MCP) server is a standardized connection that lets Bolt access real-world information from the apps and data sources you use, rather than relying only on its built-in knowledge. When you connect an MCP server, Bolt can directly interact with your applications and data while chatting. For example, you can:
* Connect to Notion to let Bolt read or edit your Notion pages
* Connect to Linear to pull in context from your Linear tasks
* Connect to GitHub to let Bolt read or create issues and pull requests
This gives Bolt more precise, up-to-date context and lets you build more powerful workflows without switching between apps.
New to MCP? To learn how it works in-depth, visit the [official MCP documentation](https://modelcontextprotocol.io/docs/getting-started/intro). For an introduction to MCP's uses and benefits, try [What is MCP? The Universal Connector for AI Explained](https://www.backslash.security/blog/what-is-mcp-model-context-protocol).
## Before you start
Most connectors require you to prove that you have access to an external app or data source, either by entering a key or by signing in to the app. Before you connect, make sure you have the necessary credentials from the app or service provider. Bolt verifies these credentials when you set up your connection.
## Authentication methods
Bolt supports these authentication methods:
* `API key`: Get an API key from the app you're connecting to. You can usually find this in the app's developer or account settings. An API key is like a password, so keep it secret and don't share it with others.
* `MCP OAuth`: Sign in to the app you're connecting to. This works the same way as signing in to an app using Google or another third-party account.
If you're connecting to a site that's open to the public and has no login, like the [Bolt Help Center](https://support.bolt.new), you can leave the authentication setting for your server as `None`. This is uncommon, and in most cases you need to use either an API key or MCP OAuth.
## Add a connector
Bolt offers built-in connectors for several tools, including Notion, Linear, GitHub, and others. To add a connector to a different tool, like Slack, Google Workspace, or another tool you use, set up a custom MCP server.
### Access your connector settings
1. From the Bolt homepage, in the chatbox, click the plus icon.
2. Click **Connectors**, then click **Manage connectors**.
1. From the Connectors (MCP) page, click a built-in connector (like Notion or GitHub).
2. Click **Connect**.
3. When prompted, enter your API key or log in to the application. The type of authentication Bolt asks for depends on the connector.
Once Bolt confirms you have access to the server, a `Connected` status appears in the upper-right corner of the screen.
The **Auto-enable for all projects** setting controls whether or not a connector is turned on automatically when you create a new project.
* If you want a connector to be turned on automatically, select **Auto-enable for all projects**.
* If you prefer to [turn on the connector for each project as you need it](#turn-connectors-on-or-off-for-a-project), leave **Auto-enable for all projects** deselected.
### Add a custom connector
To add a custom connector, you need the server URL, transport type, and authentication method. Most apps that support MCP publish documentation with this information. If you're not sure where to find it, try searching the web for the app's name and "MCP server."
1. From the Connectors (MCP) page, click **Custom MCP server**.
2. Enter the following information.
| Setting | Description |
| ---------------- | ------------------------------------------------------------------------------------------------------------------------------------------------------------------------------ |
| `Name` | A recognizable name to show in your connector settings. |
| `URL` | The server address, similar to a web address. For example, `https://support.bolt.new/mcp`. |
| `Transport type` | The method Bolt uses to communicate with the server. `HTTP` is the standard transport type for most MCP servers. Use this unless the server's documentation says to use `SSE`. |
| `Authentication` | The method used to verify your access. Select `API key` and enter your key, or select `MCP OAuth` to use a sign-in flow. |
3. Click **Connect**.
Once Bolt confirms you have access to the server, a `Connected` status appears in the upper-right corner of the screen.
The **Auto-enable for all projects** setting controls whether or not a connector is turned on automatically when you create a new project.
* If you want a connector to be turned on automatically, select **Auto-enable for all projects**.
* If you prefer to [turn on the connector for each project as you need it](#turn-connectors-on-or-off-for-a-project), leave **Auto-enable for all projects** deselected.
### Manage which tools are turned on
Each connector includes tools, which are actions the server allows Bolt to do, like reading, creating, or editing data on your behalf. The number and type of tools available vary by app.
When you add a connector, all available tools are turned on by default. We recommend that you review these tools and turn off any that you don't want or need. For example, if you want Bolt to be able to create data but not delete it, turn off any tools that can delete files or information.
The tools you enable in the connector apply to all projects. You can't turn on and off tools individually by project.
To manage your tools:
1. From the Connectors (MCP) page, select a connector, then click the three dots in the upper-right corner of the screen.
2. Click **Edit**.
3. In the Tools list, deselect any tools you don't want to use. You can select them again later if you change your mind.
4. Click **Save changes**.
## Turn connectors on or off for a project
To optimize performance, we recommend that you turn on a connector for a given project only if you need it.
To turn on a connector for your Bolt project:
1. Log in to the project.
2. In the chatbox, click the plus icon.
3. Click **Connectors**.
A list appears that shows connectors you've added.
4. Turn on the toggle next to the connector's name.
You can turn off a connector at any time while chatting to reduce the amount of context Bolt is working with.
## Best practices for using connectors
When you turn on a connector, Bolt adds its data to your project's context, which is the information Bolt processes when thinking or building. This is what makes connectors powerful, but it also means that having multiple connectors turned on, each with multiple tools, can slow Bolt down and reduce the quality of its output. It can also increase your token consumption. To make sure you use connectors effectively, follow these guidelines:
* Turn off connectors for projects where they don't add relevant information.
* Turn off tools you don't need in the connector settings. Tools you turn on apply across all projects. To adjust your available tools, see [Manage which tools are turned on](#manage-which-tools-are-turned-on).
* Turn on and off connectors for a project as needed while building, rather than leaving connections on all the time.
## Refresh a connector
When a service provider updates their MCP server, Bolt automatically discovers new tools. You don't need to make any updates to your connector for new tools to work. However, you can refresh your connection to check for new tools and review or turn them off before Bolt uses them. If a connector is showing as offline, refreshing the connection can help confirm whether it's back online.
To refresh a connector:
1. From the Connectors (MCP) page, select a connector, then click the three dots in the upper-right corner of the screen.
2. Click **Edit**.
3. Click **Refresh connection**.
## Edit or delete a connector
1. From the Bolt homepage, in the chatbox, click the plus icon.
2. Click **Connectors**, then click **Manage connectors**.
3. Click the connector you want to change.
4. In the upper right corner of the screen, click the three dots.
5. Do one of the following:
* To edit the connector, click **Edit**, make your changes, then click **Save changes**.
* To delete the connector, click **Delete**, then click **Delete server** to confirm.
# Using the chatbox
Source: https://support.bolt.new/building/using-bolt/interacting-ai
Understand the main actions you can take in the Bolt chatbox and how each option supports your work.
The chatbox is the main space where you shape and direct your work in Bolt. It gives you a straightforward way to talk through ideas, outline goals, and request changes as your project evolves.
Many builders spend most of their time in the chatbox because it offers a clear view of the conversation without needing to switch into [Code View](/building/using-bolt/code-view). Using the chatbox, you can review suggestions, explore alternatives, and decide how to move forward at your own pace.
## Switch between Bolt agents
Only the Standard agent is available on the free plan. To choose the Max agent, upgrade to a paid plan.
You can switch between agents in two places: from the Bolt homepage when starting a build, or inside a project while working. For each project, Bolt remembers the agent you select, and it automatically uses it again the next time you open the project.
If you want all new projects to use a specific agent, you can [set a default agent within your account settings](/settings/team-settings#general-account-settings). Bolt then automatically selects it when you start a new project.
### Switch agents on the homepage
The agent name shown at the bottom of your chatbox indicates which agent is currently in use.
### Switch agents in a project
Hover over an agent's name to see more details about it.
## How to use Plan or Discussion
The **Plan** option is available in the chatbox.
If you're using v1 Agent (legacy), you'll see Discussion Mode instead.
As of April 13, 2026, the v1 Agent is no longer available for new projects. After August 3, 2026, remaining projects that use the v1 Agent will be automatically switched to use the Standard agent. Make sure to [switch to Bolt Agent](/building/switch-v1-projects) before that date to save your chat history and choose the agent you want to use.
### Use Plan Mode on the Bolt homepage
You can begin your Bolt project in Plan Mode right from the first prompt. This lets you create and refine a plan through back-and-forth discussion before executing a build, helping you avoid unwanted changes and use fewer tokens overall.
Simply click **Plan** before submitting your prompt to generate a plan for your build.
When you use Plan mode from the homepage, it starts by creating the base structure of your app. After that, it shares a plan in the chatbox. You can review this plan, suggest changes, and continue building step by step.
If you want to create a mobile app, it’s important to mention this directly in your prompt. For example, you might prompt: “Build a mobile app that helps people track their daily habits.”
Plan Mode highlights blue when active. Click it again to turn it off and return to Build mode.
### Use Discussion Mode in a Bolt project
As of April 13, 2026, the v1 Agent is no longer available for new projects. After August 3, 2026, remaining projects that use the v1 Agent will be automatically switched to use the Standard agent. Make sure to [switch to Bolt Agent](/building/switch-v1-projects) before that date to save your chat history and choose the agent you want to use.
Follow the steps below to switch to Discussion Mode while working in a Bolt project:
Discussion Mode highlights blue when active. Click it again to turn it off and return to Build mode.
## Import a Figma frame
In addition to starting your build from the Bolt homepage by importing a Figma frame, you can also import a Figma frame for design reference using the chatbox.
Learn more about [Figma frames](/integrations/figma#figma-frames).
To import a Figma frame, follow the steps below:
Image generation is an optional feature available on paid plans. Before you can generate images, you have to turn on this feature in your account settings.
You can create new AI images directly from text prompts inside Bolt. Describe what you want, and Bolt generates a ready-to-use image for your project. Generated images can include transparent backgrounds for easy placement in designs, and all output is automatically converted to WebP format for fast loading and efficient web performance.
Generating new images uses more tokens and takes more processing time than using stock images. Turn on image generation if you need high-quality custom images, or leave it off to use stock images but save time and tokens.
To turn on image generation:
1. Go to your account settings:
1. Log in to a Bolt project.
2. Click **your avatar** in the top-right corner of your screen.
3. Click **Settings**.
2. In the left navigation menu, under Account, click **Add-on features**.
3. Turn on **Image Generation**.
Once you turn on this setting, Bolt can generate images in any project.
To generate an image in chat, ask Bolt for the image you want using a prompt, as shown in the following screen capture.
To get the best result, make your prompt as specific as possible about the subject, style, and where the image should appear.
You are responsible for ensuring any published or deployed content complies with applicable rights and laws.
## AI image editing
AI image editing lets you make targeted changes to images that already exist on your site. You select an image, describe the change you want, and Bolt (using Nano Banana) updates the image while keeping the rest intact.
This feature is available on all paid plans. It is not included on free plans. Using AI image editing does not add any additional fees, but each edit uses tokens from your plan.
For generating brand-new images or completely replacing an existing image, use image prompts or upload a new file. Those tools are intended for full image creation and total replacements, while image editing focuses on modifying an existing image rather than rebuilding it from scratch.
Images can also be selected when they are used as background elements. To remain selectable, the image must be within five layers of the top of the layout. Background images placed six or more layers deep cannot be selected for AI image editing.
To make edits to an image in your project, follow the steps below:
Image files: `.jpg` `.jpeg` `.png` `.gif` `.webp` `.svg`
Text files: `.pdf` `.txt` `.doc` `.docx` `.py` `.ipynb` `.js` `.mjs` `.cjs` `.jsx` `.html` `.css` `.scss` `.sass` `.ts` `.tsx` `.java` `.cs` `.php` `.c` `.cc` `.cpp` `.cxx` `.h` `.hh` `.hpp` `.rs` `.swift` `.go` `.rb` `.kt` `.kts` `.scala` `.sh` `.bash` `.zsh` `.bat` `.csv` `.log` `.ini` `.cfg` `.config` `.json` `.yaml` `.yml` `.toml` `.lua` `.sql` `.md` `.tex` `.latex` `.asm` `.ino` `.s`
Bolt can upload file types for a wide range of programming languages. Bolt only builds JavaScript-based applications (see [Supported technologies](/concepts/supported-technologies)), but you can upload files from other programming languages to guide Bolt, or ask Bolt to convert them into JavaScript.
You can upload files when creating a new project on the Bolt homepage or in an existing project chat (shown in the following screenshot).
Bolt adds the file to your project files.
**Use a file for design inspiration**
1. Upload an image file to show Bolt the look and feel you want.
2. In your prompt, say: `Using the attached image for inspiration, change the site’s colors, fonts, and other styles to match the image style.`
Bolt uses the file temporarily but doesn’t permanently add it to your project files.
If you have trouble uploading images, see our [image upload troubleshooting tips](/troubleshooting/issues#images-not-uploading-or-working-properly) for instructions to add your image directly to your project in Code view. This often helps resolve image upload problems.
## Tag a project file or folder
To mention a project file or folder in your prompt, type the `@` symbol to tag the resource. Bolt brings up a list of matching files and folders that filters as you type. Select a resource to insert its path into your prompt.
## Search the Help Center from the chatbox
You can search the entire Bolt Help Center without leaving your project by following these steps:
1. In the bottom-left corner of the chatbox, click the **plus icon**, then click **Search Help Center**.
2. Enter your keywords, and a list of articles will appear.
3. Click any topic to open it in a new tab.
## Clear context
You can clear the context in Bolt by entering the `/clear` command in your chatbox, then clicking **Clear context** in the Results section above.
You can also clear context from your [General Project Settings](/settings/project-settings#project-general-settings).
For a video introduction to clearing context, watch the video below:
You can edit and delete any prompts that you create. You cannot edit and delete built-in prompts provided by Bolt.
Fill in the following:
* Choose a category, or create a new one from the dropdown.
* Select an icon.
* Name your prompt.
* Write the prompt in the prompt field.
* Click **Create prompt** to save it.
### Manage a prompt
You can favorite any prompt (both built-in and custom). This adds it to the top of the list.
1. In the bottom-left corner of the chatbox, click the **plus icon**, then click **Open Prompt Library**.
2. Locate the prompt you want to manage and click on it.
3. Click the three-dot menu.
Use the search bar at the top to find a specific project.
### From inside a project
Inside a Bolt project, you can switch to another recent project. Projects are sorted with the newest first.
To run the project on your computer, you'll need [Node.js](https://nodejs.org/en) installed first. Node.js is a free tool that lets you run web applications locally.
If your site uses a custom domain you purchased through Bolt, you can't reconnect the custom domain until after it expires. We don't recommend transferring a project that uses a Bolt-purchased domain.
To make sure the new owner can use the database, we recommend transferring the Supabase project to a new owner first using [Supabase's project transfer instructions](https://supabase.com/docs/guides/platform/project-transfer), then transferring your Bolt project.
* **GitHub**: Bolt removes the GitHub integration when the new owner accepts the transfer. The new owner can then connect their own GitHub account and [create a new repository from the project](/integrations/git#create-a-new-repository-from-a-bolt-project).
* **Custom domains**: You have to remove the custom domain before transferring.
To transfer a project to another user:
1. In your project, in the top menu, click the project name.
2. Click **Transfer to**.
3. In the **Transfer project** dialog, select the **To a user** tab.
4. Enter the recipient's email address.
5. Click **Continue**, then click **Confirm transfer**.
The recipient receives an email invitation. After they accept, ownership transfers to their account.
## Duplicate a project
Duplicating a project creates a fresh copy in Bolt with all of your code and settings intact, except for GitHub and Netlify integration settings.
### Database duplication
If your project uses a Bolt database, the duplicated project copies the database structure (the tables and columns you've set up) but not the data itself.
If your project uses a Supabase database, you can either create a new Bolt database (which copies the structure only) or connect the duplicated project to the same Supabase project as the original.
Deselect **Use Bolt database** if you want to maintain your existing Supabase connection.
If you want to keep your data in the duplicated project, stay connected to your Supabase database. Avoid making changes to the same database from both projects — after duplicating, manage database changes from one project only.
### Duplicate your own project
Duplicating a project clears your chat history.
Duplicating creates a copy of the project files. It doesn't retain chat history or context.
1. Log in to your Teams account on Bolt.
2. Go to StackBlitz and open your Bolt collection page: `https://stackblitz.com/@USERNAME/collections/bolt`.
3. Click the project you want to edit.
4. Click **Open in bolt.new | AI**. When you send a new prompt, Bolt automatically duplicates the project to your team.
You can also manually duplicate it to your team on StackBlitz, where the action is called forking. Open the **Fork** dropdown menu, select your team, then click **Open in bolt.new | AI**.
## Share team projects
By default, only you can edit a project you create. Other team members have view-only access unless you grant them edit access.
You can share your project and manage access separately for:
* Your entire team (options are No access, Viewer, Editor, or Co-owner)
* Individual members of your team (options are Viewer, Editor, or Co-owner)
* Invited collaborators who aren't members of your team (options are Viewer or Editor)
* Anyone else with the link (options are No access, Viewer, or Editor)
To learn more about team project sharing and the permissions associated with different levels of access, see [Share your project](/building/using-bolt/sharing).
## Find your Bolt projects
Both your personal and team projects are under your Bolt collection: `https://stackblitz.com/@USERNAME/collections/bolt`
## Open a project in StackBlitz
If you prefer to edit code directly rather than use Bolt's chat interface, you can open your project in StackBlitz's IDE. StackBlitz is Bolt's parent company, and your accounts are automatically linked.
As of April 2026, we're updating how Bolt stores project code. When a project moves to the new format, the **Open in StackBlitz** option is no longer available.
You can still use [Code View](https://support.bolt.new/building/using-bolt/code-view) if you want to edit your project's code directly.
1. In Bolt, open your project.
2. In the top left of your screen, click the **project title**, then click **Export** > **Open in StackBlitz**.
## Open a StackBlitz project in Bolt
To open a StackBlitz project in Bolt, do one of the following:
* Click **Open in Bolt** in the upper-left corner of any StackBlitz project.
* Enter the following URL in your browser, replacing `STACKBLITZ_PROJECT_SLUG_HERE` with your project's ID (visible in the StackBlitz URL): `https://bolt.new/~/STACKBLITZ_PROJECT_SLUG_HERE`
## Open a public GitHub repository in Bolt
You can open any public GitHub repository in Bolt by adding `bolt.new` to the front of the GitHub URL.
For example: `bolt.new/~/github.com/mantinedev/remix-template`.
To connect your GitHub account to Bolt and sync projects, see [GitHub for version control](/integrations/git).
## Delete a project
To fully delete a project, you need to delete both the chat in Bolt and the associated project in StackBlitz (the platform that runs Bolt in the background).
### Delete a project chat
This is our recommended method of restoring your projects from backup.
You can see a clear visual timeline of your backups and edit their names for clarity. You can also preview a backup before restoring it to make sure it’s the one you want.
To restore a backup using version history, follow the steps below:
1. Open a project that you’ve made changes in.
After following these steps, you should see a success message in the chat history telling you that the version you selected has been restored.
### Change a backup name in version history
Version history lets you rename autogenerated backup names so they’re easier to recognize. To do so, follow these steps:
1. Open a project that you’ve made changes in.
2. In the top left of your screen, click the **project title**, then click **Version history**.
3. Review the list of versions, or search for one.
You’ll now see that version show up in the Bookmarked Versions section of Version history.
### Version history and database restores
Restoring to an earlier project version will not change your current Bolt or Supabase databases.
## Restore using your chat history
Version history gives you a quick overview of your backups so you can easily pick the right one without mixing them up. However, if you already know which backup you want and it’s recent, you may find it easier to restore directly from the chat.
To restore from chat, follow the steps below:
1. Scroll up in your chat history and find the version you want to restore.
Environment variables are values your project uses to store sensitive information, like API keys and authentication tokens, without exposing them in your code. To keep your project secure, Bolt only allows Editors and Co-owners to view environment variables.
If a project relies on environment variables, parts of it may not load or work as expected for Viewers, because there's no way to run the project in the browser while keeping those values hidden. In that case, Viewers see this message: `You have view-only access to this project. Environment variables aren't available in view-only mode, so some features may not work.`
When collaborators prompt in a project, Bolt uses tokens from the prompter's account rather than from the project owner's.
## Share your project on a personal plan
On a personal plan, you can manage access separately for anyone with the link and for individual collaborators you invite.
### Share an invite link
Only set access to **Editor** if you want anyone with the link to be able to make changes to your project.
4. Click **Copy link**, then share the link with anyone you want to invite.
### Invite individual collaborators by email
Inviting collaborators outside your team requires external sharing to be turned on in your team's workspace settings. If you're a team admin, you can manage this in your
[Team settings](/settings/team-settings/#allow-members-to-invite-external-users-to-collaborate-on-projects).
### Share an invite link
Only set **Anyone else with the link** to **Editor** if you really want to let anyone with the link make changes to your project.
4. Click **Copy link**, then share the link with anyone you want to invite.
Team members are automatically assigned the access level you select in step 3. You don't need to send them the link.
### Invite individual collaborators by email
Inviting collaborators by email lets you share with people outside your team or give specific team members a different access level than the rest of the team.
To invite members outside your team, a team admin must have turned on **[External collaboration in teams projects](/settings/team-settings/#allow-members-to-invite-external-users-to-collaborate-on-projects)** in the team settings.
To learn more, see Bolt Cloud [Hosting](/cloud/hosting).
## Domains
With Bolt Cloud, you can manage your domain directly from your Bolt workspace. You can buy a new domain or connect one you already own.
If you purchase a domain through Bolt, you don’t have to visit other websites or edit DNS records. Bolt connects everything for you so your domain goes live in just a few clicks.
To learn more, see Bolt Cloud [Domains](/cloud/domains).
## Bolt Database
Every project includes **unlimited databases**. You don’t need to create servers or handle setup files.
Your databases grow automatically as your project gets more data and users, so you can build confidently without worrying about limits.
To learn more, see Bolt Cloud [Database](/cloud/database).
### Authentication and User Accounts
Bolt Cloud lets you add signups, logins, and password resets to your app without writing them from scratch. You can also create roles and permissions for different types of users.
Everything is handled securely behind the scenes, so your users can sign in safely and your app can grow smoothly.
### File storage
Bolt Cloud gives you a place to store and share files such as images, documents, or user uploads.
File storage allows you to view all your files in one place, and you don’t need to manage separate storage systems or connect third-party tools. Everything is built in and ready to use as soon as your project is created.
### Server functions (edge functions)
Functions let you add your own backend code inside Bolt. These small pieces of code can power things like forms, data processing, or custom features.
As soon as you add a function, Bolt Cloud handles everything behind the scenes, running it on servers close to your users for quick response times.
### Analytics
Analytics in Bolt Cloud show you how people are using your website or app. You can view pageviews, visitors, and where your traffic comes from.
There’s no need to install any extra scripts or create another account. Everything is already built in.
## Payments
You can accept payments right inside Bolt using Bolt Cloud paired with Stripe. This works for one-time purchases, subscriptions, or other paid services.
You don’t have to store or process any payment information yourself because Bolt Cloud and Stripe handle security and compliance for you.
Learn more about [Stripe for payments](/integrations/stripe).
# Database
Source: https://support.bolt.new/cloud/database
Create and manage databases in Bolt without the need for third-party tools.
Bolt makes it easy to add database functionality to your app without the hassle of extra infrastructure. You get a ready-to-use database whenever your project needs one, helping you focus on building features rather than configuring servers.
## Database settings
If you’re new to the concept of databases and their importance in web development, you can learn more in our [Introduction to databases](/concepts/intro-databases) article.
## Creating and using databases
Bolt creates a database automatically if your project needs one, or if you explicitly ask Bolt to create a database or a database-related feature. This makes it easy to get started without manually setting anything up.
### Ask Bolt not to create a database
If you don't want Bolt to provision a database, you can explicitly request that it not do so.
For example, when submitting a prompt, add the instruction: `Don't use a database, I want to use local storage for this app.`
### Use Supabase instead of Bolt database
If you prefer to use Supabase when creating a new project, you can select it during setup.
See [Start a project using Supabase](/integrations/supabase#start-a-project-using-supabase) to learn more.
### Version history and database restores
Bolt's [Version History](/building/using-bolt/rollback-backup#restore-using-version-history) feature currently does not support database restores.
Restoring to an earlier project version will not change your current databases.
## Automatically paused databases
If your project’s Bolt database hasn’t been used for six days or more, it may be automatically paused to conserve resources.
When you next open your project, you’ll see a message letting you know that the database is being restored. This process usually only takes a few minutes.
This is a normal, routine operation. Please wait for the restoration to finish before making any changes to your project to avoid potential issues.
## View Bolt Database limits
You can view database-related limits on the Cloud settings page. Your Cloud settings appear in a different location depending on your plan. For individual accounts, **Cloud** is under your Account settings. For Teams accounts, it's under your team's workspace settings.
If your project already has a Bolt database, connecting a Supabase database will replace the connection, which may cause data loss. You may want to [claim](#claim-your-bolt-database-in-supabase) instead.
## Restart your database
If Bolt reports that your database is unresponsive, timing out, or having connection issues, you can restart the database to try to restore the connection.
To restart your database:
1. In your Bolt project, click the **database icon** in the top center of your screen.
2. Click **Advanced**.
3. Click **Restart**.
The database will be temporarily unavailable while it restarts. For most projects, this only takes a few minutes.
If your database is still unresponsive after restarting, [contact support](/troubleshooting/contact-support).
## Claim your Bolt Database in Supabase
Using Bolt Database is a straightforward solution for data storage that works well for most use cases. However, if you need external management tools, SQL editing, or advanced monitoring, you may prefer to use Supabase.
If you've started a Bolt database that you'd like to use with Supabase instead, see [Claiming your Bolt Database in Supabase](/integrations/supabase#claim-your-bolt-database-in-supabase) for instructions.
# Database: Authentication settings
Source: https://support.bolt.new/cloud/database/authentication
View and manage authentication settings for your database in a Bolt project.
## View Authentication settings
To open the authentication settings for your project's database, follow these steps:
Click the **Preview** button to see what the email with your changes will look like to your recipients.
### Reset email templates to default
If you have updated your email templates and want to return to the original versions, click **reset all templates to their default**. This link appears in blue at the bottom of the editing window.
This will reset **all** templates to their original state.
### Email template terminology
The templating system provides the following variables for use:
| Name | Description |
| :----------------------- | :------------------------------------------------------------------------------------------------------------------------------------------------------------------------------------------------------------------------------------- |
| `{{ .ConfirmationURL }}` | Contains the confirmation URL. For example, a signup confirmation URL would look like: `https://project-ref.bolt.host/auth/v1/verify?token={{ .TokenHash }}&type=email&redirect_to=https://example.com/path`. |
| `{{ .Token }}` | Contains a 6-digit One-Time-Password (OTP) that can be used instead of the `{{ .ConfirmationURL }}`. |
| `{{ .TokenHash }}` | Contains a hashed version of the `{{ .Token }}`. This is useful for constructing your own email link in the email template. |
| `{{ .SiteURL }}` | Contains your application's Site URL. This can be configured in your project's authentication settings. |
| `{{ .RedirectTo }}` | Contains the redirect URL passed when `signUp`, `signInWithOtp`, `signInWithOAuth`, `resetPasswordForEmail` or `inviteUserByEmail` is called. The redirect URL allow list can be configured in your project's authentication settings. |
| `{{ .Data }}` | Contains metadata from `auth.users.user_metadata`. Use this to personalize the email message. |
| `{{ .Email }}` | Contains the original email address of the user. Empty when trying to link an email address to an anonymous user. |
| `{{ .NewEmail }}` | Contains the new email address of the user. This variable is only supported in the "Change Email Address" template. |
Bolt Database email templates are powered by Supabase technology. If you want a deeper look at topics like mobile deep linking, email prefetching, routing signups through a server endpoint, or tailoring emails based on signup method, see the [Supabase Email Templates](https://supabase.com/docs/guides/auth/auth-email-templates) documentation.
## Google authentication
This option allows your project's users to sign up using Google Single Sign-On (SSO), meaning they can log in with their Google accounts instead of signing up with an email and password.
For a full Google SSO setup guide, see [Google SSO authentication](/integrations/google-sso).
Clicking **Continue with Google** in the Authentication settings opens the Google Provider Settings window, where you can set the following:
* Allow or block Google sign-in
* Enter your Google Client ID
* Enter your Google OAuth Client Secret
You'll also be able to find the origin and redirect URIs you'll need to set up your Google Cloud Console project, as shown in the example screenshot below:
At this time, Bolt lets you view the storage buckets you create through prompts, but it does not yet support viewing or managing individual files.
## Supported file types
Bolt supports the following file formats:
Images: `.jpg` `.jpeg` `.png` `.gif` `.webp` `.svg`
Text files: `.pdf` `.txt` `.doc` `.docx` `.py` `.ipynb` `.js` `.mjs` `.cjs` `.jsx` `.html` `.css` `.scss` `.sass` `.ts` `.tsx` `.java` `.cs` `.php` `.c` `.cc` `.cpp` `.cxx` `.h` `.hh` `.hpp` `.rs` `.swift` `.go` `.rb` `.kt` `.kts` `.scala` `.sh` `.bash` `.zsh` `.bat` `.csv` `.log` `.ini` `.cfg` `.config` `.json` `.yaml` `.yml` `.toml` `.lua` `.sql` `.md` `.tex` `.latex` `.asm` `.ino` `.s`
Bolt supports uploading files from many programming languages. While it builds applications using JavaScript technologies (see [Supported technologies](/concepts/supported-technologies)), you can still upload files written in other languages to help guide your project or ask Bolt to convert them into JavaScript.
# Database: Logs
Source: https://support.bolt.new/cloud/database/logs
View and manage logs for your database in a Bolt project.
Database logs give you a behind-the-scenes look at what your project’s database is doing. These logs record the events, queries, and system messages that help you understand how your data is being accessed or changed. They are especially helpful when you want to troubleshoot an issue, check a feature's behavior, or ensure everything is running as expected.
Log types you can view include the following:
* **Server Function**: Server function execution logs with request/response data
* **Authentication**: User authentication and security logs
* **PostgreSQL**: Database queries, errors, and performance metrics
* **Realtime**: WebSocket connections and realtime subscriptions
* **Storage**: File uploads, downloads, and storage operations
* **Cron Job**: Scheduled job executions and cron task logs
* **Server**: HTTP requests and responses from Server Functions
* **Function**: Serverless function logs and events
* **PostgREST**: API requests to your database through PostgREST
* **Supavisor**: Connection pooling and database proxy logs
* **PgBouncer**: Legacy connection pooling logs
* **Warehouse**: Data warehouse operations and analytics
* **PostgreSQL Upgrade**: Database upgrade processes and migration logs
## View database logs
To open the logs screen for your project's database, follow these steps:
Alternatively, you can delete secrets by clicking **Delete** in a secret’s row.
## Tips for improved security
* Rotate your keys regularly to reduce risk.
* Remove keys you no longer use.
* Never store secrets in plain text in your code.
# Database: Security settings
Source: https://support.bolt.new/cloud/database/security
View and manage the security settings for your database in a Bolt project.
The Security section of database settings lets you identify vulnerabilities, such as missing RLS policies and insecure permissions.
## View Security settings
To open the security settings for your project's database, follow these steps:
If you see this warning, the **Prevent Leaked Passwords** setting is turned off for your database. It's on by default for Bolt databases, so this usually means it was turned off or your database is managed in Supabase using a free Supabase plan, where the setting isn't available. To learn more see [Leaked Password Protection](/cloud/database/authentication#leaked-password-protection).
To automatically correct security issues, click the **Ask Bolt to fix** button.
# Send emails from your Bolt app
Source: https://support.bolt.new/cloud/database/send-emails
Send transactional and authentication emails from your Bolt app by connecting an email provider.
Many Bolt features rely on email to communicate with users. Common examples include authentication flows like email verification and password reset, along with application events like order confirmations and product updates.
In Bolt, email sending fits closely with your database configuration:
* Your database manages users and authentication
* Secrets stored in database settings protect sensitive credentials
* Server functions use those secrets to send email through external services
This guide explains how to connect an email service to your Bolt project so your application can send email securely and reliably.
You may only need to send email from your app code, or you may also want to send auth emails from your own domain. They're separate, so you can do one or both of the processes described here, depending on your needs.
## How email works with Bolt databases
When your project has a Bolt database, you have access to several interrelated features:
* [Authentication](/cloud/database/authentication) handles user sign-up, login, and password reset flows.
* [Secrets](/cloud/database/secrets) store sensitive values like API keys so they're never exposed to client code.
* [Server functions](/cloud/database/server-functions) run trusted server-side logic that can send email, call external APIs, and interact with your database.
Email services integrate through server functions using API keys stored as secrets in your database settings. This setup keeps credentials secure and ensures email logic runs on the server.
## Choose an email service
Before setting up email notifications, choose an email provider to deliver your messages. Popular options include:
* Resend (often used by Bolt by default)
* Mailgun
* Postmark
* SendGrid
Bolt server functions can work with any provider that exposes an HTTP API.
When choosing a service, consider:
* **Email volume**: how many messages you expect to send each month
* **Email type**: transactional messages, marketing campaigns, or both
* **Setup complexity**: how quickly you can create an account and generate an API key
### Let Bolt choose your email service
If you ask Bolt for email notifications without selecting a provider, Bolt typically uses Resend. It integrates cleanly with Bolt's infrastructure and requires minimal setup.
When Bolt uses Resend, the email infrastructure is prepared automatically, but you still need to add your own Resend API key so Resend can send emails on your behalf.
## Set up email notifications using a third-party service
The following steps use Resend, which is commonly used with Bolt. If you prefer, you can choose a different email service provider. Using a different provider changes only how you create the account and API key in Part 1.
### Prerequisites
Before a third-party service can send emails from your app, make sure you have:
* A [Bolt database](/cloud/database) in your project
* [Secrets](/cloud/database/secrets) set up in your project's database settings
* A [published](/cloud/hosting/publish) project with a [custom domain](/cloud/domains) attached
### Configure email notifications
1. Create an account at [https://resend.com/onboarding](https://resend.com/onboarding) using email, Google, or GitHub.
2. Follow Resend's API key documentation to create a new API key.
3. Copy the API key and store it securely. You may not be able to view it again later.
The key will look similar to the following: `re_CQmFPLaM_siCReVwuKEYvFXMRuSAMPLEz`
1. Open your Bolt project.
2. At the top center of the screen, click the **database icon**.
3. In the left navigation menu, click **Secrets**.
If Secrets doesn't appear, your project doesn't have a database yet.
4. Create a new secret with the following values:
* Name: `RESEND_API_KEY`\
The name is case-sensitive.
* Value: ``
5. Click **Create secret**.
This allows your server functions to authenticate with Resend and send email.
After adding your Resend API key to your Bolt project, add your published project domain to Resend.
1. Log in to your Resend account.
2. In the left menu, click **Domains**.
3. Click **Add Domain**.
4. Under **Name**, enter your primary Bolt domain. For example, `mysite.bolt.host`
5. Select your preferred region.
6. Click **Add Domain**.
7. Keep this page open, as you'll need the information in Part 4.
The final step in setup is to add the DNS records created by Resend to your project.
Where you add them depends on your domain setup:
* If your domain was created through Bolt, follow the steps below.
* If you registered it through a third-party registrar such as Namecheap, GoDaddy, or Cloudflare, add the records in that registrar's dashboard instead.
1. Log in and open any Bolt project.
2. In the top right of your screen, click your **profile icon**, then click **Settings**.
3. In the left navigation menu, click **Cloud**.
4. Scroll down to the **Custom domains** section and identify the domain you want to update.
5. On the right side of the domain's row, click the three dots, then click **Open domain settings**.
6. Click **Add new record**.
7. Select your record type, then fill in its values based on the information shown in the **Resend → Domains** page from Step 3.
8. Click **Save**.
9. Create additional Resend records as necessary.
After completing the steps above, email sending should start working once the domain records finish resolving. This usually takes 10 to 20 minutes, though in some cases it can take a few hours.
After giving your DNS records some time to resolve, you can verify the setup by:
* Triggering an email in your application and confirming it arrives
* Checking the Resend dashboard for delivery logs or errors
## Send Supabase auth emails from your own domain
The steps above cover emails your app sends from code, such as order confirmations and in-app notifications. If your project uses Bolt's [authentication features](/cloud/database/authentication) like email sign-up or password reset, there's a second type of email to consider: auth emails. Bolt's authentication is powered by Supabase, which can send auth emails automatically on your behalf. They include password reset links, email verification messages, and magic link sign-ins.
By default, Supabase routes auth emails through its address (`no-reply@mail.supabase.io`). To send them from your own domain instead, you configure custom SMTP (Simple Mail Transfer Protocol). SMTP is the standard protocol for sending email. Custom SMTP tells Supabase to route auth emails through your email provider rather than its default server.
If you want auth emails to come from your own domain, follow the steps below. If you only need to send application notifications and other custom emails from your app code, you set that up already in [Set up email notifications using a third-party service](#set-up-email-notifications-using-a-third-party-service).
### Prerequisites
Before you can send auth emails from your own domain, make sure you have:
* A [Bolt database](/cloud/database) in your project
* A [published](/cloud/hosting/publish) project with a [custom domain](/cloud/domains) attached
* A [Resend](https://resend.com) account with a verified custom domain
* A dedicated Resend API key for SMTP use
Steps 1 through 3 below walk you through the Resend and database setup if you haven't done it yet.
### Configure custom SMTP for Supabase auth emails
Custom SMTP requires your Supabase project to be under your own Supabase account. Bolt-managed databases run on shared Supabase infrastructure, where custom SMTP settings don't apply. Without this step, SMTP settings will appear to save correctly but auth emails will continue to come from Supabase's default address.
If your project is already connected to your own Supabase account rather than a Bolt-managed database, you can skip this step.
1. In your Bolt project, at the top center of the screen, click the **database icon**.
2. In the left navigation menu, click [**Advanced**](/cloud/database/advanced).
3. Click **Claim**.
4. Follow the prompts to transfer the Supabase project to your own Supabase account. Make sure you have an account at [supabase.com](https://supabase.com) and that your browser allows popups for bolt.new.
If the claim process doesn't complete or the Supabase window doesn't appear, do these steps before trying again:
1. Log out of both Bolt and Supabase, then log back in.
2. Under **Settings > Applications**, disconnect and reconnect the Supabase integration.
Your sender email address must use a domain you've verified in Resend. Verification proves you own the domain and authorizes Resend to send email from it. This is separate from any API key you may have already set up for app notifications.
1. Log in to your [Resend](https://resend.com) account.
2. In the left menu, click **Domains**.
3. Click **Add Domain**.
4. Enter your domain (for example, `yourdomain.com`), then click **Add**.
5. Add the DNS records Resend provides to your domain registrar. Wait until all records show as verified before continuing.
Create a separate API key specifically for SMTP. If you already have a Resend API key from setting up app notifications, don't reuse it. Keeping them separate makes it easier to manage permissions and debug issues later.
1. In your Resend dashboard, click **API Keys**.
2. Click **Create API Key**.
3. Give the key a descriptive name, such as `Supabase SMTP`.
4. Copy the key immediately and store it somewhere safe. You won't be able to view it again.
1. Open your Supabase project dashboard.
2. Navigate to **Authentication > Email > SMTP Settings**.
3. Turn on **Enable custom SMTP**.
4. Fill in the following values:
| Field | Value |
| ------------ | -------------------------------------------------------------------- |
| SMTP Host | `smtp.resend.com` |
| Port | `465` |
| Username | `resend` |
| Password | Your Resend SMTP API key from Step 3 |
| Sender email | An address at your verified domain, such as `noreply@yourdomain.com` |
The sender email must use the exact domain you verified in Resend in Step 2. If it doesn't match, Supabase won't be able to send through Resend.
5. Click **Save**.
Trigger an auth email in your application, such as a password reset request, and confirm it arrives from your custom domain. You can also check delivery logs in your Resend dashboard.
DNS changes and SMTP configuration can take a few minutes to take effect. If you don't receive emails right away, wait a few minutes and try again.
### Customize auth email templates
After you configure custom SMTP, you can also update the content of auth emails to match your branding. You can do this in two places:
* **In Bolt**: Go to **Database > [Authentication](/cloud/database/authentication#edit-email-templates) > Email**, then click **Edit email templates**.
* **In Supabase**: In your Supabase project, navigate to **Authentication > Email Templates**.
Both give you access to the same templates, including password reset, invite, magic link, and email verification.
## Troubleshooting
If the API key is missing or misconfigured, you may see the following error:
`The following secrets are used in the code but don't exist yet: RESEND_API_KEY`
If email isn't being delivered, check the following:
* Confirm the secret name is exactly `RESEND_API_KEY`
* Verify the API key value is correct and active
* Check your email quota with your provider
* Review your Bolt project logs for server function errors
### Mailgun example
The following example shows a server function sending email with Mailgun (as opposed to Resend) using fetch():
```text theme={"system"}
const res = await fetch(`https://api.mailgun.net/v3/${MAILGUN_DOMAIN}/messages`, {
method: "POST",
headers: {
Authorization: `Basic ${btoa(`api:${MAILGUN_API_KEY}`)}`,
},
body: new URLSearchParams({
from: "noreply@yourdomain.com",
to: email,
subject: "Hello from Mailgun",
text: "Your notification is working!",
}),
});
```
# Server functions
Source: https://support.bolt.new/cloud/database/server-functions
View and manage your server function settings for your database in a Bolt project.
Not everything in an app can safely or efficiently happen on the user's device. Some tasks need extra security, reliability, or processing power. That's where server functions (sometimes called edge functions) come in.
Server functions handle important work behind the scenes, like talking to your database, checking permissions, or processing payments. Instead of running this logic directly in a user's browser or mobile app, where it could be slower or less secure, the function runs on a server. This keeps sensitive information safe and makes sure your app behaves consistently for every user.
Common use cases include:
* Handling payments, authentication, or other sensitive logic
* Receiving webhooks from third-party services like Stripe or GitHub
* Generating images or social preview cards on demand
* Calling external AI APIs like OpenAI
* Sending transactional emails
* Building messaging bots for Slack, Discord, or other platforms
Watch the video below for an introduction to using APIs and server functions in your app:
Only delete a server function if your project isn't using it and you no longer need the function or its logs. You can't undo this action.
To delete a server function:
1. Open your Bolt project.
2. In the top center of the screen, click the **database icon**, then click **Server Functions**.
3. Find the function you want to delete, then click the **trash can icon**.
4. Click **Delete** to confirm.
# Database: Tables
Source: https://support.bolt.new/cloud/database/tables
View and manage the tables for your database in a Bolt project.
## View your database tables
To open the Tables settings for your project's database, follow these steps:
1. Log in to your Bolt project.
2. Click the **database icon** in the top center of your screen.
The database settings open to the Tables page by default.
## Understanding the Tables interface
When you open Tables, you'll see all of your individual database tables and records, as shown in the screenshot below:
Select the checkbox in the header row of the table to select all rows.
### Export or copy table data
Bolt also gives you the option to manually export or copy row data from your database tables. You can do this in either CSV or JSON format.
To export or copy your row data, follow the steps below:
1. Log in to your Bolt project.
2. Click the **database icon** in the top center of your screen.
3. Click the table you want to make changes to.
4. Select one or more rows.
5. Click either the **Export** or **Copy** button that appears above the top-right corner of the table.
6. Select **CSV** or **JSON** format.
Select the checkbox in the header row of the table to select all rows.
# Database: FAQs
Source: https://support.bolt.new/cloud/database/troubleshoot-db
Find answers to common questions about Bolt database.
### My database isn't responding
If Bolt reports that your database is unresponsive, timing out, or having connection issues, you can restart the database to try to restore the connection. For instructions, see [Restart your database](/cloud/database/advanced#restart-your-database).
If the database is still unresponsive after restarting, [contact support](/troubleshooting/contact-support).
### What are server functions (also called edge functions), and when should I use them?
Server functions run on the backend (or at the edge) rather than in the user’s browser or mobile app. They are useful for tasks that require extra security, reliability, or power. For example: talking to your database, checking permissions, processing payments, receiving webhooks, and generating images or Open Graph tags.
Use them when you don’t want sensitive logic exposed in the client, want consistent behavior, or need low-latency HTTP endpoints.
[Learn more about server functions](/cloud/database/server-functions).
### How do I safely use API keys or other secrets in my server functions?
Prompt Bolt or use the [Secrets](/cloud/database/secrets) section to create a named secret value (such as an API key or database password), then reference it in your server function. That way, the secret stays outside your plain code and is not exposed to users.
### Can I switch from Supabase to Bolt Database?
There's currently no supported flow for migrating a Supabase database to Bolt Database.
# Database: User Management
Source: https://support.bolt.new/cloud/database/user-management
View and manage your User Management settings for your database in a Bolt project.
The User Management section of your database settings gives you insight into how people use your app. Here, you can:
* View a graph of sign-ups over time
* See a list of the most recently added users
* Invite users to your project via email
* Create and delete users
* Search for users by email/ID
## View User Management settings
To open the User Management settings, follow these steps:
After completing Step 5 in the section above, you will be returned to the **Domains & Hosting** window. Follow the steps below to point your domain from your registrar to Bolt.
1. Click **Resolve DNS issues**.
2. Keep this DNS Configuration window open. (You'll need this information.)
3. In a new tab, log in to your domain registrar account. (This is the company you registered your domain with.)
4. Find the area that allows you to manage your DNS settings.
5. Create an **ALIAS record** as instructed in the DNS configuration window.
If you can’t find your DNS settings or create records, reach out to your domain registrar’s support team for help connecting your domain to Bolt.
It can take time for your DNS changes to update across the internet. Most domains connect within a few hours, but in some cases, it may take up to 24 hours before your site is fully accessible on the new domain.
After giving the domain some time to make the change, you can return to Bolt and verify its status by following the steps below:
1. Click the **gear icon** in the top center of your screen, then click **All project settings**.
2. Click **Domains & Hosting**.
3. Verify that your domains show a **green shield** over the domain icon next to them, meaning that the domain is registered and connected with a working SSL certificate in place.
# Connect your domain
Source: https://support.bolt.new/cloud/domains/connect
Connect a domain you own to one of your Bolt projects.
If you've already purchased a custom domain, you can connect it to your Bolt project. The steps are different depending on whether you purchased your domain through a third-party provider or through Bolt.
## How to connect a domain to Bolt registered through a third-party
You can connect a domain only to a published site. If you don't see the option to connect a domain under the Domains & Hosting page, you probably haven't [published your project](/cloud/hosting/publish) yet.
To connect a domain purchased outside of Bolt to one of your Bolt projects, follow these steps:
You'll see a warning if there's a problem with the domain, like if it's unregistered (and needs to be purchased), already connected to another project, in use on Netlify, or owned by another user.
5. Keep the DNS configuration page that appears open in your browser and follow the steps in the next sections in a new tab or window.
You've told Bolt that you want to add a custom domain. If you're connecting a subdomain, continue on to verify ownership. Then point your domain to your Bolt site through the provider where the domain is registered.
This step applies when you connect an external subdomain, like `app.exampleco.com`, not a root domain, like `exampleco.com`. You need to verify domain ownership before Bolt can attach a subdomain to your project.
You only have to complete domain verification the first time you connect a subdomain. Unless you delete the DNS record, you won't see this step again when connecting additional subdomains.
1. When you add your domain, Bolt displays the TXT record you need for verification.
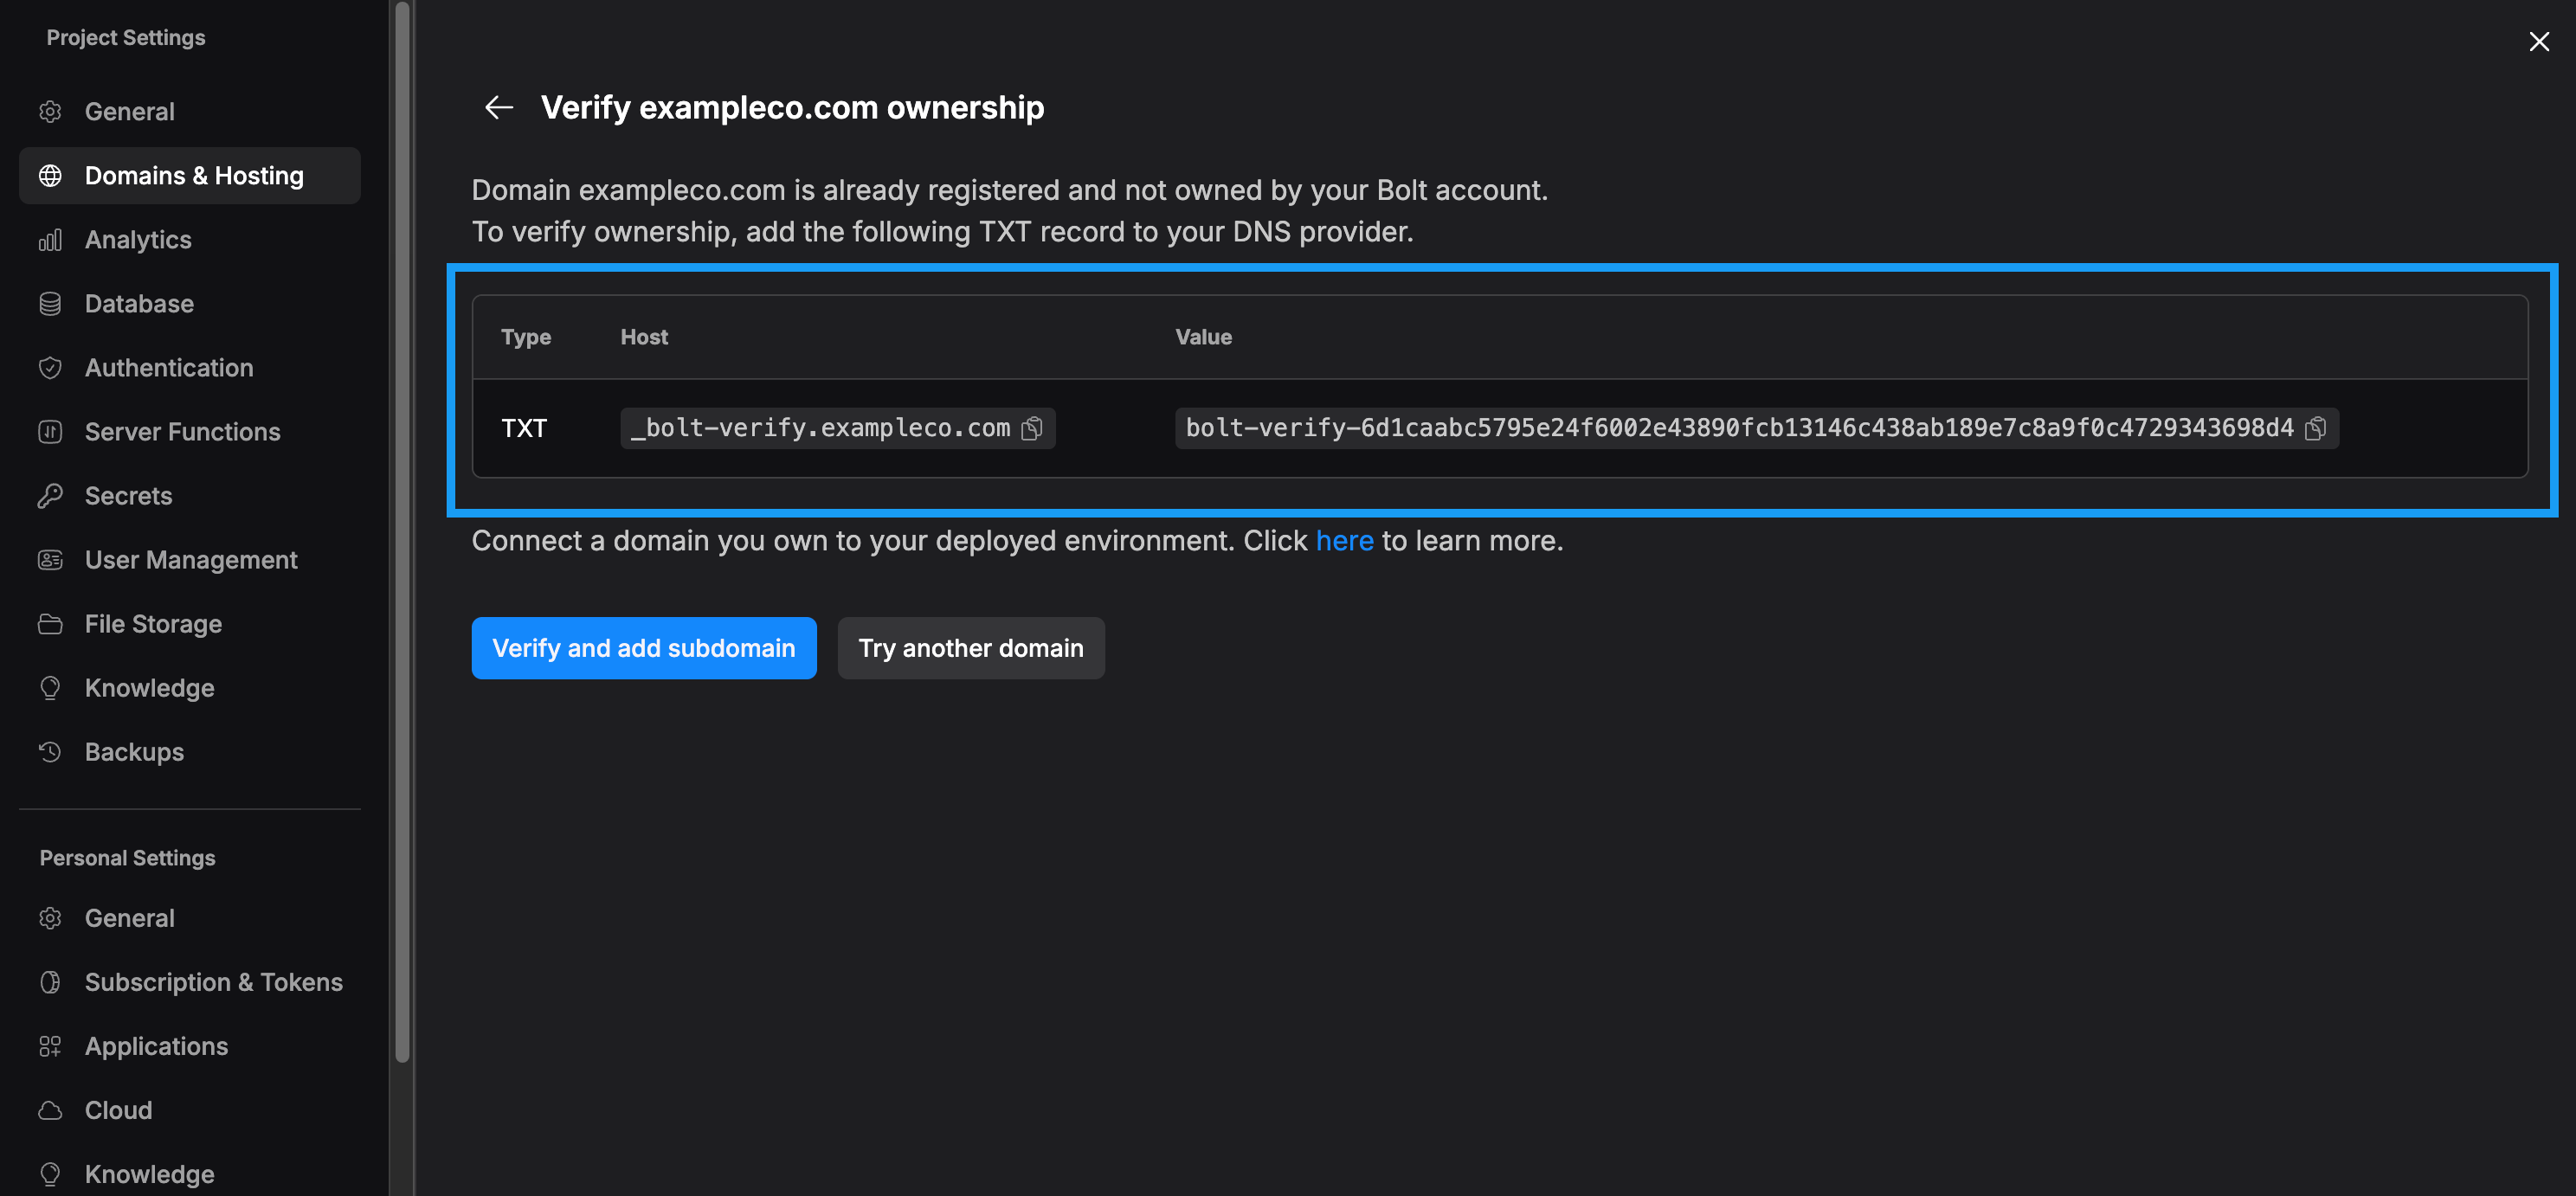
2. Log in to your domain registrar account. (This is the company you registered your domain with.)
3. Find the area in your domain registrar's dashboard where you manage your DNS settings.
4. Add a new TXT record to your DNS settings using the host name and value Bolt provides.
5. Return to Bolt and click **Verify and add subdomain** to confirm the record has been added.
After you add the TXT record, it may take a few minutes for the change to become publicly available. This usually takes 3 to 5 minutes, but it could take a little longer, depending on your DNS provider.
Continue on to add the DNS records for your root domain through the provider where the domain is registered.
1. Return to your domain registrar account. (This is the company you registered your domain with.)
2. Find the area in your domain registrar's dashboard where you manage your DNS settings.
3. Follow the steps outlined in the DNS configuration page that appeared after you added your domain to Bolt. This includes:
* Connecting the `www` domain using a CNAME with the value `site-dns.bolt.host`
* Connecting the `root` domain using an ALIAS, ANAME, or Flattened CNAME with the value `site-dns.bolt.host`
If you can't find your DNS settings or create records, reach out to your domain registrar's support team for help connecting your domain to Bolt.
It takes time for your DNS changes to update across the internet. Most domains connect within a few hours, but in some cases, it can take up to 24 hours before your site is fully accessible on the new domain.
After waiting for your DNS changes to take effect, return to Bolt and verify your domain's status on the Domains & Hosting page.
1. Click the **gear icon** in the top center of your screen, then click **All project settings**.
2. Click **Domains & Hosting**.
3. Check the **Status** column.
If you experience any issues connecting your domain, see the [Domain statuses](/cloud/domains/ssl-https#domain-statuses) section for details and resolution steps.
### Incorrectly pointed domains
If you're connecting a domain you purchased outside of Bolt, make sure to complete all of the DNS configuration steps Bolt shows you.
If you skip these steps or only complete some of them, you may experience problems with your site's security certificate. In turn, your site could become unreachable or behave inconsistently for visitors.
Learn more about your site's security certificate in [SSL certificates](/cloud/domains/ssl-https).
## Subdomains as primary domains
You can use a subdomain as the primary domain on a published project only if you purchased your domain through Bolt. If you bought your domain through another registrar, you can set the main domain as primary, but not any of its subdomains.
There are two ways to set a subdomain as your primary domain:
* [Add it as an alias](/cloud/domains/aliases), then set it as primary on the **Domains & Hosting** page.
* Connect the subdomain directly when creating a new project.
## How to connect a domain previously purchased through Bolt
If you [purchased a domain through Bolt but haven't yet connected it to your account](/cloud/domains/purchase#purchase-a-domain-without-attaching-it-to-a-project), follow these steps:
Because your domain is already associated with your Bolt account, it typically connects within 5–10 minutes, which is faster than an externally registered domain. After waiting, verify its status on the Domains & Hosting page.
1. Click the **gear icon** in the top center of your screen, then click **All project settings**.
2. Click **Domains & Hosting**.
3. Check the **Status** column.
4. Click **Verify domain status** to refresh if needed.
## Disconnect a domain
To remove a domain from one of your projects, follow these steps:
1. Click the **gear icon** in the top center of your screen, then click **All project settings**.
2. Click **Domains & Hosting**.
3. Click the three dots on the right side of the domain name row.
4. Click **Remove**.
# DNS records
Source: https://support.bolt.new/cloud/domains/dns-records
Create, edit, and delete DNS records from your project settings.
DNS records are instructions that define how your domain name works on the internet. They control things like where your website loads from, how your emails are routed, and which services can connect to your domain. They are essential for making sure everything linked to your domain functions correctly.
Bolt gives you the ability to add and manage custom DNS records right in your Project Settings, so you can easily configure your domain to match your needs.
## DNS Record types
Bolt supports the creation and management of the following types of records:
* **AAAA**: IPv6 Address record, which is used to map host names to their IPv6 address.
* **CAA**: Certificate Authority (CA) Authorization, which is used to specify which CAs are allowed to create certificates for a domain. If subdomains don’t have their own records, they inherit the same records from the apex domain.
* **CNAME**: Canonical name record, which is used to specify alias names.
* **MX**: Mail exchange record, which is used in routing requests to mail servers.
* **NS**: Name server record, which delegates a DNS zone to an authoritative server. If subdomains don’t have their own records, they inherit the same records from the apex domain.
* **SRV**: Service locator record, which is used by some voice over IP, instant messaging protocols, and other applications.
* **TXT**: Text record, up to 255 characters. It can contain arbitrary text and can also be used to define machine-readable data, such as security or abuse prevention information.
## View your records
Bolt shows you two types of DNS records: system records and records you've created.
To view your records, follow the steps below:
1. Log in and open any Bolt project.
2. Click your **profile icon** in the top right of your screen, then click **Settings**.
3. Click **Cloud** in the left navigation menu.
4. Scroll down to the **Custom domains** section and identify the domain you want to change.
5. Click the three dots on the right side of the domain's row, then click **Open domain settings**.
Click **To project** to open the associated project in Bolt.
**Your DNS Records**
In addition to system records, you can create and manage your own DNS records in Domain Settings. These user records let you configure how your domain behaves. The screenshot below shows where your records appear, listed under the system records.
Domains purchased through Bolt are locked for 60 days starting on the purchase date. During this window, you can move the domain into your own [Name.com](http://Name.com) account. Transfers to other registrars become available once the 60 days are up.
## How to purchase a domain
To purchase a domain using Bolt and attach it to your project, follow these steps:
You’ll see a warning if there’s a problem with the domain you searched for, such as if it’s already registered.
7. Click **Buy** next to your preferred domain.
8. Choose to **Purchase domain** or **Cancel** the purchase.
Once you've purchased your domain, it will show up in the **Domains & Hosting** page of your project settings. You'll need to wait up to 24 hours for the domains to properly attach to your project and for the SSL certificates to generate.
To learn more about your rights as a domain owner, see the ICANN article on [Registrants' Benefits and Responsibilities](https://www.icann.org/resources/pages/benefits-2013-09-16-en).
You can continue managing any domains you’ve purchased, even after downgrading to the free tier.
### Purchase a domain without attaching it to a project
You can buy a domain and keep it available in your account without connecting it to a specific project. This works well when you want to reserve a name for later.
To purchase a domain outside of a specific project, follow these steps:
1. Log in to a Bolt project.
2. Click your profile icon in the top-left corner of the screen.
3. Click **Settings**.
4. Click **Cloud**.
5. Click the **Custom Domains** tab.
6. Click **Buy a new domain**.
7. Search for the domain you want and complete the purchase.
After checkout, the domain appears in your domains list. It is owned by your account and stays unattached, so it does not point to any project until you choose to connect it.
Once you're ready to connect it to a project, see [How to connect a domain previously purchased through Bolt](/cloud/domains/connect#how-to-connect-a-domain-previously-purchased-through-bolt).
When you buy a domain from the **Domains & Hosting** tab inside a project, the domain is linked to that project right away. When you buy from **Cloud > Custom Domains**, the domain stays unattached and available for future use.
### Domain limits
To start, you can purchase up to 10 domains through Bolt (per account). This doesn't include any domains you purchased through other providers. When you're close to the limit, you'll see a warning on the **Domains & Hosting** page in your project settings and on the **Cloud** page, in the **Custom domains** tab in your Account settings. Here's an example of what that message looks like on the **Domains & Hosting** page.
It takes time for the support team to review your request, and response times can vary. If you know that you need more domains than your current limit allows, request an increase when you're close to your limit rather than waiting until you reach it.
## Domain renewals
When you purchase a domain through Bolt, the renewal cost is shown during checkout. By default, domains purchased through Bolt are set to auto-renew at the shown cost.
You can review the renewal cost at any time and choose whether to turn domain renewal on or off from the **Domain Settings** page.
To view renewal costs for a specific domain and manage auto-renewal status, follow these steps:
To keep a domain active, auto-renewal must be enabled no later than 6 days before the expiration date.
## Purchasing failures due to billing issues
To buy a custom domain through Bolt, you must have billing set up with a valid payment method on your account. If no card is on file, the purchase will fail, and you’ll see an error message saying *“Something went wrong,”* as shown in the screenshot below:
Clicking **Check DNS status** will refresh the status of your domains.
## SSL certificates and HTTPS
SSL (Secure Sockets Layer) is the technology that encrypts the connection between a visitor’s browser and your site. When a domain has a valid SSL certificate, it can be accessed over HTTPS (the secure version of HTTP), which shows the padlock icon in the browser.
Without SSL, browsers like Chrome and Safari display a warning before allowing visitors to proceed. Bolt automatically provides SSL certificates for all connected domains, so your site is served over HTTPS by default.
How HTTPS is handled in Bolt:
* **Domains purchased through Bolt:** HTTPS is set up automatically.
* **Domains purchased elsewhere:** Set up your DNS first, then Bolt will provision HTTPS.
## Domain statuses
Your domain status shows whether everything is set up correctly or if something still needs attention.
Analytics data currently includes visits and actions from web crawlers and bots. At this time, there is no built-in way to separate crawler traffic from visits by real users. This means that reported page views, sessions, and other engagement metrics may be higher than actual human activity.
## View your analytics data
To view your hosting analytics data, follow these steps:
Pro hosting is included with every Bolt paid subscription.
## Increase hosting limits
Free plan sites stop serving content once they hit their monthly data limits. When that happens, they stay offline until usage resets at the start of the next billing cycle.
As a Pro plan user, you have the option to keep your sites online by using pay-as-you-go data. This lets you automatically purchase additional bandwidth and requests beyond your monthly hosting limit, up to a spending cap you set in your dashboard.
Once the cap is reached, the site will pause until your usage resets. This way, you can handle sudden traffic spikes or seasonal surges while keeping your budget in control.
Expecting a product launch or viral moment? Increase your spending limit in advance to avoid downtime.
## Made in Bolt badge
On the Free plan, projects display a **Made in Bolt** badge in both preview and published sites.
Upgrading to any paid plan removes the badge on your next site update and the next preview refresh. Note that changes may take a few minutes to appear due to caching.
# Publish your project to a live website
Source: https://support.bolt.new/cloud/hosting/publish
Publish your project to a free `bolt.host` address.
Bolt offers built-in hosting, so you can publish your Bolt project for free at a web address ending in `bolt.host`. You don't need to set up a separate account with a third-party hosting service: just open the **Publish** menu to get started.
When you publish, you choose whether your site is visible to everyone on the web (public) or only to your team and other people you invite (private). Private sites are useful for sharing in-progress work with specific collaborators or with your organization before it's ready for public launch.
If you belong to a team, other members of your team can view your site by default, even if it's private. Team admins can also [set site visibility to private only or public only](/settings/team-settings#set-published-site-visibility) for all team projects. If your team has a global visibility setting, you'll see it in the **Publish** menu.
If you're on a paid plan and you'd rather use your own web address, you can [attach a custom domain](/cloud/domains/connect) you own (like `yoursite.com`) or [buy a domain through Bolt](/cloud/domains/purchase).
Bolt also checks for security vulnerabilities each time you publish, so you can catch issues before they go live.
Always use the **Publish** or **Update** button in the `Publish` menu to publish your site, since these options don't use tokens. Prompting Bolt to publish your project decreases your token balance.
## Publish your project as a publicly available site
Only the project owner or collaborators with [Co-owner permissions](/building/using-bolt/sharing/#access-by-role) can publish the project, update its visibility, and manage access. Collaborators and teammates can view the published site but can't perform these actions themselves.
When your site is public, anyone on the web can view it and search engines can find and list it in search results. In the `Publish` menu, the default visibility is public. If you only want invited users to see your site, [publish it as private](#publish-your-project-as-a-private-site-with-restricted-access) instead.
To publish your project as a public site:
Sites with a custom domain can only be published publicly. To publish privately, first [disconnect the domain](/cloud/domains/connect#disconnect-a-domain).
To publish your project as a private site:
1. In the top-right corner of your screen, click **Publish**.
2. In the `Publish your project` menu, change the visibility from **Public** to **Private**.
If you're on a team, you don't have to invite your teammates individually. They have access to view your site by default.
To manage access to your private site:
1. In the upper-right corner of your screen, in the `Publish` menu, make sure the site visibility is set to `Private`.
2. Click **Manage access**.
Enter the email address of each user you want to add, then click **Invite**.
1. To the right of `Trusted domains`, click **Manage**.
2. Enter any domain whose viewers should automatically get viewing access. For example, if you enter `exampleco.com`, any user whose address ends in `@exampleco.com` can see your site.
3. Click **Save domains**.
Do one of the following:
* To publish your project for the first time, click **Publish**.
* To update access to a previously published site, click **Update**.
You can see that you've added a trusted domain or invited individual viewers. You can also see that viewers who haven't yet accepted your invitation show a `Pending` status.
### Resend an invitation or remove a viewer
To resend an invitation or remove a viewer from your private site:
1. In the upper-right corner of your screen, click **Publish**.
2. Click **Manage access**.
3. Next to the viewer you want to manage, click the three dots (**...**).
4. Do one of the following:
* To resend an invitation to a pending viewer, click **Resend invite**.
* To remove a viewer's access, click **Remove**.
## Review security
During publishing, Bolt automatically checks for security vulnerabilities. If Bolt finds any issues it alerts you and provides a `Review security` link, which takes you to the [Security Audit](/cloud/database/security) section in your Project Settings. From there, you can click the **Ask Bolt to fix** button to resolve issues automatically.
Before you begin, check whether your project is using a custom domain. If so, you have to [disconnect the custom domain](/cloud/domains/connect#disconnect-a-domain) before you unpublish your site. After the site is unpublished, you can reconnect the domain at any time if you decide to publish again.
This page provides an introduction to databases for newcomers. For information about database use in your project, see our guides on [Bolt databases](/cloud/database) (recommended) or [connecting to Supabase databases](/integrations/supabase).
## What is a database?
A database is like the memory of your web app. It stores, organizes, and protects all the information your app needs to remember. Think of databases like very organized spreadsheets that can be searched, updated, and shared instantly. The screenshot below shows an example Bolt database.
To learn more, see [Creating and using Bolt databases](/cloud/database#creating-and-using-databases).
### Example: When you might add a database
Let’s say you started with a simple personal recipe website where you list out your favorite dishes. At first, it’s just static content, like text and photos, so Bolt doesn’t need a database.
But then you decide you want visitors to create their own accounts and save their favorite recipes.
That means your site now needs to remember users, store their saved recipes, and let them log back in later. This is where Bolt Database comes in.
Here’s an example of how you might prompt Bolt to make that change:
Example prompt: `I want people to be able to create accounts with email and password, log in, and save their favorite recipes. Set up authentication and a database table for storing users and their saved recipes`
Bolt will then recognize the need for a database, create it automatically, and connect it to your app so you don’t have to do the setup work yourself.
## Real-time updates
With Bolt’s Postgres setup, changes can be sent to your app instantly, so when someone posts a new message or updates stock, for example, it shows up right away without refreshing.
That means when something changes, such as a new chat message or a stock level in an online store, the change can appear immediately without needing to refresh the page.
## Growing with your app
A database might start small with just a few rows, but it can expand to handle thousands or even millions of records. This means your app can grow without you needing to rethink how data is stored.
## PostgreSQL: The type of database Bolt uses
Bolt Database is built on **PostgreSQL (often called Postgres)**, which is a type of SQL database.
### What SQL means
SQL stands for **Structured Query Language**. It’s the standard way of interacting with relational databases, which are databases that organize data into tables with rows and columns, allowing you to connect that data through relationships.
In practice, this means that your data in Bolt is stored in an organized and flexible way, capable of handling everything from a handful of users to thousands of records across multiple tables. SQL makes it easy to sort, filter, and connect data efficiently, which is why it has been the backbone of most web applications for decades.
### Why Postgres matters
Postgres is one of the most trusted SQL databases in the world. It’s:
* **Reliable:** tested and stable for decades
* **Scalable:** works for small apps and large, enterprise-level systems
* **Feature-rich:** supports advanced data types, relationships, and real-time features
* **Open source:** widely supported by a large community of developers
By using Postgres, Bolt ensures your app’s data is handled with the same kind of infrastructure trusted by major companies and services worldwide.
Ready to build your first database? Start by prompting Bolt to [create a Bolt database](/cloud/database#creating-and-using-databases) or [connect your own Supabase database](/integrations/supabase).
## Understanding environment variables
Environment variables are small pieces of information that your application reads while it is running. They often store values that change depending on where the app is deployed. Instead of placing this information directly in your code, you keep it in a separate configuration layer so your project stays secure, flexible, and easier to maintain.
Common examples include:
* API keys
* Database connection strings
* URLs for services the app depends on
* Feature flags and other configuration options
When your application starts, it loads these values and uses them to connect to the outside world or adjust its behavior.
### Why Bolt uses environment variables
Environment variables play a practical role in keeping sensitive information protected and out of source control. A codebase can safely be shared or published without exposing private credentials, because those values live outside of the files that get committed.
### How environment variables work with databases
Applications often need to connect to a database, and that connection requires a few important values. These values are usually provided through environment variables so the application can build a secure connection at startup.
Most databases require the following:
* A connection URL
* A database password
* A project ID or host address
You place these values into environment variables, and your application reads them when it needs to communicate with the database.
### How this applies to Bolt and Supabase databases
Whether you're using a Bolt or Supabase database, every project has a set of keys and a database connection string. These are sensitive values. If someone else gains access to them, they could read or change your data.
Environment variables keep these values private. Instead of writing the keys into your code, you store them in variables such as:
* `VITE_SUPABASE_URL`
* `VITE_SUPABASE_ANON_KEY`
* `VITE_SUPABASE_SERVICE_ROLE_KEY`
When your application runs, it uses these values to connect to Supabase in a secure and predictable way.
### Why this matters for new coders
Environment variables create a flexible boundary between your code and your configuration. As you begin working with hosted services and databases, you will rely on them regularly. They give you a safer way to handle private information, and they help your project adapt to different environments without rewriting any code.
Whenever you connect an application to a Bolt or Supabase database, following the pattern of storing your keys and URLs in environment variables helps you keep your project clean and protected.
# Supported technologies
Source: https://support.bolt.new/concepts/supported-technologies
Technologies you can use with Bolt.
## Browser support
Bolt works best in Chrome and other Chromium-based browsers on desktop.
Examples of Chromium-based browsers include the following:
* Microsoft Edge
* Brave
* Vivaldi
* Opera
* Epic
Browser extensions such as ad blockers, privacy tools, or VPNs can sometimes cause issues. If things aren't working as expected, try turning them off and refreshing the page.
## Mobile
Bolt works on any mobile browser. From your phone or tablet, you can start a project, chat with Bolt, and publish your site. Some features, including [code view](/building/using-bolt/code-view), [project settings](/building/using-bolt/project-settings), and your [database](/cloud/database), aren't available on mobile. Use the desktop app for those.
When you publish from mobile, your site is always publicly accessible. You can't change site visibility from the mobile interface.
After your site is published, you need to click **Publish** again to push changes, just like you do in the desktop app.
## Platforms
You can use Bolt to build websites, web apps, and even mobile apps. Bolt projects can be turned into mobile applications using [Expo](/integrations/expo).
Include the words `mobile app` in your initial prompt to direct Bolt to create an Expo-compatible app.
## Languages and frameworks
Bolt focuses on JavaScript-based web technologies. It supports:
* Node.js for the backend.
* Browser-native code: any JavaScript framework that runs on the frontend.
Bolt only supports JavaScript-based backends, so languages such as PHP or Python aren’t compatible.
## Databases
Bolt offers built-in database creation and management through [Bolt Cloud](/cloud/bolt-cloud).
You also have the option to [connect your project to Supabase](/integrations/supabase) for more advanced database management and configuration.
# Version history, version control, and GitHub
Source: https://support.bolt.new/concepts/version-history-github
Learn why version history and control matter, and where GitHub fits.
This article introduces the basics of version history, version control, and GitHub. If you already understand these concepts and need guidance on integrating or managing your project with GitHub, see [GitHub for version control](/integrations/git).
## What is version history?
Version history means being able to track changes to a file over time. Instead of saving multiple copies with different names, you can look back at previous versions, see what changed, and restore them if needed. It gives you an undo button for your entire project.
The old, clunky way of version history was saving full copies of a project with different file names, like `Project v1`, `Project final`, `Project final FINAL`, and so on. Today, many types of software have built-in version history features that automatically track changes and let you roll back, so you don't have to manage those copies manually.
Bolt is no exception, offering a built-in feature that allows you to easily switch between different saved copies (backups) of your project.
## What is version control (and how is it different from version history)?
Version control goes further than just recording history and allowing simple switching between backup copies of a project. It’s a whole system for managing changes across time *and* across people. Instead of only being able to “go back,” version control tools like GitHub let you:
* Create duplicate copies of your project to test new features without impacting the main project.
* Merge changes from different teammates, even if they worked on the same files.
* Track who made each change and why.
* Resolve conflicts when two people edit the same spot.
Version history is like keeping older editions of a book on the shelf so you can pull down an earlier copy. Version control is like running the whole library. You still have every edition, but you also track who borrowed each one, who added notes, how the editions connect, and where new copies should be approved and stored.
## Bolt’s Version History feature
Bolt has a Version History feature built in, which automatically keeps older versions of your work. If you make a mistake, you can roll back. If you want to compare what you had before, you can use the Preview feature to see what looks different.
To learn more about using Bolt's built-in Version History feature, see [Restore using Version History](/building/using-bolt/rollback-backup#restore-using-version-history).
This is a very useful feature for individual work and simple edits.
However, if you need to work on your project outside of Bolt or require advanced collaboration, branching, or detailed history, Bolt’s built-in system may not be sufficient. That's where GitHub comes in.
## GitHub: The most popular version control tool
GitHub is the most widely used platform for version control. While Bolt’s Version History tracks your work in Bolt, GitHub allows you to:
* Work with teammates on the same project without overwriting each other.
* Create branches to test new ideas without touching the main version.
* Keep a full, permanent history of every change.
* Review changes before they are accepted.
GitHub is built on a tool called [Git](https://git-scm.com/book/en/v2/Getting-Started-What-is-Git%3F), which records changes to files and makes it possible to go back in time. GitHub adds collaboration, sharing, and an online home for your projects.
The following video provides an official introduction for beginners:
## How GitHub works step by step
Working in GitHub can feel overwhelming at first, but the basics are easy to grasp.
If you are new and hear someone say, ***“push your commits from that branch to the repo because I’m looking at the pull request now,”*** you might have no idea what that means.
But if they said instead, ***“save your changes in the copy of the project you’re working on, because I’m reviewing everyone’s changes together now,”*** you would understand right away.
Working in GitHub can admittedly get complicated, but the core workflow is straightforward. Here are the main steps:
1. **Create or connect your main project folder.** GitHub calls this a **repository** or **repo**.
2. **Manually save your progress.** Each manual save is called a **commit**.
3. **Send your commits to GitHub.** This is called **pushing a commit**, which means recording your changes in the shared project online.
4. **Make experimental copies of your project.** These are called **branches**, and they let you test ideas without affecting the main project.
5. **Ask for a team review.** You bundle your changes into a **pull request**, which lets others review and approve before merging.
6. **Integrate changes into the main project.** This step is called a **merge**.
## Key terms in simple language
* **Repository (Repo):** The main folder for a project.
* **Commit:** A saved snapshot of your work.
* **Push / Pushing a Commit:** Sending your commits (saved snapshots) from your computer to GitHub so they are recorded in the shared project online.
* **Branch:** A separate copy of the project where you can test changes safely.
* **Merge:** Combining changes from a branch into the main project.
* **Pull Request (PR):** A way to propose changes and get feedback before merging them.
* **Fork:** Your own copy of someone else’s project that you can edit independently.
* **Clone:** A copy of the project stored on your computer.
* **Remote vs. Local:** Local is the version on your computer. Remote is the version stored on GitHub.
## Why this matters in Bolt
Integrating your project with GitHub keeps you flexible. You can work in Bolt as long as you like, switch to your repository directly, and return to Bolt whenever you are ready.
It also lets you publish your site to other hosting services if you prefer not to use [Bolt’s built-in hosting](/cloud/hosting) or [Netlify](/integrations/netlify).
Since GitHub is the global standard, learning it aligns you with how teams everywhere manage projects, whether you're working in software, writing, design, or research.
## Try it yourself
Now that you've got a grasp on what GitHub is and why it matters, you can give it a try yourself by using our [GitHub integration guide](/integrations/git) to connect your Bolt project to your GitHub account.
## Keep learning
If you want to learn more about GitHub, see the following resources:
* [Getting started with your GitHub account](https://docs.github.com/en/get-started/onboarding/getting-started-with-your-github-account): a roadmap for how to set up an individual GitHub account and start using it.
# Referral program
Source: https://support.bolt.new/external-resources/referral-program
Refer your friends to get free tokens.
Invite your friends to Bolt using your own personal referral link.
When they activate their account, you’ll both receive 200,000 bonus tokens.
If you’re on a paid plan and your friend also upgrades to a paid plan within 30 days of you sharing the link with them, you’ll each get an additional 5 million bonus tokens.
To get your referral link:
1. Log in to Bolt.
2. In the sidebar, click your profile icon in the bottom-left, then click **Get free tokens**.
3. Copy and share the link.
# Expo for mobile apps
Source: https://support.bolt.new/integrations/expo
Using Bolt with Expo to create mobile apps and publish them to app stores.
If you're new to mobile development and Expo, start with the [Overview](#overview) to understand the benefits of Expo, then skip to [New to Expo](#new-to-expo) for a brief introduction to key concepts.
## Overview
Expo is a platform that lets you build mobile apps for both iPhone and Android using the same code. When you ask Bolt to create a mobile app, it automatically uses Expo to make your app work on multiple platforms.
Bolt's Expo integration aims to:
* Make mobile app development accessible to everyone, regardless of coding experience.
* Provide a seamless path from idea to app store, handling the complex technical setup for you.
* Give you complete control over your app's publishing and distribution.
You can publish to:
* The web.
* iOS: TestFlight (for testing) and the Apple App Store (for public access).
* Android: Google Play Beta (for testing) and Google Play Store (for public access).
## Build your project as a mobile app from the first prompt
If you know you want your project to be a mobile app, it’s important to say so right from the start. Projects created for web do not easily switch over to mobile. By mentioning `mobile app` in your very first prompt, you’ll set up the right foundation from the beginning.
This way, Bolt will generate your project with mobile features in mind and ensure your app is designed for phones and tablets.
Here are a few examples:
* `Build a mobile app for meal planning and grocery lists.`
* `Create a mobile app where users can track their workouts and share progress with friends.`
* `Build a mobile app for learning a new language with flashcards and quizzes.`
## Quick testing with Expo Go
While working on your app, you can quickly test it on your own phone using Expo Go.
The first time you do this, it will take some time to build.
## Build and publish with Expo Application Services
You need to build and publish your app in order to:
* Thoroughly test it, including making it available for other people to test.
* Make it available to the public on app stores.
The instructions below will help you get your app from Bolt to your users' phones. If you prefer learning by watching, check out this tutorial. Note that it assumes you already have Expo installed and set up.
While this video shows an older interface, the fundamental steps for working with Expo are still the same.
### Prerequisites
Before you can publish your app, you'll need:
* A computer with [Node.js LTS](https://nodejs.org/en) and [Git](https://git-scm.com/) installed.
* An [Expo](https://expo.dev) account.
* For iPhone apps: an [Apple Developer account](https://developer.apple.com/account/).
* For Android apps: a [Google Play Developer account](https://play.google.com/apps/publish/signup/).
You can test your app for free using Expo's development tools. You'll need paid developer accounts for Apple and Google if you want to distribute your app through the official app stores.
### Set up your development environment
After building your app with Bolt, download the code and open it in a code editor such as [VS Code](https://code.visualstudio.com/).
Install the EAS CLI (Expo's command-line tool) by opening a terminal and running:
```bash theme={"system"}
npm install -g eas-cli
```
Log in to your Expo account:
```bash theme={"system"}
eas login
```
Navigate to your project folder and install dependencies:
```bash theme={"system"}
npm install
```
Check that everything is set up correctly:
```bash theme={"system"}
npx expo-doctor
```
This command will identify and help you fix any setup issues.
### Configure your app
Before publishing, customize your app's basic information:
1. Open the `app.json` file in your project.
2. Update the `"name"` field with your app's display name:
```json theme={"system"}
"name": "Example Name"
```
3. Update the `"slug"` field with a URL-friendly version:
```json theme={"system"}
"slug": "example-slug"
```
You can't change the slug after you create your first build, so choose carefully.
Initialize your project with EAS:
```bash theme={"system"}
eas init
```
Configure EAS Build:
```bash theme={"system"}
eas build:configure
```
This creates the necessary configuration files for building your app.
### Publish to web
Publish your app as a website. This is a quick way to share your app.
1. Build your web app:
```bash theme={"system"}
npx expo export --platform web
```
2. Publish to Expo's hosting:
```bash theme={"system"}
eas deploy --prod
```
3. Choose a URL for your project and press `Enter`.
Your app is now live on the web. Share the URL with anyone to let them try your app in their browser.
### Publish to iOS
To get your app on iPhones, submit it to Apple's TestFlight for testing, then to the App Store for public release.
#### TestFlight (testing)
Use TestFlight to share your app with testers before it's publicly available.
Run this command:
```bash theme={"system"}
eas build --platform ios --auto-submit
```
Follow the prompts. EAS will:
* Build your app for iPhone
* Create an app listing in your Apple Developer account
* Set up a TestFlight testing group
* Submit your build for internal testing
When the build is ready, you'll receive an email invitation to test your app through TestFlight.
#### App Store (public release)
Once you're happy with your app:
1. Go to [App Store Connect](https://appstoreconnect.apple.com/).
2. Fill in your app's details.
3. Submit for App Store review.
4. Once approved, your app will be publicly available on the App Store.
### Publish to Android
To get your app onto Android devices, you'll use Google Play Console.
#### Build for Android
Create a production build:
```bash theme={"system"}
eas build --platform android
```
When complete, download the build file (APK or AAB) from the link provided in the CLI.
#### Testing
1. Go to [Google Play Console](https://play.google.com/console/).
2. Create a new app.
3. Set up internal testing:
1. Go to **Testing** > **Internal testing**.
2. Create a release.
3. Upload your build file.
4. Add email addresses of people you want to test the app.
4. Share the testing link with your testers.
#### Public release
When ready for public release:
1. In Google Play Console, go to **Production**.
2. Create a release and upload your build.
3. Fill in your app's store listing details.
4. Submit for review.
5. Once approved, your app will be live on Google Play.
## Manage your app
Steps to update and monitor your app.
### Update your app
When you make changes in Bolt and want to update the app you published:
1. Download the updated code from Bolt.
2. For web updates:
```bash theme={"system"}
npx expo export --platform web
eas deploy --prod
```
3. For mobile updates, rebuild and resubmit:
```bash theme={"system"}
eas build --platform ios --auto-submit
eas build --platform android
```
### Monitor your app
Use Expo's dashboard at [expo.dev](https://expo.dev) to:
* View build status and logs.
* Monitor app crashes and errors.
* Track app usage and performance.
## Adding in-app purchases to your Expo app
If you want users to pay for some of your app features, you need to add subscription and payment functionality.
RevenueCat is a tool to power in-app purchases. They've provided a guide to adding RevenueCat to a Bolt Android app: [How to add subscriptions to a Bolt-generated Expo app](https://www.revenuecat.com/blog/engineering/how-to-add-in-app-purchases-to-your-bolt-generated-expo-app/). You can also use RevenueCat in iOS apps.
## Troubleshooting
How to handle common issues, and where to get help with Expo.
### Common issues
Build fails: Check that all required certificates are set up in your Apple and Google Developer accounts. EAS can guide you through certificate setup.
App crashes on device: Check the error logs in your Expo dashboard. Most crashes are due to missing dependencies or platform-specific code issues.
Upload rejected: Make sure your app meets platform requirements (App Store guidelines for iOS, Google Play policies for Android).
### Get help
If you have issues with Expo:
* Check the [Expo documentation](https://docs.expo.dev/).
* Visit the [Expo Discord community](https://discord.gg/expo).
* Post questions in the [Expo forums](https://forums.expo.dev/).
## New to Expo
If you're completely new to mobile app development, here's what you need to know to use Expo with Bolt.
Expo is a platform that simplifies mobile app development by handling the complex technical setup for you. Instead of learning platform-specific languages (Swift for iPhone, Kotlin for Android), you can build apps that work on both platforms using web technologies.
Benefits of using Expo:
* Cross-platform: write once, run on iPhone, Android, and web.
* Fast iteration: see changes immediately without rebuilding.
* Simplified publishing: EAS handles the complex build and submission process.
Key terms:
* Build: Creating the app file that can be installed on devices.
* TestFlight: Apple's system for testing iPhone apps before they go live.
* Play Console: Google's system for managing Android apps.
* EAS: Expo Application Services. This is the Expo cloud platform that builds and manages your apps.
Resources to learn more about Expo:
* [Expo documentation](https://docs.expo.dev/): comprehensive guides and API reference.
* [Expo blog](https://blog.expo.dev/): latest updates and best practices.
* [React Native basics](https://reactnative.dev/docs/getting-started): understand the underlying technology.
# Figma for design
Source: https://support.bolt.new/integrations/figma
Bolt integrates directly with Figma to import designs and generate code.
If you're new to Figma and designing UIs, start with the [Overview](#overview) to understand the benefits of this feature, then skip to [New to Figma and design](#new-to-figma-and-design) for an introduction to Figma and some design tips and resources.
## Overview
Figma is a widely used design tool. From their docs:
> Figma Design is for people to create, share, and test designs for websites, mobile apps, and other digital products and experiences. It is a popular tool for designers, product managers, writers and developers and helps anyone involved in the design process contribute, give feedback, and make better decisions, faster. [*What is Figma?*](https://help.figma.com/hc/en-us/articles/14563969806359-What-is-Figma).
Using Bolt's Figma integration, you can quickly load Figma designs into Bolt, and generate sites and UIs based on the designs. You can collaborate on and refine designs in Figma, before moving into Bolt for development.
Bolt uses [Anima](https://www.animaapp.com/) to handle turning Figma designs into apps.
## Connect to Figma and import a frame from the homepage
1. On the [Bolt homepage](https://bolt.new), click **Import from Figma**.
2. Follow the steps to connect your Figma account.
3. In the **Choose a Figma frame** window, paste the URL of the Figma frame you want to import.
4. Click **Import Figma frame into Bolt**. Bolt processes the frame and generates a project based on the layout.
## Import a Figma frame from the chatbox
In addition to starting your build from the Bolt homepage by importing a Figma frame, you can also import a Figma frame for design reference using the chatbox.
Learn more about [Figma frames](/integrations/figma#figma-frames).
To import a Figma frame, follow the steps below:
To import from Figma, you need to be logged in to your Figma account. For instructions, see [Connect to Figma and import a frame from the homepage](/integrations/figma#connect-to-figma-and-import-a-frame-from-the-homepage).
To import a Figma frame:
1. On the Bolt homepage, in the chat toolbar, click **Design System**, then select the design system you want to use.
2. In the chat toolbar, click the plus icon (**+**), then click **Import from Figma**.
3. Select **Screenshot**.
When using a design system, always select the **Screenshot** option when importing from Figma. The **Code** option uses a tool that isn't aware of your design system, so it won't build with your components.
4. Paste the URL of your Figma frame and follow the prompts.
5. Add any additional context to your prompt, then click **Build now**.
### Tips for using Figma import with your design system
* Make sure your design system is set to the correct active revision before importing. Bolt uses whichever revision is marked active.
* If the output doesn't match what you expected, check that your design system has the relevant components. You can browse what Bolt knows about your design system by opening the **Storybook** from the project chat.
* Use your prompt to fill in any context Bolt can't infer from the screenshot alone — for example, interaction states, content guidelines, or component variants you want to prioritize.
## New to Figma and design
If you're completely new to Figma, or to designing apps, this section contains information to get you started.
### Key terms
* UI: user interface. Usually means a GUI.
* GUI: graphical user interface. Most interfaces are graphical, but sometimes people refer to GUIs to differentiate them from text-based interfaces such as command-line tools.
* Web apps: interactive software applications that run in a browser. For example, Bolt itself is a web app.
* Responsive design: a design that works on different devices and screen sizes.
* Accessibility: making your design usable for everyone. For example, ensuring your color contrast is clear for people who are colorblind, or making your font size readable.
### Figma frames
When importing from Figma, you use a single frame, not an entire Figma project.
> Frames are layers that act as containers to organize other layers—such as shapes, images, and text—into cohesive designs. You can even nest frames within other frames, allowing you to create more complex designs. [*Frames in Figma design*](https://help.figma.com/hc/en-us/articles/360041539473-Frames-in-Figma-Design)
To get the frame URL:
1. Right-click the frame.
2. Click **Copy/Paste as** > **Copy link to selection**.
If you're new to version control and GitHub, we strongly recommend reading our [Introduction to version history, version control, and GitHub](/concepts/version-history-github) to get familiar with the basics.
When you connect Bolt to GitHub, your work is automatically backed up with a full history of changes.
This means you’re never locked into using Bolt. You can build in Bolt, switch to working directly in GitHub, and then come back to Bolt whenever you want. And since your code lives in GitHub, you can publish your site with other services too, not just through Bolt hosting or the Bolt/Netlify integration.
The GitHub connection is designed to:
* **Keep things simple**: Bolt handles the tricky parts of Git for you.
* **Keep branches separate**: Each branch has its own memory, so nothing “bleeds over” between them.
* **Give you control**: You decide which projects connect to GitHub.
* **Give GitHub organization admins control:** Admins can decide which organization repos are available to which organization accounts.
You can bring an existing GitHub project into Bolt, or start fresh in Bolt and create a new GitHub repository for it.
For an introduction to version control and GitHub with Bolt, watch the video below:
If your GitHub organization is connected to Bolt, you can access organization repositories through your org instead. See [GitHub organization setup](/integrations/github-org) for details.
[Sign up for one](https://github.com/signup) if you don't already have one.
To connect an individual GitHub account to Bolt, follow these steps:
1. Log in to your Bolt account and open a project.
2. Click the **GitHub icon** in the top right of your screen.
3. Click **Log in to GitHub**.
4. Click **Authorize stackblitz**. (StackBlitz is Bolt's parent company.)
5. Follow any further verification steps required.
## Create a new repository from a Bolt project
Prerequisite: You must have GitHub connected to Bolt.
To create a repository from your Bolt project:
1. [Log in to GitHub](https://github.com/login).
2. Click your profile icon in the top-right corner of your screen.
3. Click **Settings**.
4. Click **Applications** in the left-side navigation menu (likely near the bottom of the menu).
5. Click the **Authorized GitHub Apps** tab.
6. Click **Revoke** in the Bolt/StackBlitz row.
7. Click **I understand, revoke access**.
If you signed up for your StackBlitz/Bolt account using Google or your email address, continue to part 2 to complete the process. If you signed up using GitHub, your GitHub integration is now removed.
1. Log in to [StackBlitz](https://stackblitz.com/).
2. Click **Settings** in the left navigation menu.
3. Click the **Credentials** tab.
4. Click **Delete** in the GitHub section.
If you added a second email to your account specifically for GitHub, you can go to **Settings** > **Profile** to delete it from your account.
## Branching and merging
When working with a shared GitHub repository it is a good habit to create a new branch for your changes rather than committing directly to the `main` branch. This helps keep work isolated, reduces the chance of merge conflicts, and makes it easier to review and collaborate on changes. You can create a branch from the default branch and then open a pull request when your changes are ready to be merged.
When you create or import a repository in Bolt, you’ll start on the **main** branch. This is usually the live version of your project. You can do all your work on main, or create branches.
Branches allow you to:
* Work with others without overwriting each other’s changes.
* Work on different features separately, so unfinished work doesn’t go live.
For example, if you’re building three new features on the main branch, you’d have to finish all three before publishing. With branches, you can finish and merge each one into main as they're ready.
### Create a new branch in Bolt
Prerequisite: You must have GitHub connected to Bolt and a repository already created.
1. Log in to Bolt and open a project that is already linked to a GitHub repository.
2. Click the GitHub icon in the top-right of your screen.
You're now working on your new branch, which is also created in your GitHub repository.
### Change branches in Bolt
Prerequisite: You must have GitHub connected to Bolt, a repository already created, and multiple branches created.
1. Log in to Bolt and open a project that is already linked to a GitHub repository.
2. Click the GitHub icon in the top-right of your screen.
Bolt currently doesn't support merging branches in-app. You need to merge branches in GitHub.
### Committing and fetching
Bolt saves your work automatically. Every time you make a change that doesn’t break the project, Bolt creates a commit for you.
It also checks GitHub every 30 seconds for any updates made outside Bolt and pulls those in.
Very rarely, both Bolt and GitHub might update at almost the same time. If that happens, Bolt will keep your changes and overwrite the GitHub version.
# Set up GitHub organization access
Source: https://support.bolt.new/integrations/github-org
Give your GitHub organization admins control over which repositories Bolt users can access.
When you connect Bolt to a GitHub organization, admins control which repositories are visible to members, rather than each person managing their own connection. Members of the organization can access approved repositories in Bolt without having to connect their own GitHub account to Bolt. This makes GitHub organization setup the right choice for teams that need centralized oversight, consistent permissions, and a single point of control over what Bolt can access.
For general information about connecting your Bolt account to GitHub or performing tasks like committing, branching, or merging, see [GitHub for version control](/integrations/git).
## How it works
Bolt connects to GitHub organizations through the [Bolt.new GitHub app](https://stackblitz.com/github_app?redirect_to=https%3A%2F%2Fbolt.new%2F%3Fprovider%3D%25%7Bprovider%7D%26slug%3D%25%7Bslug%7D%26showMembersModal%3Dtrue&__hstc=69929231.d0f4705698d2ee8385504a1a6fac116c.1765480305580.1765516813359.1765530637946.3&__hssc=69929231.1.1765530637946&__hsfp=2366648210). An organization admin installs the app once and selects which repositories Bolt users can access. After that, every member of the organization who uses Bolt works within those approved boundaries — no individual configuration required.
This approach keeps permissions management centralized. Instead of each person granting Bolt access to their own repositories, the organization controls access from a single, consistent place.
GitHub organizations offer free and paid plans. Paid plans add stronger access controls, protected branches, required reviewers, increased GitHub Actions usage, and advanced security options. To learn more, see GitHub's [About organizations](https://docs.github.com/en/organizations/collaborating-with-groups-in-organizations/about-organizations).
## Install the Bolt.new GitHub app
An organization admin must install the Bolt.new GitHub app before Bolt users can access organization repositories.
Bolt users in your organization can now access the repositories you approved in step 6.
## Change repository access after install
1. Sign in to an admin account for your GitHub organization.
2. In the top-right corner, click your **profile icon**, then click **Organizations**.
3. Click the organization with the Bolt.new GitHub app installed.
4. In the top navigation menu, click **Settings**.
5. In the left navigation menu, scroll to the Third-party Access section and click **GitHub Apps**.
6. In the StackBlitz row, click **Configure**.
7. Update your repository access, then click **Save**.
## Suspend or uninstall the Bolt.new GitHub app
1. Sign in to an admin account for your GitHub organization.
2. In the top-right corner, click your **profile icon**, then click **Organizations**.
3. Click the organization with the Bolt.new GitHub app installed.
4. In the top navigation menu, click **Settings**.
5. In the left navigation menu, scroll to the Third-party Access section and click **GitHub Apps**.
6. In the StackBlitz row, click **Configure**.
7. Click **Suspend** or **Uninstall**.
8. Click **Okay** to confirm.
Suspending the app blocks its access to organization repositories and webhooks while keeping your settings saved. You can restore access at any time by unsuspending, which makes this a good option when you need a temporary pause rather than a full removal.
# Google SSO for authentication
Source: https://support.bolt.new/integrations/google-sso
Bolt integrates directly with Google to handle user authentication.
Google SSO (Single Sign-On) lets users sign in to your website using their Google account instead of creating a new account with an email and password. It provides a simple and secure way to log in, reducing the number of passwords people need to remember.
You need a Google account to set up Google SSO for your website.
## How it works
Using your Google account, you'll create an OAuth 2.0 app in the Google Cloud Console, which generates a Client ID and Client Secret that identify your website to Google.
Then, you'll enter those values into Bolt's Authentication settings. After that, your visitors can sign in to your website securely using their Google account.
## Part 1: Enable Google SSO on your project
Before creating your Google credentials, complete the initial setup for Google SSO in Bolt.
1. Log in to Bolt and open your project.
2. Prompt Bolt to create a user authentication database to use with Google SSO. For example, as part of your prompt, include the following: `Add Sign-In with Google to my application.`
You can't view Authentication settings in your project until you've created a Bolt database or connected to a Supabase project.
3. After Bolt creates your database, click the **gear icon** in the top center of your screen.
4. Click **All project settings**.
5. Click **Authentication**.
6. Click **Continue with Google**.
7. Turn on **Enable Google Sign In**.
After you enable Google sign-in, make note of the following information, as you'll need it in the Google Cloud Console:
* Your authorized JavaScript origin
* Your authorized redirect URI
Google Cloud Console may look different depending on your account and setup. This guide shows a personal Google account without an organizational connection. For complete technical details, see Google's official guide on [Creating Access Credentials](https://developers.google.com/workspace/guides/create-credentials#choose_the_access_credential_that_is_right_for_you).
Visit [https://console.cloud.google.com/](https://console.cloud.google.com/) and sign in with the Google account you want to use. If you're new to the console, you may need to agree to their terms first.
1. Click **Go to APIs overview**.
2. Click **OAuth consent screen**.
3. Click **Get started**.
4. Enter your app name and select a user support email, then click **Next**. (The email must be connected to your Google account; you cannot manually enter one.)
5. Select **External**.
6. Enter a contact email. (This does not have to be connected to your Google account.)
7. If you agree to the terms, select the checkbox, then click **Create**.
You may need to add multiple origin or redirect URIs depending on your project domain configurations.
7. Enter the redirect URL found in your **Authentication > Google** settings from Part 1 of this guide, for example, `https://loremipsumexample.supabase.com/auth/v1/callback`.
8. Click **Create**.
## Part 3: Enter your Google credentials in Bolt
After creating your Google SSO credentials, enter your Client ID and Client Secret into your project's Authentication settings.
1. Under the Client ID column, click the **copy icon** next to your Client ID and save it.
2. Click your project name to open it.
3. Under Client secrets, click the **copy icon** next to your Client secret and save it.
1. Log in to Bolt and open your project.
2. Click the **gear icon** in the top center of your screen.
3. Click **All project settings**.
4. Click **Authentication**.
5. Click **Continue with Google**.
6. Paste in your **Google Client ID** and **Client Secret** in the appropriate fields.
## Part 4: Test your OAuth app
Google's OAuth flow blocks iframes, so you need to test using your published site rather than in the Bolt Preview window.
1. In Bolt, [publish your project](/cloud/hosting/publish) to make the latest version live.
2. Open your published site in a new tab.
3. Sign in with a Google account to confirm everything is working.
## Next steps
Your Google credentials are now set up, which means your Bolt site can authenticate users via Google SSO. By default, Google sets your OAuth app's publishing status to Testing, which limits sign-in to up to 100 users.
There are a few additional steps to take in the Google Cloud Console before your sign-in flow is ready for real users.
### Add OAuth app branding
When your Google OAuth app is in Testing mode, only your domain appears on the sign-in screen. To show your app name and logo, you need to complete your branding and get it verified by Google.
To add, verify, and publish your branding, sign in to Google Cloud Console, then go to **Google Auth Platform** > **[Branding](https://console.cloud.google.com/auth/branding)**.
For instructions, see [Manage OAuth app branding](https://support.google.com/cloud/answer/15549049?sjid=16117075869637690768-NC) in Google's support documentation.
Your app name and logo won't appear until you publish your branding, even after verification is complete.
### Publish your OAuth app
To let any Google account holder sign in to your app using Google, you need to publish your Google OAuth app.
To publish your Google OAuth app, sign in to Google Cloud Console, then go to **Google Auth Platform** > **[Audience](https://console.cloud.google.com/auth/audience)**.
For instructions, see [Manage App Audience](https://support.google.com/cloud/answer/15549945?sjid=16117075869637690768-NC) in Google's support documentation.
### Request scope verification (if needed)
If your site only uses Google sign-in, you don't need to do anything here. If your site needs to access Google data (like Drive, Gmail, or Calendar), you'll need to request scope verification in the Google Cloud Console.
To add scopes, sign in to Google Cloud Console, then go to **Google Auth Platform** > **[Data access](https://console.cloud.google.com/auth/scopes)**.
For instructions, see [Manage App Data Access](https://support.google.com/cloud/answer/15549135) in Google's support documentation.
# Use Google Stitch designs in Bolt
Source: https://support.bolt.new/integrations/google-stitch
Export your Google Stitch designs to Bolt and build them into a fully functional app.
[Google Stitch](https://stitch.withgoogle.com) is an AI-powered design tool that generates app mockups and design systems from prompts.
You can use it to visualize your app before writing any code, then bring your designs into Bolt and build out the functionality you need, like [data storage](/cloud/database), [user sign-ins](/cloud/database/authentication), and [web hosting](/cloud/hosting).
For a guided walkthrough of turning your Stitch designs into a Bolt app, watch this tutorial.
Before exporting from Stitch, make sure you've created a Bolt account and you're signed in.
To test, prompt Bolt to generate a new component and verify that the output matches your design system.
## Add new Stitch designs to your project
As your app grows, you may want to design additional pages in Stitch and bring them into your existing Bolt project. You can export any page as code and paste it directly into Bolt.
For each page you want to add:
1. In Google Stitch, select the page you want to export.
2. Click **Export**, click **Code to Clipboard**, then click **Copy**.
This page explains how to use a third-party application, which means the steps may become outdated over time. If you run into trouble exporting from Lovable to GitHub, start by checking Lovable’s own documentation for the most up-to-date guidance.
## QuickStart
To import a project from Lovable into Bolt:
1. Sync your Lovable project with GitHub. Refer to [Lovable's GitHub Integration](https://docs.lovable.dev/integrations/git-integration) docs for guidance.
2. Connect Bolt to GitHub, then import the project. Refer to [Bolt's GitHub integration](/integrations/git) doc for guidance.
## Step-by-step guide
First, sync your Lovable project to GitHub.
1. In your Lovable project, click the **GitHub icon** > **Connect to GitHub**.
2. Click **Connect GitHub**, and go through the authorization steps. Once authorized, Lovable displays a prompt to link an organization.
3. You must link an organization, even if you’re using an individual account. Click **Continue** next to the account or organization you want to connect.
4. Select the repositories you want to authorize, then click **Install & Authorize**.
5. Click **Continue**, then any other confirmation steps.
6. Return to your Lovable project.
7. Click the **GitHub icon** to view your repository information.
Next, import the project from GitHub to Bolt.
You can import an existing repository into Bolt on the Bolt homepage:
1. Click the **GitHub icon**.
2. If it's your first time connecting, Bolt displays a dialog to connect your accounts. Select **Log in to GitHub**. A new tab opens. Follow the steps to authorize StackBlitz.
3. Select the repository you want to import:
* **Your repositories**: choose this to select from a list of your own repositories.
* **Import from URL**: enter the URL of the repository you want to import. This can be your own repository (public or private) or any public repository.
4. Select **Choose this repository**.
5. Bolt loads the project and you'll start working on the `main` branch.
# Netlify for hosting
Source: https://support.bolt.new/integrations/netlify
You can publish your projects using Bolt hosting, or you can connect them to Netlify for deployment through their platform.
Bolt now includes built-in [hosting](/cloud/hosting) and [custom domain management](/cloud/domains). Previously, these features were handled through Netlify.
All new projects created in Bolt are published using Bolt hosting by default, though you can choose to publish new projects to Netlify instead if you prefer.
## Connect Bolt to your Netlify account
A Netlify account is required to connect Bolt to Netlify. If you don't have one, [sign up for one](https://app.netlify.com/signup).
Follow these steps to connect your Netlify account to Bolt:
This feature is available on Teams plans only. Users on individual plans will not see the option to edit the automatically-generated URL.
To change your Netlify domain name after the initial publish, follow the steps below:
1. Click **Publish** in the top-right corner of your screen.
2. Click the **pencil icon** next to your published domain URL.
3. Make your changes in the window that appears.
4. Decide whether to republish after updating using the checkbox.
5. Click **Save**.
## Unpublish a project with Netlify hosting
Want to take down a site you've published with Netlify hosting? No problem, just follow these steps:
You cannot switch from Netlify to Bolt hosting when your project is in a published state.
To switch your project from Netlify to Bolt hosting, follow the steps below:
1. [Unpublish your project](/integrations/netlify#unpublish-a-project-with-netlify-hosting) if it is currently published to Netlify.
2. Click the **gear icon** in the top center of your screen, then click **All project settings**.
3. Click **Domains & Hosting**.
4. Use the drop-down to select **Bolt Cloud** as your hosting provider.
Your project will now publish to Bolt hosting.
## Limitations
If you plan to continue using Netlify, you may want to understand more about the platform and the type of software it's designed to host. For example, Netlify can't host your database or a traditional backend.
* Read Bolt's [Supported technologies](/concepts/supported-technologies)
* [What is Netlify?](https://docs.netlify.com/platform/what-is-netlify/): Netlify's own description of their purpose and features.
* [Intro to Composable Architecture](https://www.netlify.com/guide-to-composable-architecture): this is a big topic, but it's worth exploring, as it helps you understand what Netlify can and can't support, and how to build for publishing to Netlify.
Explore Netlify's [website](https://www.netlify.com/) and [documentation](https://docs.netlify.com/) for full details of Netlify's features.
## Publish manually
You can also publish your project to Netlify without connecting your Bolt account.
1. Run the project build command (usually `npm run build`).
2. Click **Download** to download the project.
3. Follow Netlify's [Manual deploy instructions](https://docs.netlify.com/site-deploys/create-deploys/#drag-and-drop).
Note that Bolt calls this feature **Publish** whereas Netlify calls it **Deploy**.
## Disconnect your Netlify integration
If you'd like to disconnect your Netlify integration, follow the steps below:
1. Open any Bolt project.
2. Click the **gear icon** in the top center of your screen, then click **All project settings**.
3. Click **Applications** under Account settings.
4. Click **Disconnect** in the Netlify row.
5. Log in to your Netlify account and remove Bolt from your authorized applications:
1. Click your profile > **User settings** > **OAuth**.
2. Under **Authorized applications**, click the menu for the **Bolt** entry.
3. Click **Revoke access**.
## Netlify FAQs and troubleshooting
For projects published after August 14, 2025, see [Unpublish a project with Netlify hosting](/integrations/netlify#unpublish-a-project-with-netlify-hosting). For projects originally published to Netlify prior to August 14, 2025, **without a Netlify integration**, contact [Bolt customer support](/troubleshooting/contact-support) to request unpublishing. If your account does have a Netlify integration, you can unpublish your site through your Netlify account. See their article on [Deploys, rollback, and deletion](https://www.netlify.com/blog/deploy-deletion/).
No, you do not have to make the switch. The choice is yours to continue publishing your existing projects to Netlify and use them to manage any custom domains, or to [switch to Bolt hosting](/integrations/netlify#switch-your-project-from-netlify-to-bolt-hosting).
Yes, though your project needs to be in an unpublished state to make the switch. See [Publish new projects to Netlify instead of Bolt hosting](/integrations/netlify#publish-new-projects-to-netlify-instead-of-bolt-hosting).
# Stripe for payments
Source: https://support.bolt.new/integrations/stripe
Bolt integrates directly with Stripe to handle user payments and subscriptions.
## Overview
Connecting to Stripe enables secure payment processing for your application, supporting both one-time payments and subscription billing.
Bolt's Stripe integration provides:
* Automatic synchronization of products from your Stripe dashboard
* Built-in support for one-time payments and subscriptions
* Secure server-side payment processing through Supabase edge functions
* Automatic webhook handling for payment events
* Test mode support for safe development
The integration requires Supabase as your database provider and handles all the complex payment processing logic automatically.
## Connect Stripe
You can add Stripe payments to any Bolt project that uses Bolt Database or Supabase for its database, authentication, and edge functions.
### Prerequisites
* A Bolt project with a Bolt database or Supabase created in it.
* User authentication set up in your project.
* A Stripe account (individual or business).
Stripe integration requires edge functions and doesn't work with Firebase. Existing custom Stripe implementations cannot migrate to this built-in integration but will continue to function.
## Add Stripe to your project
1. [Create a Stripe account](https://dashboard.stripe.com/register) if you don't have one.
2. Make sure you are in test mode. Learn more about [Testing](https://docs.stripe.com/testing) in the Stripe docs.
Use test keys for development. Test keys start with `sk_test_`
To add Stripe payments to your Bolt project:
Always use Stripe's test environment during development. Use [test card numbers](https://docs.stripe.com/testing) to simulate payments. Never use real payment details in test mode.
Bolt automatically handles webhook endpoint registration and signature verification. You don't need to manually configure webhook endpoints in your Stripe dashboard.
## Testing payments
Test your Stripe integration thoroughly before going live:
* Use Stripe's [test card numbers](https://docs.stripe.com/testing) to simulate different payment scenarios.
* Test both successful and failed payment attempts.
* Verify that webhooks are processed correctly.
* Ensure subscription flows work as expected.
Common test scenarios:
* Successful payment with card `4242424242424242`.
* Declined payment with card `4000000000000002`.
* Payment requiring authentication with card `4000002500003155`.
## Payment behavior
Bolt's Stripe integration handles the complexity of secure payment processing automatically.
Product synchronization:
* Products are fetched directly from your Stripe dashboard.
* Changes to products in Stripe sync automatically.
* You can select which products to use in each Bolt project.
Security and compliance:
* All payment processing happens server-side through Supabase edge functions.
* Sensitive payment data never touches your client-side code.
* PCI compliance is handled by Stripe's secure infrastructure.
* Webhook signatures are automatically verified.
Subscription handling:
* Automatic subscription lifecycle management.
* Webhook processing for subscription events (created, updated, canceled).
* Built-in handling of trial periods and prorations.
* Support for multiple subscription tiers.
## Agent considerations
If your project was created with the v1 Agent (legacy) and uses Supabase databases for Stripe integration, [switch to Bolt Agent in your project](/building/switch-v1-projects).
As of April 13, 2026, the v1 Agent is no longer available for new projects. After August 3, 2026, remaining projects that use the v1 Agent will be automatically switched to use the Standard agent. Make sure to [switch to Bolt Agent](/building/switch-v1-projects) before that date to save your chat history and choose the agent you want to use.
However, when switching, you must continue using your Supabase databases. Switching agents does not allow you to move from Supabase to Bolt databases.
New projects can use either Bolt or Supabase databases. Choose and set up your preferred database before connecting Stripe.
# Supabase for databases
Source: https://support.bolt.new/integrations/supabase
Use Supabase with Bolt to add a database, authentication, or edge functions to your app as an alternative to Bolt Database.
Databases and their features, such as server functions and authentication, are among the more technical parts of Bolt. If you are just getting started and want a simple introduction to the key concepts, see [Introduction to databases](/concepts/intro-databases).
## Overview
By default, new projects use Bolt Database, though you also have the option to [set Supabase as your default project database from the start](#start-a-project-using-supabase).
You can choose to [claim your Bolt Database in Supabase](#claim-your-bolt-database-in-supabase) if you want to work there, or [connect an existing Supabase database](#connect-a-supabase-database) to your project.
If you know you want to use Supabase, select it from the outset when you start a new project. Switching from a Bolt Database to Supabase later requires extra steps.
Supabase provides:
* A hosted [SQL database](https://supabase.com/database), which you can connect your application to. You don't need to worry about managing your database.
* [Authentication](https://supabase.com/auth) services, for adding user login and user management to your application.
* [Edge functions](https://supabase.com/edge-functions): Bolt uses these if your application needs to include an API. They're also used for communicating with other applications, such as Stripe for payment handling.
Explore Supabase's [website](https://supabase.com/) and [documentation](https://supabase.com/docs) for full details of Supabase's features.
Supabase connections are **available with Vite projects**. Next.js projects are not supported at this time.
## Connect Bolt to Supabase
To start working with Supabase, you'll first need to connect Bolt to Supabase. You can do this in your Account settings, under Applications.
This feature is available on all paid plans and requires a Supabase application connection. If Supabase is not yet connected to your Bolt account, selecting this option will guide you through the connection process.
For most projects, Bolt database offers the simplest and smoothest experience. It works out of the box, requires no additional setup, and supports most use cases. However, if you already have a Supabase account connected and need more advanced database features or tighter control over your data, choosing Supabase during project creation may be a better fit.
Follow the steps below to get started:
Bolt's [Version History](/building/using-bolt/rollback-backup#restore-using-version-history) feature currently does not support Supabase database restores.
Restoring to an earlier project version will not change your current Supabase databases.
## Connect a Supabase database
If you already have a Supabase database you want to use in your Bolt project, or want to create a new one, follow the steps below to connect it.
If your project already has a Bolt database, connecting a Supabase database will replace the connection, which may cause data loss. To keep your existing data, you can [claim your current Bolt database in Supabase](/integrations/supabase#claim-your-bolt-database-in-supabase) instead.
To claim your database in Supabase, you must be a Supabase org owner. These permissions are controlled through your Supabase account, not through Bolt. If you're not the org owner, ask the org owner to claim the database or adjust your permissions.
To migrate your Bolt database and start using Supabase in your project:
You should now see your claimed database appear as a Supabase project. If you don't see the connected database, refresh the Supabase **Projects** page in your browser.
## Use Supabase in a v1 Agent (legacy) Bolt project
Use this section only if your project doesn't yet have a Bolt database and is working with the v1 Agent (legacy). If your project does have a Bolt database, you must [claim the database in Supabase](#claim-your-bolt-database-in-supabase).
To use Supabase in a Bolt project using the v1 Agent (legacy) that does not yet have a database set up, follow the steps below:
Bolt now uses your connected Supabase project for database operations.
## Disconnect Supabase
If a claimed database doesn't appear in the **Select your database** dialog when you click **Connect**, try disconnecting and reconnecting Supabase in **Settings** > **Applications**. This should restore the project list.
The most common reasons Bolt cannot connect to Supabase are that your Bolt account is not [connected to Supabase](#connect-bolt-to-supabase) or that your Bolt database has not been [claimed in Supabase](#claim-your-bolt-database-in-supabase).
There's currently no supported flow for migrating Supabase databases to Bolt databases.
# Account settings
Source: https://support.bolt.new/settings/account-settings
Personalize Bolt's appearance and behavior, connect applications, and manage your knowledge, connectors, and add-on features.
Account settings let you personalize how Bolt looks and works, and manage the tools connected to your account.
## Open your account settings
The `Default agent` setting only applies to new projects. If you come back to an existing project, or if you switch to a different agent after starting your project, Bolt uses the last agent you selected.
### Editor line wrapping
Controls whether long lines of code wrap in the code editor when you're using Code view. Default is *on*.
### Show open-source design systems after creating your own
Controls whether the built-in open-source design systems stay available in the **Design system** menu in the chatbox after you add your own. The built-in options are Chakra, Material UI, and Shadcn. Default is *on*.
With this setting on, your design system appears in the **Design system** menu alongside the open-source ones. When you turn it off, your design system replaces the open-source ones, so only your own appears in the menu.
To learn how to add your own design system, see [Add your design system](/building/design-system/add-design-system).
## Applications
Connect and manage third-party applications like [Supabase](/integrations/supabase), [Netlify](/integrations/netlify), [Figma](/integrations/figma), and [GitHub](/integrations/git).
## Knowledge
Add background instructions for Bolt to follow **across all of your projects**. Account knowledge gives Bolt a reliable sense of context around goals, style expectations, terminology, constraints, and workflow habits. Instead of repeating these details in every prompt, add them in knowledge so the agent uses them automatically.
If you want to set knowledge for a specific project that does not apply to your other projects, you can add project knowledge directly in your [Project settings](/settings/project-settings).
## Connectors (MCP)
Connect Bolt to the apps and data sources you use, like Notion, Linear, GitHub, or others. Bolt offers built-in connectors for several tools, and you can also add custom connectors. To learn more, see [Connect to an MCP server](/building/using-bolt/connect-mcp).
## Add-on features
Extend what Bolt can do with optional features.
### Dynamic reasoning
Controls whether Bolt uses deeper reasoning to produce more accurate results for complex prompts, such as multi-step logic, debugging, or architectural decisions. Default is *off*.
Because this setting requires more processing per prompt, it uses more tokens. Consider turning it on only when you need deeper reasoning, then turning it off again.
### Image generation
Controls whether Bolt can create images from text descriptions directly in your conversation. Default is *off*.
Image generation produces high-quality custom images, but uses significantly more tokens than text-based prompts.
To learn more, see [Generate AI images for your project](/building/using-bolt/interacting-ai#generate-ai-images-for-your-project).
# Project settings
Source: https://support.bolt.new/settings/project-settings
Rename your project, manage domains and hosting, view analytics, set project knowledge, and restore backups.
Project settings let you manage the core aspects of your project, from its name and domains to analytics and backups.
## Open your project settings
You can also change the project name [from the Projects page](/building/using-bolt/projects-files#rename-a-project) or by clicking the name in the left sidebar when you're in the project, then clicking **Rename**.
### Project agent
All projects use Bolt Agent. You can [switch between the Standard and Max agent from the chatbox](/building/using-bolt/agents#switch-agents).
### Context
To clear Bolt's short-term memory of your project:
* Click **Clear context**.
## Domains & Hosting
Edit your `.bolt.host` subdomain, buy or connect a custom domain, and unpublish your project.
### Bolt subdomain
All projects are published by default at a free `.bolt.host` subdomain. Bolt creates a URL automatically when you publish your project, but you can change the portion of the URL that comes before `.bolt.host`.
To edit your Bolt subdomain:
1. Click **Edit domain** (pencil icon).
2. Enter a new subdomain, then click **Save**.
3. Leave **Republish after updating** selected to make sure Bolt applies the new subdomain to your site right away.
You can also [buy a new domain](/cloud/domains/purchase) through Bolt or [connect a domain you own](/cloud/domains/connect).
### Unpublish project
Before you begin, check whether your project is using a custom domain. If so, you have to [disconnect the custom domain](/cloud/domains/connect#disconnect-a-domain) before you unpublish your site. After the site is unpublished, you can reconnect the domain at any time if you decide to publish again.
To take your site offline:
* Click **Unpublish**, then click **Unpublish** again.
You can also [unpublish your site from the **Publish** menu](/cloud/hosting/publish#unpublish-your-bolt-hosted-site) in your project.
## Analytics
View your published site's visitor and traffic data for a selected timeframe. To learn more, see [Analytics](/cloud/hosting/analytics).
## Knowledge
Add background instructions for Bolt to follow **for a specific project**. Project knowledge gives Bolt a reliable sense of context around goals, style expectations, terminology, constraints, and workflow habits. Instead of repeating these details in every prompt, add them in knowledge so the agent uses them automatically.
## Backups
Restore your project to an automatically saved backup.
You can also restore a saved backup using Bolt's [Version History](/building/using-bolt/rollback-backup#restore-using-version-history). In general, we recommend using Version History to switch between project versions.
To restore from a backup:
1. Find the backup with the date and time you want.
2. Click **Load** next to that backup.
3. In the confirmation window, click **Create Fork**.
This creates a duplicate of your project using the backup, without affecting the current version.
# Team settings
Source: https://support.bolt.new/settings/team-settings
Control member roles, publishing, integrations, and data exports for your team. Only team admins can access these settings.
Team settings let team admins control how the team's shared workspace operates. These settings cover member roles, publishing, integrations, and data exports.
Only team admins can view and change the settings on this page.
## Open your team settings
The default member role is different from the team role you assign when you add a new team member. **Admin**, **Billing Admin**, and **Member** are the team roles you assign when you add someone to your team. **Viewer**, **Editor**, and **Co-owner** set the default permission level members have on team projects. To learn about team roles, see [Manage your team](/account-and-subscription/teams/manage-team#team-member-roles).
### Team-wide deploy provider
Controls which publishing provider team projects use. Default is *User-specified*. Options are User-specified, Netlify, and Bolt Cloud. Leave the default selected to allow team members to use Bolt hosting or connect Netlify if they prefer. To set a single default provider for your team, select Netlify or Bolt Cloud.
When a default publishing provider is set, team members can't choose between providers in their project's Domains & Hosting settings. Instead, they see their default provider listed along with a note advising them to contact their admin to request a change.
### Published site visibility
Controls whether team members can choose their published site visibility. Default is *User-specified*. Leave the default selected to allow team members to publish their sites as either private or public. To set a single visibility option for all team projects, select either **Private only** or **Public only**.
When set to **Private only** or **Public only**, team members can't edit the site visibility in the **Publish** menu.
### Personal account restriction
Controls whether members of your team can use a personal workspace or create other teams. Default is *off*, which means that members are allowed to use a personal workspace or create a team using the same email address they use on the team.
Turn this setting on if you want to restrict team members from using their team email address to create a personal workspace or team of their own. For example, you may want to turn on this setting if your team works with sensitive data, and you want to prevent members from moving work into personal accounts.
### External collaboration in team projects
Controls whether team members can invite users outside the team as collaborators. Default is *off*.
Turn this setting on to allow members to [invite collaborators](/building/using-bolt/sharing#invite-individual-collaborators-by-email) who have an email address outside your team.
## Integration controls
Controls whether team members can integrate their projects with [GitHub](/integrations/git), [Stripe](/integrations/stripe), and [Supabase](/integrations/supabase). By default, each integration control is *on*, which means team members can use GitHub, Stripe, or Supabase in their projects. If you don't want team members to integrate with any of these apps, turn off the setting for that app. This restricts access for the entire team.
## Data export
Download your team's usage data and a list of your team members.
### Export usage data
Download a .CSV of your team's plan usage, including message counts, tokens used, and projects created over the time range you choose. To learn how, see [Export team usage data](/account-and-subscription/teams/manage-team#export-team-usage-data).
### Export team members
Download a .CSV of your team members, including each member's name, email, username, role, invitation status, subscription status, and last active date. To learn how, see [Export team members](/account-and-subscription/teams/manage-team#export-team-members).
## Delete team
Deleting your team permanently deletes the team and all projects created within it. This action can't be undone and affects all team members.
To learn how to delete your team, see [Delete your team](/account-and-subscription/teams/manage-team#delete-your-team).
# Workspace settings
Source: https://support.bolt.new/settings/workspace-settings
Manage your subscription, tokens, Cloud usage, knowledge, and shared team resources for your workspace.
Workspace settings let you manage the resources and context shared across your workspace.
Some settings are available to everyone, and others appear only if you're part of a team.
## Open your workspace settings
On a team account, the Cloud page is only available to team admins.
The Cloud page has two tabs:
* **Monthly usage**: Lists your included monthly limits for resources such as databases, custom domains, web hosting requests and bandwidth, application file storage, and other limits.
* **Custom domains**: Lists the custom domains you've [purchased through Bolt](/cloud/domains/purchase).
## Team workspace settings
These settings are available for team workspaces. The Private registries and Packages knowledge pages are only available to team admins, but other settings in this section are available to all team members.
### Knowledge
Define team-wide context that applies to all projects created in the team.
### Team
Manage your team members, roles, and subscription. To learn more about related tasks, see [Manage your team](/account-and-subscription/teams/manage-team).
If you're a team admin, click the **gear icon** to open your [team settings](/settings/team-settings).
### Private registries
The Private registries page is only available to team admins.
Connect Bolt to your team's private NPM registry so it can install packages that aren't published on the public NPM registry. This lets your team build with the internal and proprietary packages you already rely on, instead of being limited to public ones. If a project depends on private packages and no registry is connected, Bolt won't be able to install those packages.
You can integrate Bolt with any private NPM registry that's accessible from the internet without proxies or VPNs.
To connect a registry to your Teams account:
1. Get the registry URL and access token from your provider. Check your provider's documentation for specific steps.
2. On the Private registries page, click **Add private registry**.
3. Add the following information:
* **URL**: The URL of your private registry.
* **Token**: The token used to access your registry.
* **Scopes** (optional): If you leave this field empty, all package installations for your team run through your private registry. If you provide a scope or scopes, only package installations for the selected scopes run through your private registry.
4. Click **Save new registry**.
Bolt keeps registry credentials secure in your account settings and doesn't create or update an .npmrc file. Team members need to manage their .npmrc files for local development.
### Packages knowledge
The Packages knowledge page is only available to team admins.
Packages knowledge teaches Bolt how your team uses specific NPM packages from your private registry. When you add package instructions, Bolt applies them across all of your team's projects whenever that package appears in the code, so you don't have to repeat the same guidance in every prompt.
Add a prompt to tell Bolt details like which version to use, how to import from a package, or which functions to call. Bolt then writes code that follows your team's conventions from the start.
To add packages knowledge:
1. On the **Packages knowledge** page, click **+ Add package instructions**.
2. Enter the exact package name as it appears in `package.json`. For example, `acme/ui`, `react`, or `lodash`.
3. Enter your instructions, then click **Save new prompt**.
### Team templates
Team templates are reusable projects your team can use as starting points for new work. Use this page to view and manage the team templates for your workspace.
To learn more, see [Team templates](/account-and-subscription/teams/team-templates).
### Design systems
The Design systems page is where you add a design system or view and manage the design systems your team has already added.
To learn more, see [Add your design system](/building/design-system/add-design-system).
# Contact support
Source: https://support.bolt.new/troubleshooting/contact-support
Get the answers you need to keep building great things.
We understand that unexpected issues can be frustrating. If you haven't been able to find an answer to your question in the Help Center, we encourage you to reach out for further help.
Email support for product and technical questions is only available to paid plan users, but community support is available to all in [our Discord community](https://discord.com/invite/stackblitz).
* **If you're on a free plan**: Reach out for community support on Discord. The Bolt Discord community is full of knowledgeable members who may be able to help. If you're interested in upgrading to a paid plan, view the Bolt [Pricing page](https://bolt.new/?showPricing=true).
* **If you're on a paid plan**: Email us at [support@bolt.new](mailto:support@bolt.new) using the email address associated with your paid account. Our team responds Monday through Friday during business hours.
When contacting Bolt Support, make sure to use the email address associated with your Bolt account. For security reasons, we can't look up your account using a different email address.
# Integrations issues
Source: https://support.bolt.new/troubleshooting/integrations-issues
Troubleshooting for integrations.
This page offers troubleshooting guidance for Bolt integrations. The tips here assume you already have some familiarity with the underlying technologies.
If you’re new to Netlify publishing, Supabase databases, or other tools that Bolt offers integrations for, find the respective integration page for the tool you’re using as a starting point. Those pages include introductory information to help you get set up before diving into troubleshooting.
## Bolt loses connection to Netlify when duplicating projects
If you fork or duplicate your project, you'll need to reconnect to Netlify. To do so, follow the steps in the [Netlify integration](/integrations/netlify) guide.
Doing this will create a new Netlify site, so you'll need to make sure your custom domains are pointed to the new site:
* If you bought your domain through Netlify and you're using Netlify DNS, you can remove the domain from the old site and add it to the new one, all in Netlify. This [Netlify support answer](https://answers.netlify.com/t/migrate-domains-to-new-site/76080) provides more information.
* If you use another domain provider, look for their guide to updating domains.
## "Another project is already using this domain" error
If you see this error, it usually means the domain is still connected to a previous deployment on another hosting service. This happens when the domain was not fully removed from that service’s domain management settings.
### Domains originally purchased through Netlify
Typically, Netlify lets you [disconnect a domain from your project](https://answers.netlify.com/t/support-guide-another-site-is-using-this-domain-verifying-domain-ownership-for-netlify-production-domain/13765) when this issue occurs.
However, in some situations, due to an underlying communications issue between Bolt and Netlify, doing this manually isn't enough to solve the problem.
If you registered your domain with Netlify, removed it from your Netlify projects, and Bolt still shows an error message, [contact Netlify support](https://www.netlify.com/support/). They will be able to make changes to the domain settings so that it can be used with Bolt.
### Domains originally purchased through any other provider
If you see the “another project is already using this domain” error with a provider other than Netlify, follow these steps to resolve the issue:
1. Log in to the hosting service where the domain was previously connected (for example, Netlify).
2. Go to the domain management settings.
3. Check if your domain is still listed or connected to any old projects.
Domain records can be confusing, and that’s completely normal. If you run into any trouble, reach out to your registrar's support team for help.
4. Remove the domain if it is still connected.
5. Return to your Bolt dashboard and try connecting the domain again.
## Bolt failed to publish to Netlify
If Bolt fails to publish, you have the option of publishing manually to Netlify:
1. Run the project build command (usually `npm run build`).
2. Click **Download** to download the project.
3. Follow Netlify's [Manual deploy instructions](https://docs.netlify.com/site-deploys/create-deploys/#drag-and-drop).
Note that Bolt calls this feature **Publish,** whereas Netlify calls it **Deploy**.
## GitHub authentication issues
Sometimes, GitHub authentication conflicts can occur if you’ve connected the same GitHub account to more than one Bolt account. This usually happens when:
* You originally signed up for Bolt using your GitHub account.
* Later, you created a new Bolt account and tried to connect that same GitHub account through the GitHub integration.
When you use GitHub to sign in to Bolt, the same credentials are automatically used for the GitHub integration. These two functions can’t be separated, so you’ll need to adjust your setup if you want to use the same GitHub account with a new Bolt account.
Follow the steps below to resolve this issue.
1. In your first Bolt account (the one you signed up for using GitHub), reset your password using the email address associated with your GitHub account.
This adds an email and password login option to that account.
2. Log out once the reset is complete.
1. Log back in to the original account using your new email and password credentials.
2. Click **Settings** in the left menu.
3. Click the **Credentials** tab.
4. Under GitHub, click **Delete** to remove GitHub as an authentication method.
1. Log in to your new Bolt account (the one you want to use going forward).
2. Go through the usual steps to connect the GitHub integration.
## Supabase row-level security rules aren't working
If your Supabase row-level security (RLS) rules aren’t behaving as expected (such as returning no data, exposing too much data, or causing authorization errors), it’s often due to a misconfigured policy or a mismatch between your schema and the rule conditions.
You can resolve this by resetting your RLS configuration and reapplying the correct rule through Bolt.
To do so, follow these steps:
1. In the chatbox, prompt Bolt to remove all existing row-level security rules from the affected Supabase table. This clears out any incorrect or conflicting policies.
2. Once the rules are removed, prompt Bolt to add back the relevant row-level security rule. Be specific about the intended behavior (for example, “only allow users to view rows where user\_id matches their authenticated ID”).
3. After the new rule is applied, test your queries or endpoints again to confirm the policy is now enforced correctly.
If the issue persists, check that the table’s **RLS feature** is enabled in Supabase.
## Supabase edge functions
Supabase Edge Functions act as the central bridge between your application, external services, and your database. Edge functions can connect your project with services like OpenAI, Notion, Stripe, or GitHub. Each connection type introduces its own potential issues, shown at the interaction points in the diagram:
* **CORS errors** may occur when a web browser tries to call an edge function from a domain that isn’t permitted in your CORS configuration.
* **Authorization header or JWT issues** happen when external services like Stripe or GitHub send webhook requests that do not include a JSON Web Token. In these cases, JWT verification must be disabled, and other validation methods should be added instead.
* **Missing secrets** can arise when an edge function attempts to connect to an external API, such as OpenAI, without including the required authentication key or environment variable.
### CORS (cross-origin resource sharing) errors
If your edge function isn't working, it may be due to a [CORS](https://developer.mozilla.org/en-US/docs/Web/HTTP/Guides/CORS) error. To check this:
1. Open [Chrome DevTools](https://developer.chrome.com/docs/devtools/open): press `Command + Option + J` on Mac, `Control + Shift + J` on Windows or Linux.
2. Check the **Network** tab. Look for errors related to CORS.
3. Next, check if CORS headers are set correctly in the file responsible for your edge function. Here are the CORS headers for a chatbot built with Bolt using OpenAI:
```typescript theme={"system"}
const corsHeaders = {
'Access-Control-Allow-Origin': '*',
'Access-Control-Allow-Methods': 'POST, OPTIONS',
'Access-Control-Allow-Headers': 'Content-Type, Authorization',
};
```
You can use [Plan mode](/best-practices/discussion-mode) to ask Bolt if CORS headers exist and are set correctly in your application.
### Missing secret
If your Supabase edge function fails to connect to a service like OpenAI, it’s often because a required API key or secret is missing from your Supabase project. You’ll need to add the secret in Supabase first, then let Bolt know about the update so it can continue development correctly.
1. In your Supabase project, hover over the left-hand side of the page to open the main menu.
2. Select **Edge Functions > Secrets**.
3. Click **Add secret** and enter the required key–value pair.
For example, to connect to OpenAI, add a secret named `OPENAI_API_KEY` and paste in your API key.
This step securely stores your secret within Supabase so your edge functions can access it when running.
After you’ve added or updated the secret in Supabase, prompt Bolt to refresh its connection. You can do this by telling Bolt that you’ve added a new secret, so it can recognize the change and continue development or testing.
This ensures Bolt uses the most up-to-date configuration from your Supabase environment.
### Webhooks: authorization headers and JWT
When a webhook in your project is triggered by a third-party service (such as GitHub, Slack, or Stripe), the request will come from outside your application’s authentication system. This means it will not include a valid JSON Web Token (JWT).
By default, Supabase edge functions expect authenticated requests. If JWT verification remains enabled, your webhook calls from external services will fail with an authorization error.
How to handle this correctly:
1. **Disable JWT verification** for the edge function that receives the webhook.
This allows the function to accept incoming requests from third-party services that don’t use your app’s authentication.
2. **Add custom validation and authorization logic** inside your edge function to ensure requests are legitimate. For example:
* Validate a secret or signature header provided by the third-party service.
* Confirm the request source matches the expected domain or IP range.
Refer to GitHub’s [validating webhook deliveries](https://docs.github.com/en/webhooks/using-webhooks/validating-webhook-deliveries#about-validating-webhook-deliveries) for example steps.
## Branding doesn't show on the Google OAuth consent screen
If your app name or logo isn't appearing on the Google sign-in screen, the issue is usually in your Google Cloud Console branding configuration rather than in Bolt. To check, sign in to Google Cloud Console and go to **Google Auth Platform** > **[Branding](https://console.cloud.google.com/auth/branding)**. The most common causes are:
* Your branding hasn't been verified. Google requires verification before your app name and logo appear on the consent screen. If you haven't submitted for verification yet, click **Verify branding**.
* Your branding hasn't been published. Verification and publishing are separate steps. After verification is complete, click **Publish branding** to make your changes live.
* Your Google OAuth app is in Testing mode. Even with verified and published branding, your app name and logo won't appear if your publishing status is set to Testing. To fix this, go to **Google Auth Platform** > **Audience** and publish your app.
To learn more, see [Manage OAuth App Branding](https://support.google.com/cloud/answer/15549049) in Google's support documentation.
# Bolt issues
Source: https://support.bolt.new/troubleshooting/issues
Tips for troubleshooting common issues and errors in Bolt.
## Tips to avoid issues
Before trying other troubleshooting steps for Bolt, start with these checks:
* Make sure you’re using Chrome or another Chromium-based browser.
* Temporarily disable browser extensions, especially ad blockers, to see if the issue clears.
* If you’re using a VPN, turn it off and try again.
* Check whether your antivirus software is blocking Bolt assets, particularly if you see a 403 or 404 error.
## White screen, grey screen, or no preview showing
If you see a white or gray screen with nothing in the preview window, you have a few options for troubleshooting. Start by refreshing or prompting Bolt for help, then move on to other strategies if the problem persists.
1. Refresh your project in the browser.
2. If refreshing doesn't help, try prompting Bolt with:
`The preview is not showing, fix this.`
If Bolt can fix the issue from this prompt, it should work on the first try. Retrying the same prompt is unlikely to help.
### Check the browser console for error messages
A white screen can mean there's a runtime error that Bolt can't automatically detect, and the console can give you more information about what's going wrong.
To open the browser console:
* On macOS: press `CMD + Option + J`
* On Windows: press `Ctrl + Shift + I`
With the console open, get the white screen to show (for example, by refreshing your browser), then copy any error messages you see and paste them into Bolt. This gives Bolt specific information to help diagnose and fix the issue.
If the console shows errors that reference a Supabase URL, your project may be expecting a database connection that isn't set up yet. If you have an existing Supabase database, [connect it from your Advanced database settings](/integrations/supabase#connect-a-supabase-database). If you see Supabase URL errors while connected to a Bolt database, [contact support or reach out on Discord](/troubleshooting/contact-support).
### Troubleshoot in Plan mode
Switch to [Plan mode](/best-practices/discussion-mode) and ask Bolt to review the code directly:
`The app preview is showing a white screen. Review the project for runtime errors, missing dependencies, or configuration issues that could be preventing it from loading. Explain what you find and suggest a fix.`
Bolt will generate a plan and show you an **Implement plan** button. Click it to apply all the suggested changes, or switch back to Build mode and tell Bolt specifically what you want it to do.
### Use npm run build
Try running the `npm run build` command in the terminal. Running a build surfaces compilation errors that may not appear during normal development, which can help pinpoint what's preventing the preview from loading.
1. Click the **code icon** to switch to Code View.
2. Click **Terminal** in the bottom section of the page.
3. Type `npm run build`, then press **Enter**.
4. Click the eye icon to return to Preview Mode to confirm if your issue is resolved.
### Request Bolt to audit environment variables
Managing environment variables is a more advanced task. If this is new territory for you, the [Intro to Databases](/concepts/intro-databases) guide offers a simple overview of what environment variables are and how they fit into your workflow.
If none of the above steps resolve the issue, ask Bolt to review your project and list every environment variable it expects. Projects often show a white screen when required variables are missing.
Use a prompt like this: `Perform a full review of the project and list every environment variable the application requires. Include guidance on where each variable can be found so that I can add them to my setup.`
**Choose how to manage the variables**
Once you have the full list, decide how you want to add them.
**If you use a local .env file:**\
Ask Bolt to generate a complete `.env` template with placeholder values. This gives you a file that you can copy into your project and fill in with real values later.\
\
Example prompt: `Create a .env file for this project with all required environment variables. Use placeholder values so I can replace them with my own.`
**If you use the Secrets menu:**\
Ask Bolt for a list of required variables and where to find each value, then add them through the Secrets interface.
Example prompt: `List every environment variable and tell me where each value can be found so I can add them through the Secrets interface.`
## Bolt didn't do everything you asked in your prompt
When working with LLM-based tools like Bolt, it’s best to approach big updates in small, manageable steps. Large or complex requests can easily overwhelm the system or lead to unclear results or errors.
Focus on one feature or section at a time rather than trying to handle multiple changes at once. This approach makes it easier to track progress, identify issues, and maintain control over your project.
Follow this simple process:
1. Make one change.
2. Check that the change works as expected.
3. Then move on to the next change.
For each update, give a clear and specific request. Mention which part of the app you’re working on, and don’t assume Bolt remembers earlier parts of the conversation. When possible, show examples or describe exactly what you want to achieve.
For more detailed tips on writing effective prompts, see [Prompt effectively](/best-practices/prompting-effectively).
## Prompt too long, or project exceeds total supported prompt size
You can use the following methods to reduce your project’s size if it exceeds the supported prompt limit:
### Split files longer than 500 lines
It's usually best to keep files less than around 500 lines. If you find that one of your files has grown larger than that, try the following prompt:
`Refactor [filename] by splitting it into multiple files. Add comments to understand what each new file is for. Keep the original file to act as a router for functions, so the app remains functional after the split.`
### Reduce the size of your projects
As your project becomes larger it becomes more difficult to keep Bolt aligned with your code. The underlying language model has to process more source material.
Two practical approaches exist. The first is simple cleanup of unused files. The second is more advanced and involves separating your project into smaller components and maintaining those pieces outside Bolt.
Breaking your project into multiple smaller components is best for users who are experienced with version control and comfortable managing multiple code bases.
### Reduce project size by cleaning up unused files
Bolt uses a tool called Knip to perform a cleanup. You can run this when prompted by Bolt, or run it manually at any time.
Before proceeding, back up your project using one or both of these methods:
* In the top left of your screen, click the **project title**, then click **Export** > **Download**, **or**
* In the top left of your screen, click the **project title**, then click **Duplicate**.
**Automatic cleanup when prompted**
If your Bolt project exceeds the context window, you’ll see a message in chat: **Project size exceeded**. The context window is the maximum amount of information Bolt can process at once. Paid plans offer larger windows, allowing bigger projects before reaching this limit.
Click **Remove unused files** to run the cleanup.
**Manually run the cleanup**
In the Bolt terminal, run the following command:
`npx knip --production --fix --allow-remove-files`
Check the output in the terminal to see if the command ran successfully. This command removes unnecessary files from the codebase, which reduces the project size.
### Reduce project size by splitting the project
An advanced technique is to split a large app into smaller parts, then connect them later outside of Bolt. A common approach is to keep the backend and frontend as separate projects. If you are new to development, proceed carefully or get help.
If you decide to try this, keep in mind:
* Plan what each part is responsible for.
* Decide how the parts will talk to each other, such as through an API.
* Keep each project in its own repository or folder.
* Write down how to set up and run each part.
### Advanced techniques
You can also use terminal commands to help reduce your project size. These commands are especially useful once you’ve completed the earlier cleanup steps and want to make sure no unnecessary code or dependencies remain.
**Find and remove unused dependencies**
1. Click the **code icon** to switch to **Code View**.
2. Click **Terminal** in the bottom section of the page.
3. In the terminal, run `npx depcheck` to scan your project for any dependencies that are not being used in your codebase.
4. Review the results and remove any unused packages listed in the output. This keeps your project lightweight and easier to maintain.
**Check and clean up package versions**
1. Click the **code icon** to switch to **Code View**.
2. Click **Terminal** in the bottom section of the page.
3. Run `npm dedupe` to analyze your installed packages and remove duplicate or outdated versions of dependencies.
You can always use the [Version History](/building/using-bolt/rollback-backup) feature to restore an earlier version of your project if you make changes you don’t like or if something breaks. This allows you to experiment safely while keeping a reliable backup of your previous setup.
## Bolt stuck or unresponsive
If Bolt becomes stuck or stops responding to commands, [clearing the context](/building/using-bolt/interacting-ai#clear-context) can often resolve the issue.
.bolt.host sent an invalid response.`\
`ERR_SSL_PROTOCOL_ERROR`
the issue is usually related to your WiFi or router settings.
Every internet provider and router setup is a little different, but most include an option to manage trusted domains. Open your WiFi or router settings, look for that area, and add `.bolt.host` to your list of allowed or trusted domains.
If you still see the error after making that change, try connecting to a different WiFi network or use your phone’s hotspot. If your site publishes successfully, you will have confirmed the problem is with your original network settings rather than with Bolt.
## Out of memory (OOM)
This error appears when your system doesn’t have enough available memory to run the WebContainer environment , which powers projects in Bolt and StackBlitz. The WebContainer relies on your local device’s resources to simulate a full development environment inside the browser, so limited memory can cause it to fail to start or crash unexpectedly.
To resolve this:
1. Close unnecessary browser tabs and background applications to free up system memory.
2. If you’re running multiple Bolt or StackBlitz projects at once, close all but the one you’re actively working on.
3. Refresh your browser and try reopening the project.
4. If the problem persists, restart your device to clear cached processes and release additional memory.
If you regularly encounter this error, consider using a browser with fewer extensions or increasing available system memory.
## Tips for reliable editing of larger projects
Use the following best practices to help Bolt make consistent, effective edits, especially when working on larger or more complex projects.
### 1. Scope each prompt to a single change
Write prompts that focus on one specific part of the project at a time. Large, multi-step requests can overwhelm the editing process, particularly in bigger applications. Smaller, well-scoped instructions make it easier for Bolt to apply changes accurately.
### 2. Create and maintain a clear README file
Create a `README.md` file that summarizes the project’s purpose, structure, and key components. You can ask Bolt to generate this file for you. Referencing the README whenever you start a new task helps Bolt quickly understand the context and layout of your app.
### 3. Reset context between major tasks
Use the `/clear` command in the chatbox when switching to a new area of the project. After clearing, ask Bolt to read the `README.md` file and then provide your new instructions. This refreshes the working context so Bolt can focus fully on the current task.
### 4. Use debug logging to investigate errors
When issues occur, ask Bolt to add debug logging to the relevant code paths. Open the app in a separate browser tab, reproduce the issue, and view the logs in the browser console.
* On macOS, use `CMD + OPTION + J`
* On Windows, use `CTRL + SHIFT + I`
Then, copy the logs and paste them back into Bolt so it has concrete information to work from.
### 5. Break down very large files
If a file Bolt is editing is around 500 lines or more, request a refactor into smaller, more focused files. You can use the following prompt:
`Please refactor [filename] by splitting it into multiple files. Add comments explaining the purpose of each new file. Keep the original file as a router so the app continues to function after the split.`
Smaller files are easier to reason about and tend to reduce editing errors.
Following these tips helps Bolt stay focused on the right parts of your project and improves the reliability of each edit.
## WebContainer startup error
Bolt relies on [WebContainers](https://webcontainers.io/), a browser-based runtime from StackBlitz that enables a full-stack development environment in the browser.
If you encounter a WebContainer error, try the following:
* Make sure you’re using Chrome or another Chromium-based browser.
* Clear your browser cache.
* Temporarily disable browser extensions, especially ad blockers, to see if the issue clears.
* If you’re using a VPN, turn it off and try again.
## Use the `.bolt/ignore` file with v1 agent (legacy)
The `.bolt/ignore` file only works with v1 agent (legacy), which will be retired on August 3, 2026. It doesn't work with Bolt Agent.
In the `.bolt/ignore` file, list any files or folders that Bolt should exclude from the AI context window.
1. Log in to your Bolt project.
2. Click the **code icon (\<>)** in the top center of your screen to switch to Code view.
3. Either:
* In the `.bolt` directory, click `ignore` to open the file in the editor.
* If there isn't an `ignore` file, right-click the `.bolt` directory, then click **New File...**. Name the file `ignore`.
4. List the files you want Bolt to ignore. Provide the full path to the files, including directories. You can use `*` as a wildcard. For example: to ignore all files in a directory called `test`, write `test/*` in your `ignore` file. These files are now completely invisible to the AI, which frees up space in the context window.
Hiding files from Bolt can have unintended consequences, as Bolt is no longer aware of your entire project. This approach is powerful, but is only recommended for advanced users who can make informed decisions about what can safely be excluded, and can understand and resolve issues that may arise from this approach.
# Login issues
Source: https://support.bolt.new/troubleshooting/login-issues
Troubleshooting for issues logging into Bolt.
## User already associated with email
If you see an error such as “There is already a user associated with this email” when logging into Bolt, it usually means your login credentials are overlapping between different providers.
For example, you might have both a GitHub account and a Google account linked to the same email address. If you originally signed up for Bolt using GitHub, signed out, and later tried to log in with Google, this conflict can occur.
To fix the issue, follow these steps:
1. [Sign in to StackBlitz](https://stackblitz.com/sign_in) using your GitHub account.
2. Click **Settings** in the left menu.
3. Click the **Credentials** tab.
4. Click **Add Google credentials** to connect your Google login.
If you originally signed up with Google, add your GitHub credentials in Step 4 instead.
After doing this, you’ll be able to sign in with either GitHub or Google.
## Resend confirmation instructions
If you signed up for a Bolt or StackBlitz account but didn’t receive the confirmation email, you can [request a new confirmation email](https://stackblitz.com/users/resend_confirmation).
## Forgotten password
**If you signed up for a StackBlitz account using an email and password**
If you created your StackBlitz account using an email address (not Google or GitHub), you can update your password by visiting the [StackBlitz password reset page](https://stackblitz.com/users/reset_password) and following the reset instructions.
**If you signed up for an account using Google or GitHub third-party authorization**
If you created your Bolt account using GitHub or Google, your password is managed by that service. To regain access:
* Go to GitHub or Google and reset your password there
* After updating your password, return to Bolt and sign in using the same provider
Bolt does not have access to passwords created through third-party login providers, so password changes need to be completed directly with the service you originally used to sign up.
Helpful links:
* [GitHub account recovery](https://docs.github.com/en/authentication/securing-your-account-with-two-factor-authentication-2fa/recovering-your-account-if-you-lose-your-2fa-credentials)
* [Google account recovery instructions](https://guidebooks.google.com/get-started-with-google/stay-safer-with-google/how-to-recover-your-google-account?hl=en)
Once your password is updated with the provider, you should be able to log back into Bolt right away.