Switch between Bolt agents and models
Not all models are available with the free plan. To be able to switch to any model, upgrade to a paid plan.
If you are already using Claude Agent, switching between models in Claude Agent does not clear your chat history.
Switch agents or models on the homepage
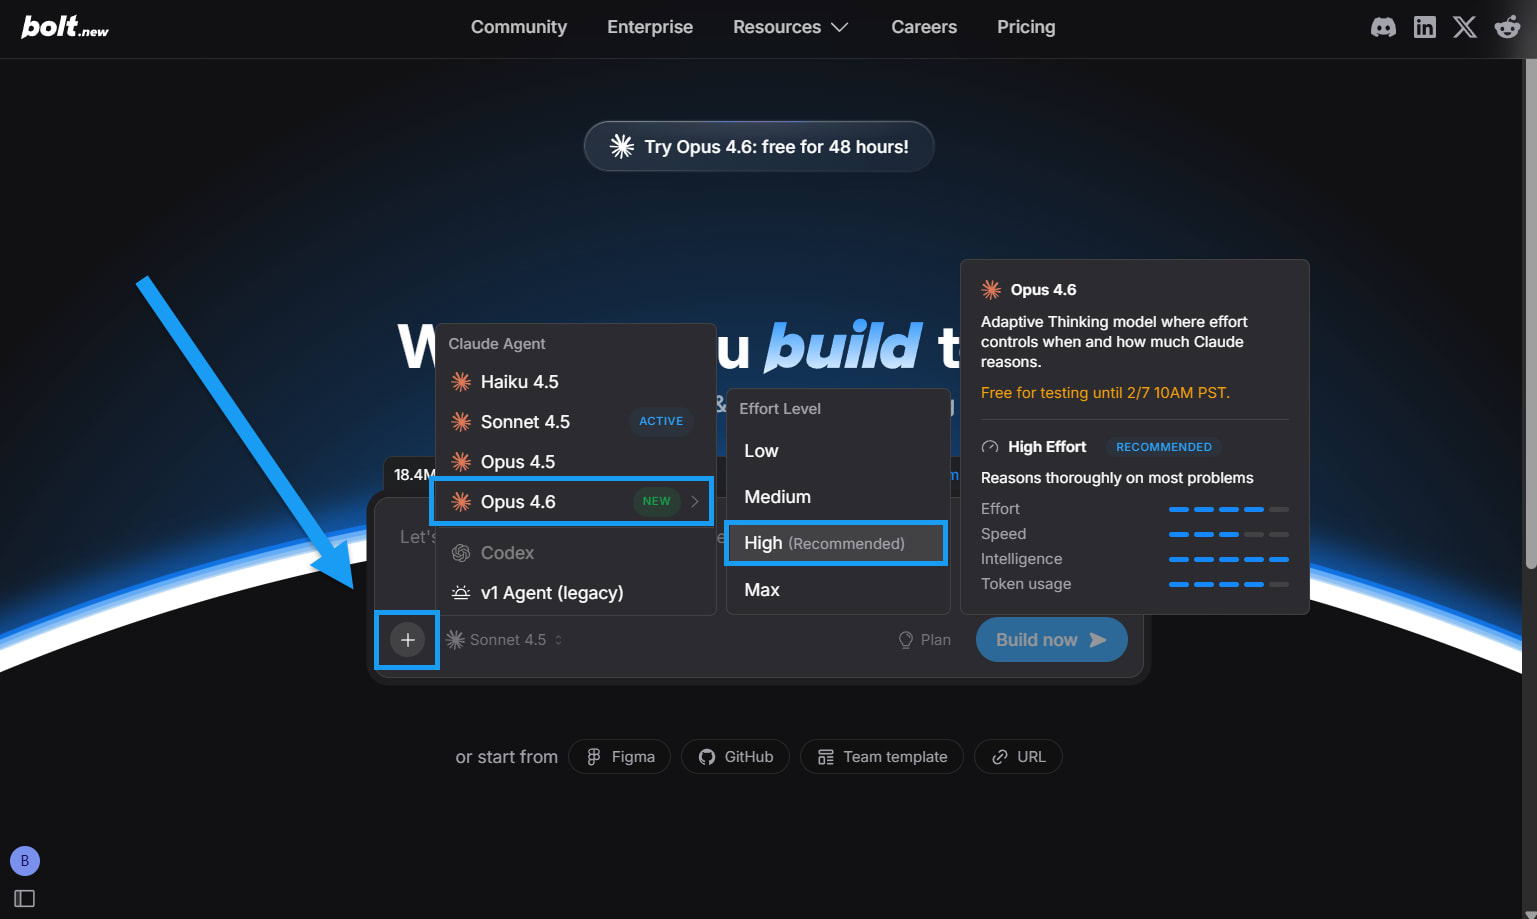
- Haiku 4.5
- Sonnet 4.5
- Opus 4.5
- Opus 4.6 (where you can select between different Effort levels)
The model name shown at the bottom of your chatbox indicates which model is currently in use.
Switch agents or models in a project
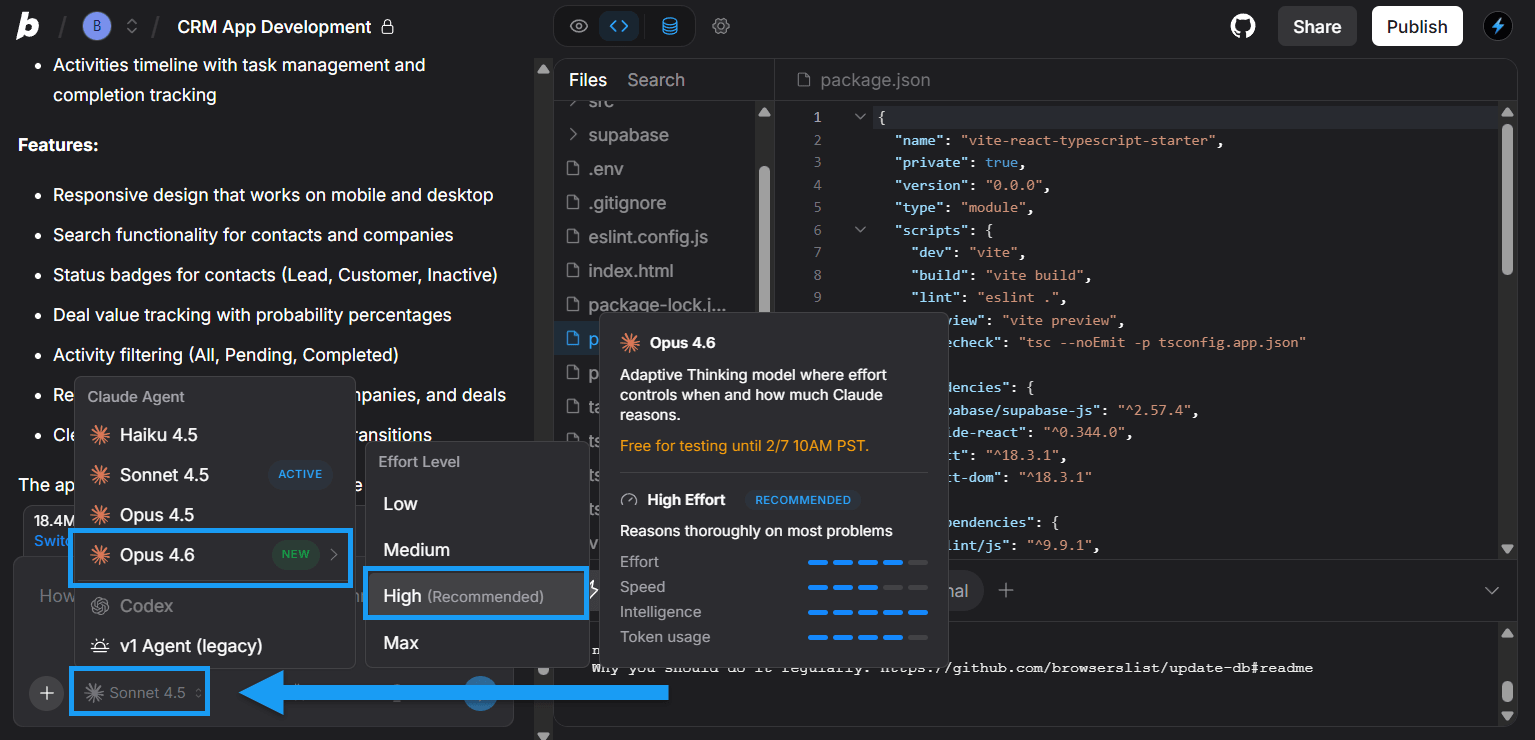
- In the bottom-left corner of the chatbox, click the current model name.
- Select the agent or model you want to use.
- Confirm your choice.
How to use Plan and Discussion Modes
The Plan and Discussion Mode menu options are available in the same location in the chatbox menu. Which one appears will depend on which agent you are using. When using Claude Agent, you’ll see Plan Mode. When using v1 Agent (legacy), you’ll see Discussion Mode.Learn more about Plan and Discussion Modes.
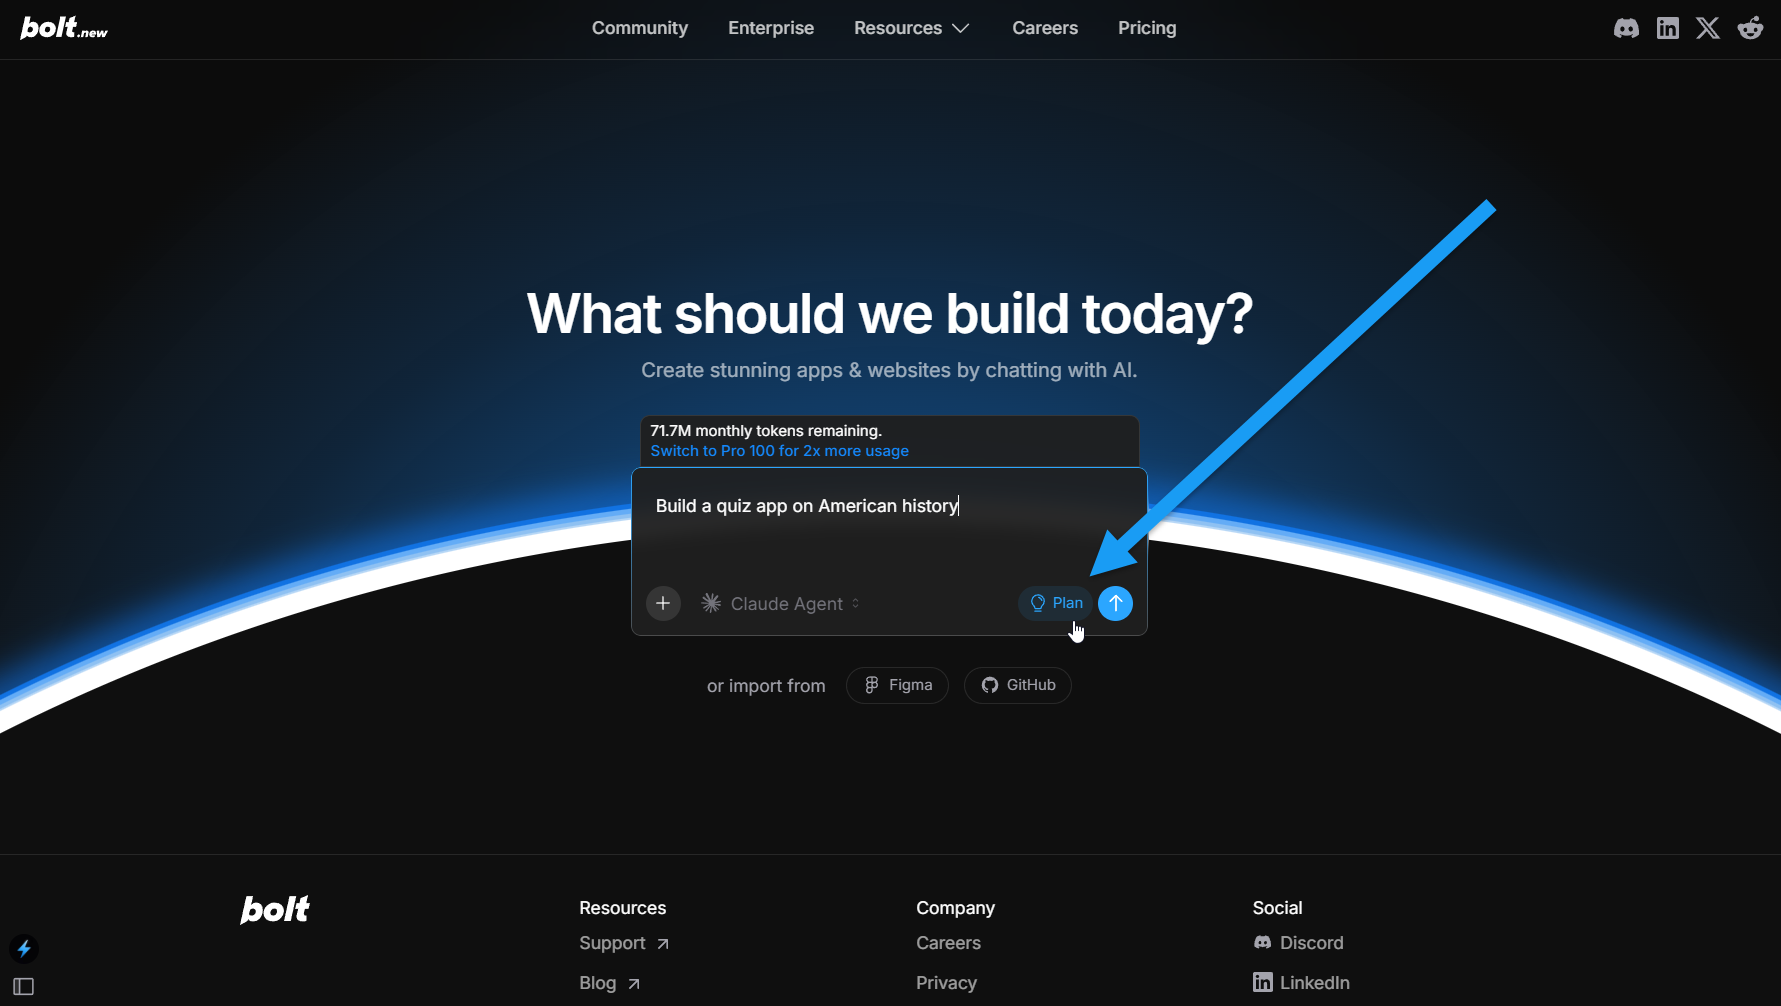
Use Plan Mode on the Bolt homepage
You can begin your Bolt project in Plan Mode right from the first prompt. This lets you create and refine a plan through back-and-forth discussion before executing a build, helping you avoid unwanted changes and use fewer tokens overall. Simply click Plan before submitting your prompt to generate a plan for your build.If you want to create a mobile app, it’s important to mention this directly in your prompt. For example, you might prompt: “Build a mobile app that helps people track their daily habits.”
Use Plan Mode in a Bolt project
Follow the steps below to switch to Plan Mode while working in a Bolt project: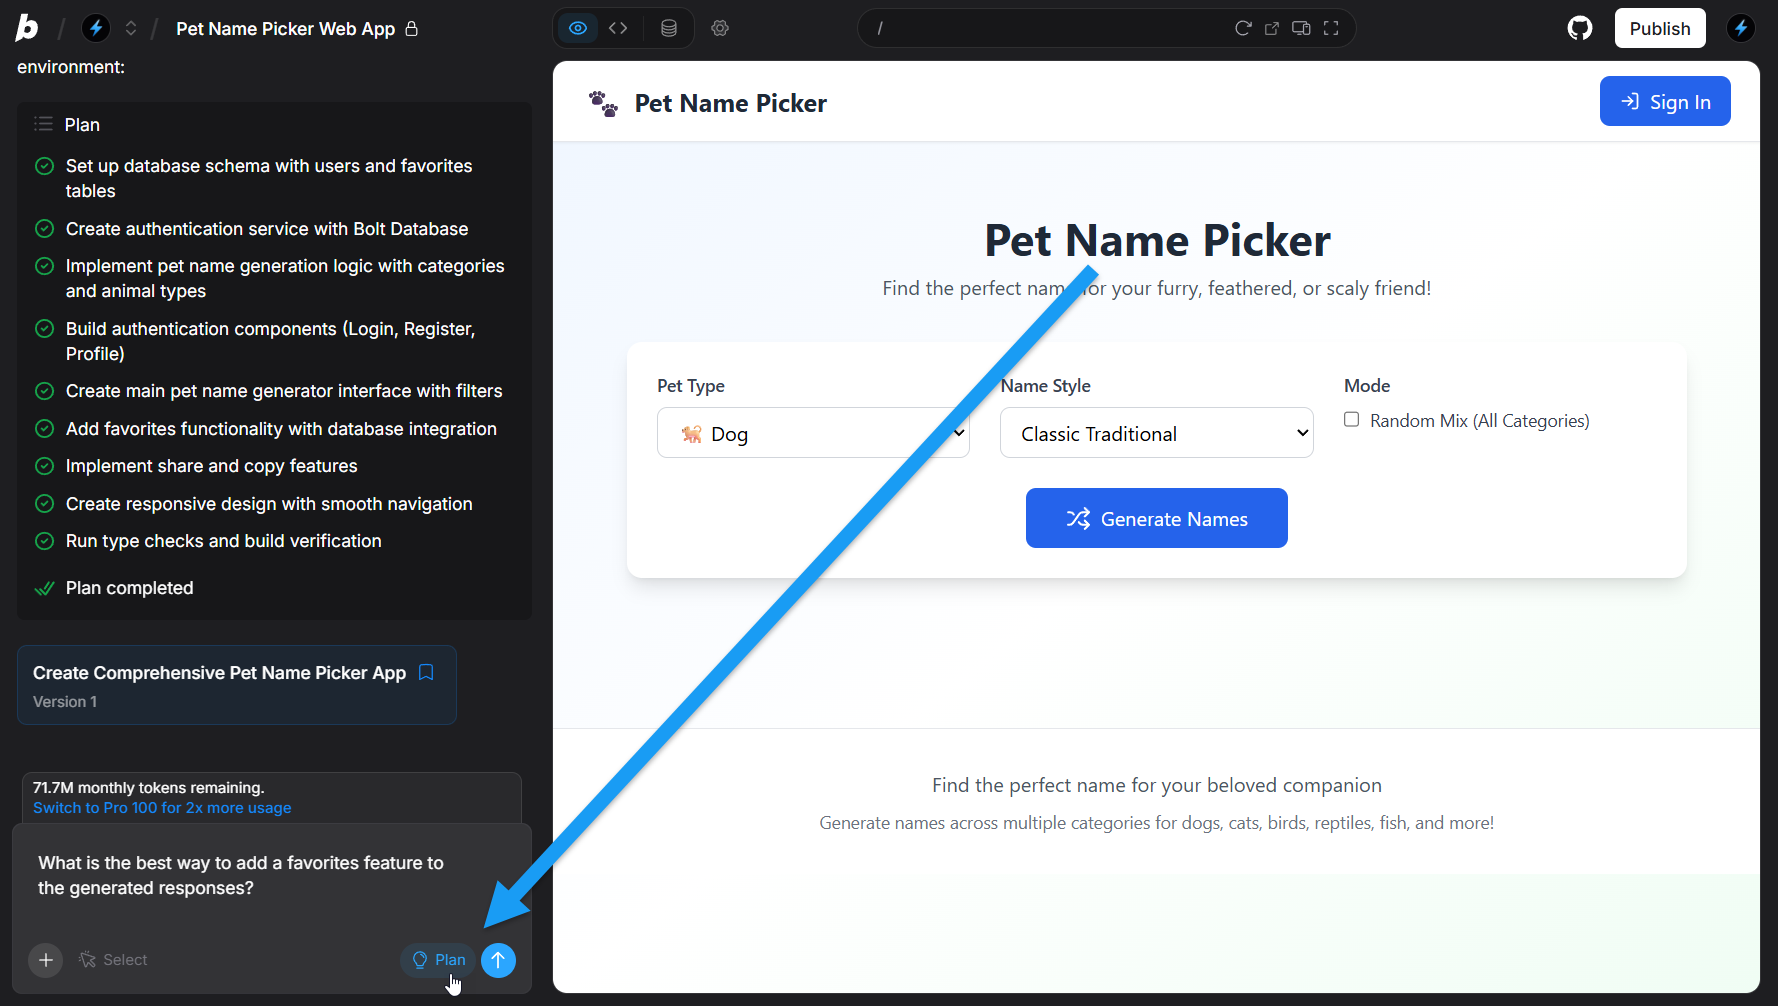
- Open a project working with Claude Agent.
- In the bottom-right corner of the chatbox, click Plan.
- Enter your question or prompt, and read the response. You can then either:
- Continue the discussion.
- Use one of the quick action buttons to implement the suggestion.
Use Discussion Mode in a Bolt project
Follow the steps below to switch to Discussion Mode while working in a Bolt project: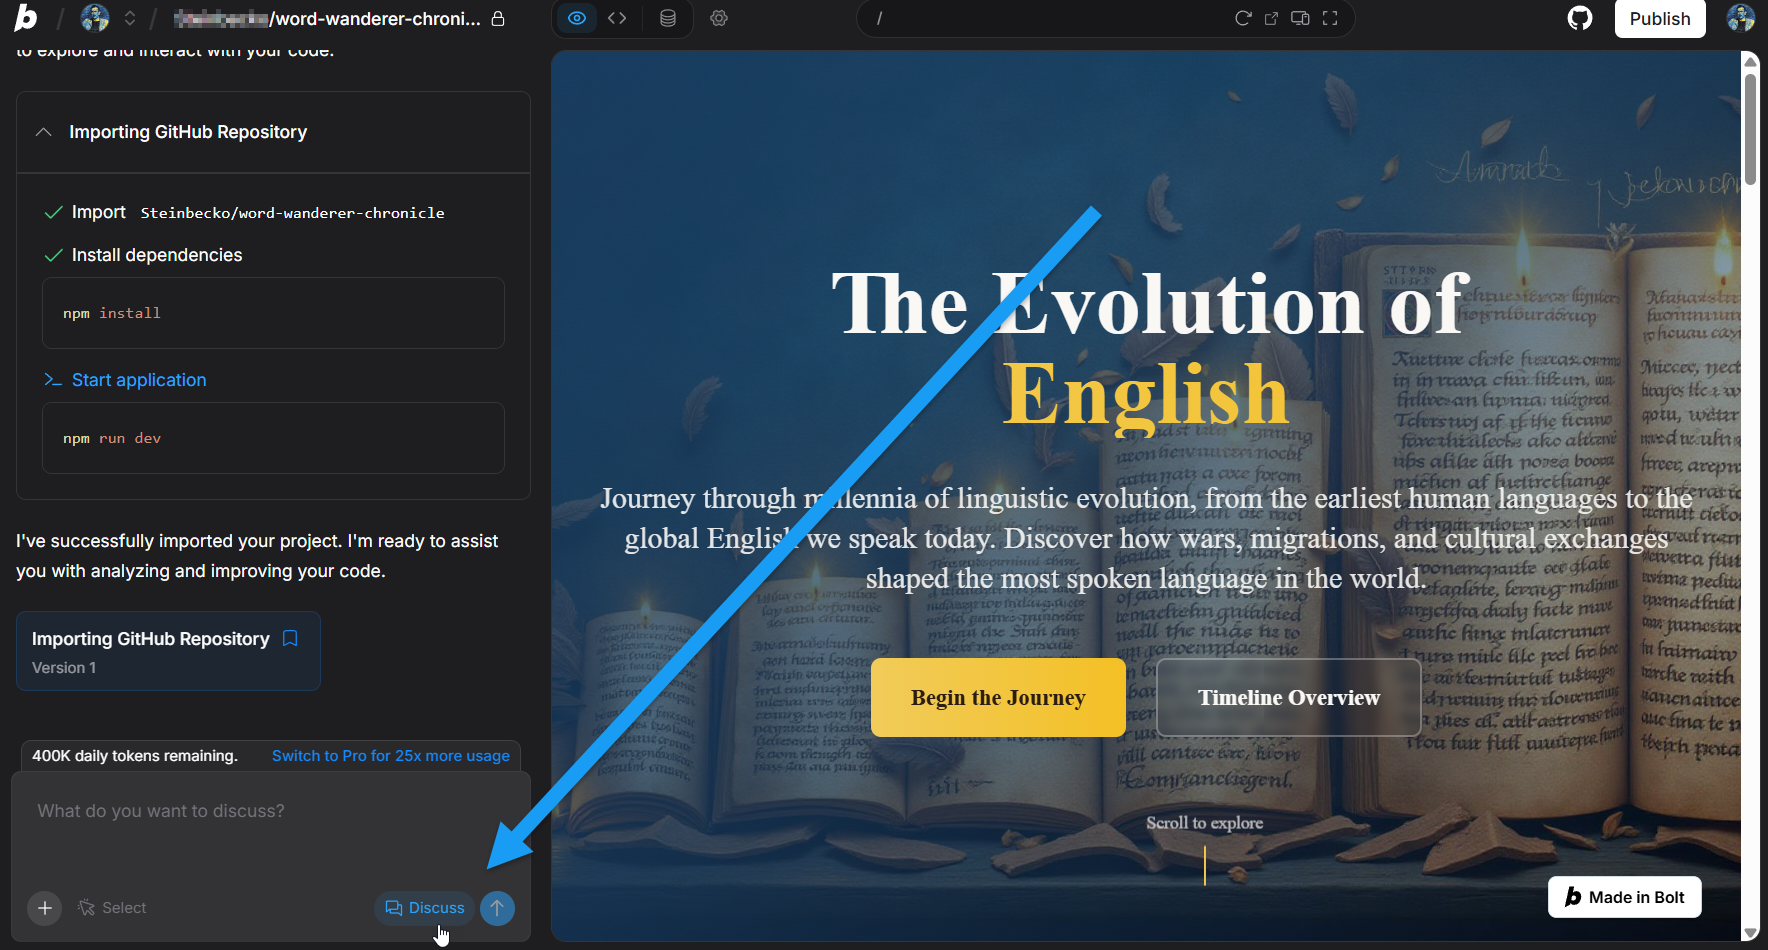
- Open a project working with the v1 Agent (legacy).
- In the bottom-right corner of the chatbox, click Discuss.
- Enter your question or prompt, and read the response. You can then either:
- Continue the discussion.
- Use one of the quick action buttons to implement the suggestion.
Import a Figma frame
In addition to starting your build from the Bolt homepage by importing a Figma frame, you can also import a Figma frame for design reference using the chatbox.Learn more about Figma frames.
- Log in to your Bolt project.
- Click the plus icon in the bottom-left corner of the chatbox.
- Click Import Figma frame.
- Paste your Figma frame URL.
- Click Import Figma frame into Bolt.
Focus on a specific UI element
The Select feature helps you direct Bolt’s attention to a specific part of your interface. By selecting an element on the page, you can guide the chatbox to focus its responses and actions on that exact piece of UI. This makes it easier to request precise updates, explore styling changes, or adjust content without needing to describe the element in detail.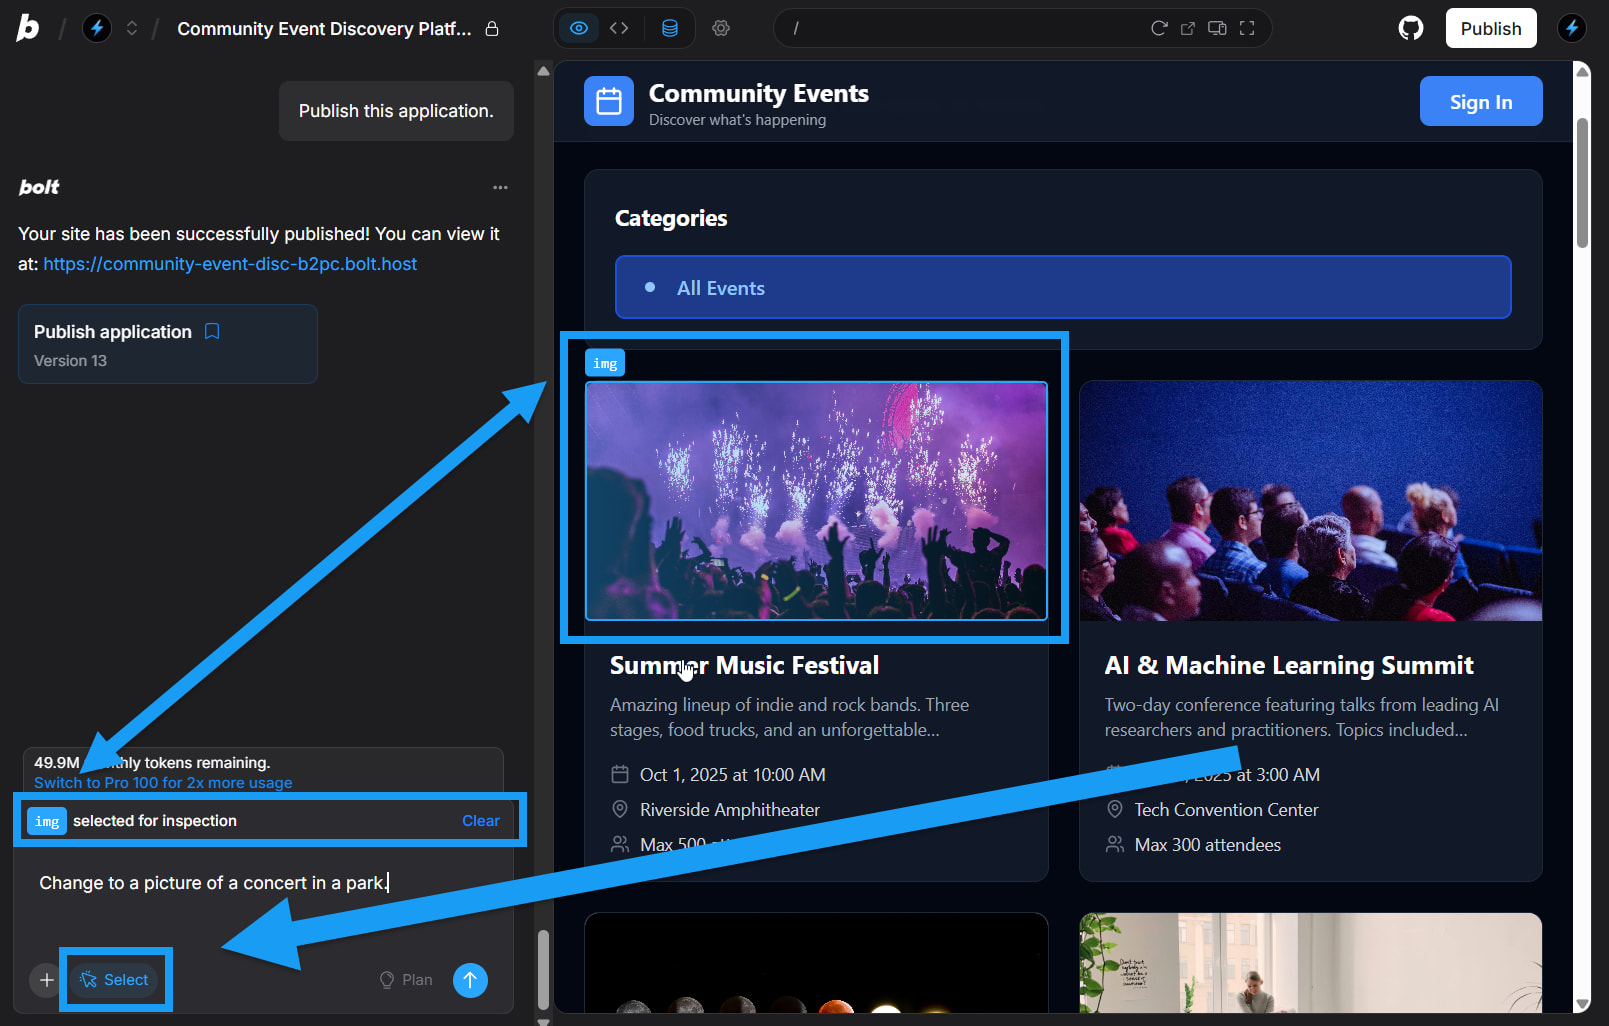
- Log in to your Bolt project.
- Click the Select icon in the bottom-left corner of the chatbox.
- Click the element you want to focus on.
Result: You will see Bolt list your selection above the chatbox. - Enter your prompt and submit.
Your prompt will focus on the UI element you selected.
AI image editing
AI image editing lets you make targeted changes to images that already exist on your site. You select an image, describe the change you want, and Bolt (using Nano Banana) updates the image while keeping the rest intact. This feature is available on all paid plans. It is not included on free plans. Using AI image editing does not add any additional fees; each edit simply uses tokens from your plan. For generating brand-new images or completely replacing an existing image, use image prompts or upload a new file. Those tools are intended for full image creation and total replacements, while image editing focuses on modifying an existing image rather than rebuilding it from scratch.Images can also be selected when they are used as background elements. To remain selectable, the image must be within five layers of the top of the layout. Background images placed six or more layers deep cannot be selected for AI image editing.
- Log in to your Bolt project.
- Click the Select icon in the bottom-right corner of the chatbox.
- Click the image you want to edit.
- Click Edit with AI.
- Describe the changes you want to make in the text box.
- Click the blue arrow icon to generate.
- Use the slider to preview your old and new images.
- Click Use this image when you’re ready.
Upload files
You can upload files to Bolt to either add them to your project or use them as reference materials. When you upload, you can tell Bolt how to use the file in your prompt, or let Bolt detect it automatically. The maximum file size is 10 MB for Free plans and 100 MB for any Pro plan.If you have trouble uploading images, check the Code view troubleshooting tips for image uploads.
Supported file types
Supported file types
Images:
.jpg .jpeg .png .gif .webp .svgText files: .pdf .txt .doc .docx .py .ipynb .js .mjs .cjs .jsx .html .css .scss .sass .ts .tsx .java .cs .php .c .cc .cpp .cxx .h .hh .hpp .rs .swift .go .rb .kt .kts .scala .sh .bash .zsh .bat .csv .log .ini .cfg .config .json .yaml .yml .toml .lua .sql .md .tex .latex .asm .ino .sBolt can upload file types for a wide range of programming languages. Bolt only builds JavaScript-based applications (see Supported technologies), but you can upload files from other programming languages to guide Bolt, or ask Bolt to convert them into JavaScript.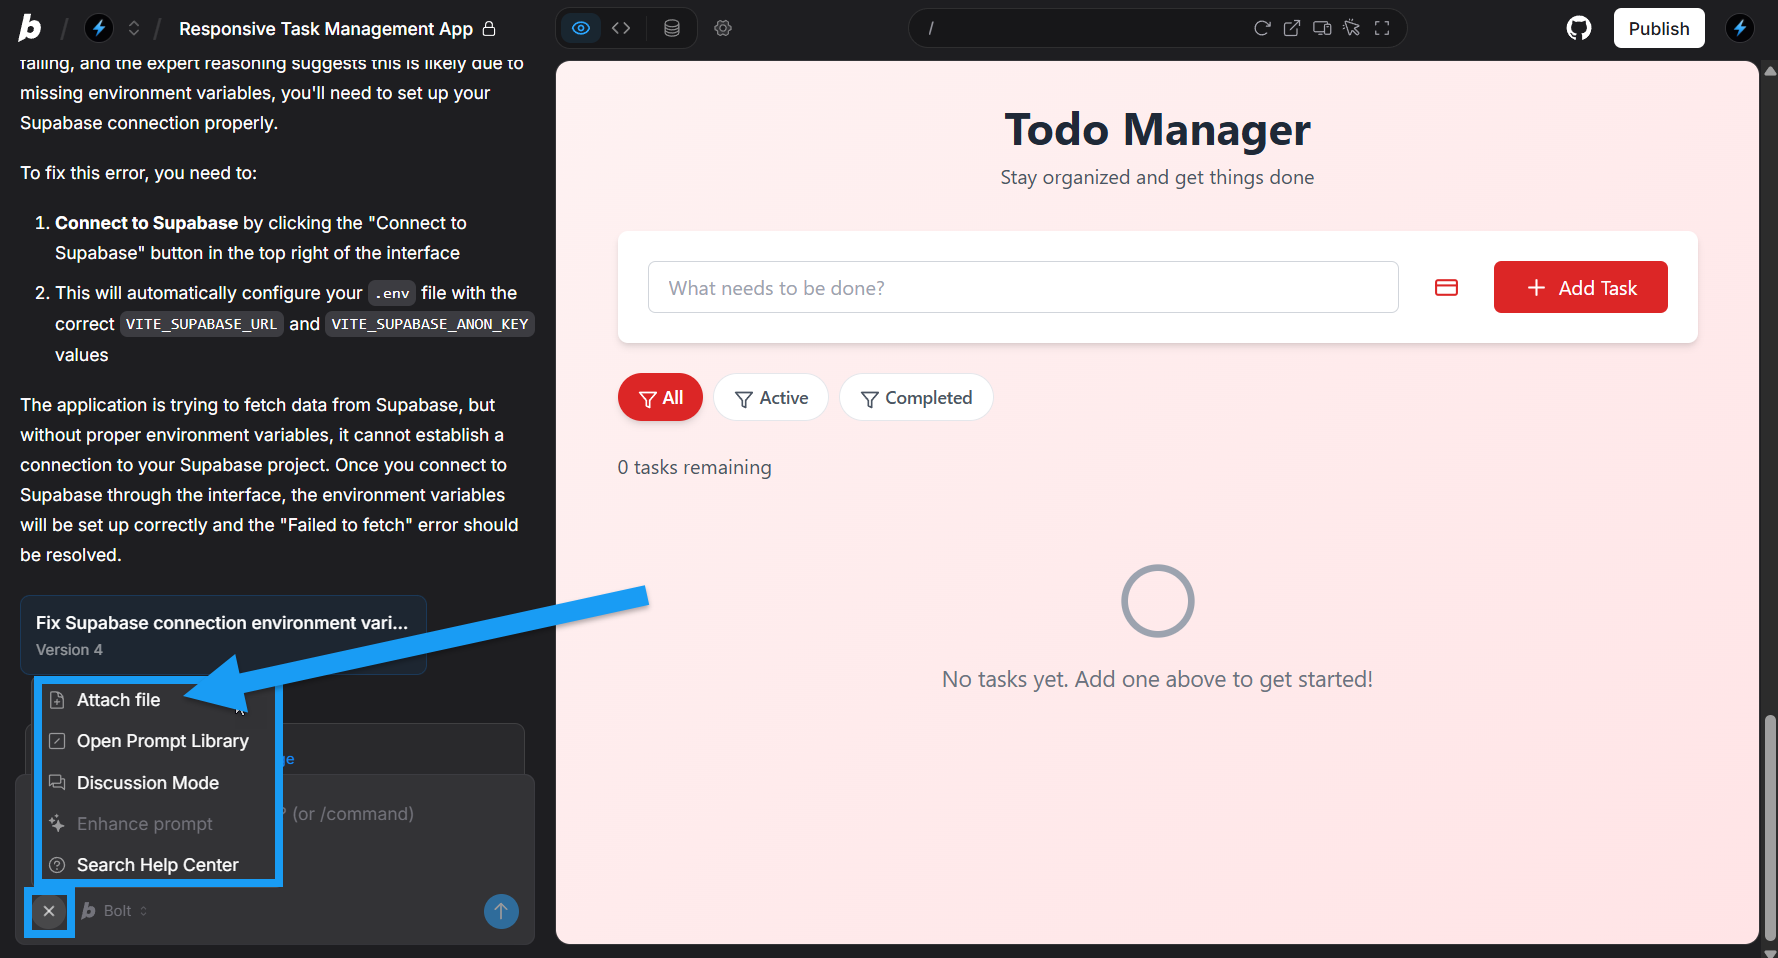
- In the bottom-left corner of the chatbox, click the plus icon, then click Attach file and select your files, or
- Drag and drop the file into the chatbox.
- Upload an image file to use as a logo on your website.
-
In your prompt, say:
Use the attached file as a logo in the header of the website.Bolt adds the file to your project files.
- Upload an image file to show Bolt the look and feel you want.
-
In your prompt, say:
Using the attached image for inspiration, change the site’s colors, fonts, and other styles to match the image style.Bolt uses the file temporarily but doesn’t permanently add it to your project files.
Search the Help Center from the chatbox
You can search the entire Bolt Help Center without leaving your project by following these steps:- In the bottom-left corner of the chatbox, click the plus icon, then click Search Help Center.
- Enter your keywords, and a list of articles will appear.
- Click any topic to open it in a new tab.
Add files to inform Bolt
You can give Bolt extra information by uploading files. You can upload files when creating a new project on the Bolt homepage or in an existing project in your chat.
- In the bottom-left corner of the chatbox, click the plus icon, then click Attach a file.
- Drag and drop the file into the chatbox.
- Add an image as an example of the look and feel you want.
- Work on defining your product features with your team in a separate document, then upload it to Bolt.
Supported file types
Open the accordion menu below to view a list of supported file types.Supported file types
Supported file types
Images:
.jpg .jpeg .png .gif .webp .svgText files: .pdf .txt .doc .docx .py .ipynb .js .mjs .cjs .jsx .html .css .scss .sass .ts .tsx .java .cs .php .c .cc .cpp .cxx .h .hh .hpp .rs .swift .go .rb .kt .kts .scala .sh .bash .zsh .bat .csv .log .ini .cfg .config .json .yaml .yml .toml .lua .sql .md .tex .latex .asm .ino .sBolt can upload file types for a wide range of programming languages. Bolt only builds JavaScript-based applications (see Supported technologies), but you can upload files from other programming languages to guide Bolt, or ask Bolt to convert them into JavaScript.Clear context
You can clear the context in Bolt by entering the/clearcommand in your chatbox, then clicking Clear context in the Results section above.
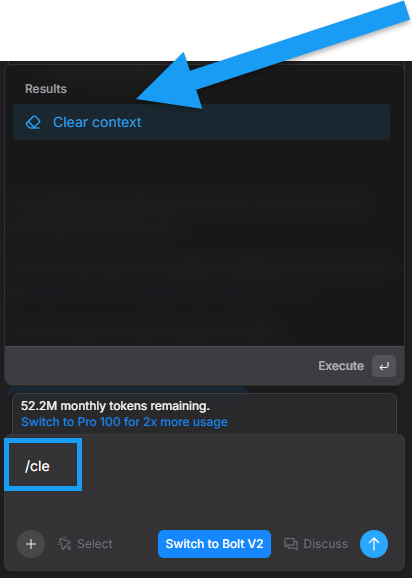
- Your recent conversation history
- Its understanding of how your codebase has changed over time
Automatically improve your prompts
Bolt helps you craft better prompts, which are key to building successfully.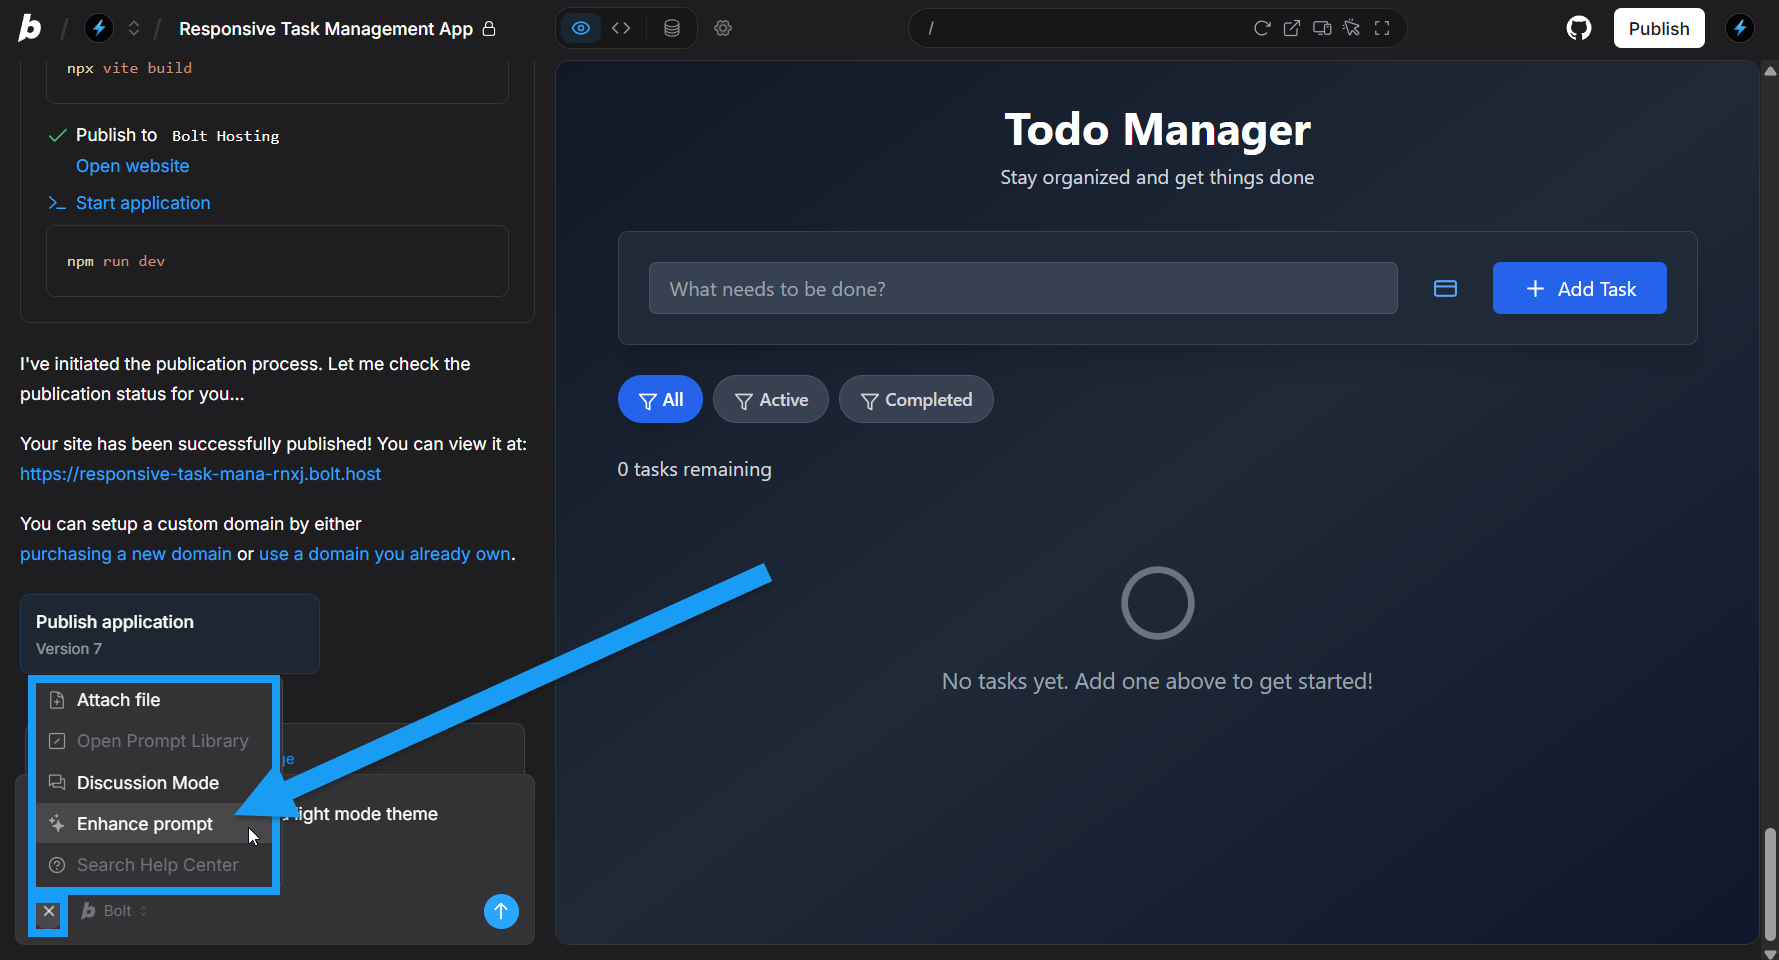
- Write your prompt in the chatbox.
- In the bottom-left corner of the chatbox, click the plus icon, then click Enhance prompt.
- Bolt generates a recommended prompt, which you can then edit.
Comparing original and enhanced prompt results
The image below compares two websites created with the same prompt. The version on the right was built with a simple prompt, while the version on the left was enhanced to produce a more engaging homepage and additional pages.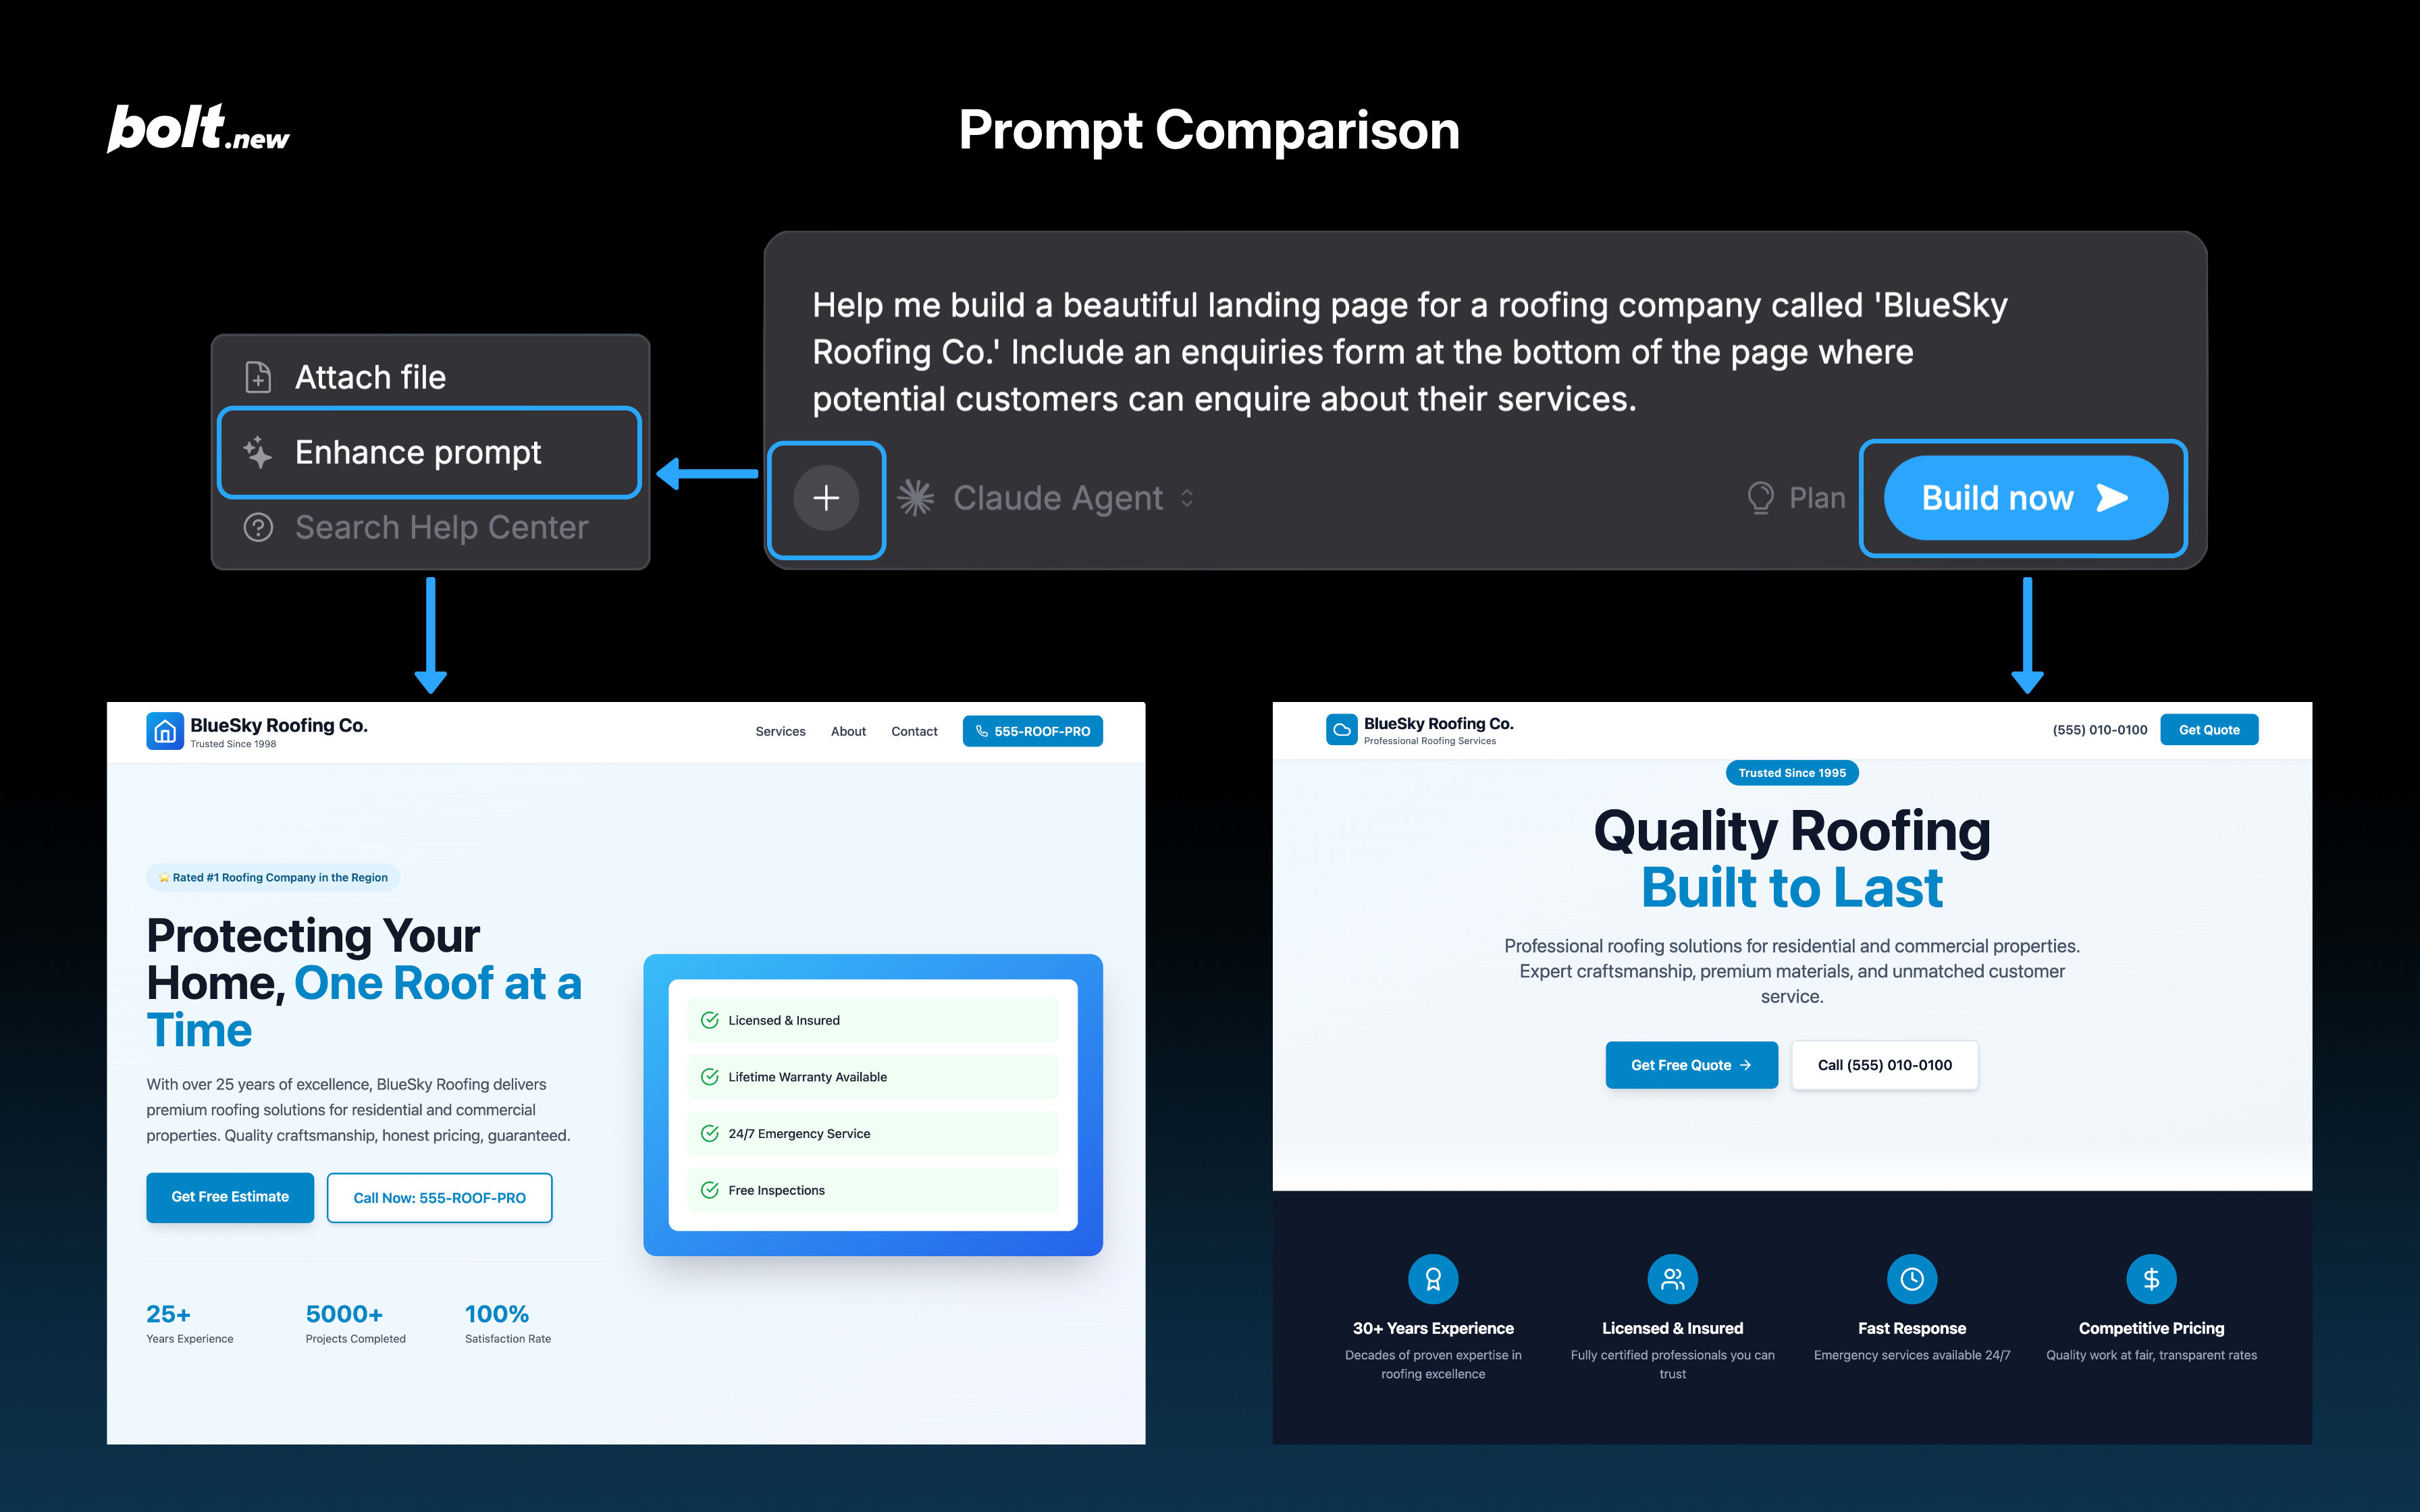
Prompt library
The prompt library is a collection of prompts. It contains prompts provided by Bolt and custom prompts you’ve created and saved. Instead of typing out the same prompt over and over again that you like to use in your projects, you can simply choose it from the list. Using a pre-written prompt saves time and allows you to save and reuse good prompts. You can access the prompt library either in the chatbox on the homepage or in your projects.Use an existing prompt
In the bottom-left corner of the chatbox, click the plus icon, then click Open Prompt Library. Browse through the list of available prompts. Prompts are organized into categories like “SEO” and “Usability”. There are also two special categories: “Favorites” and “Commands”. When you select a prompt, you will see a preview of the prompt. To use the selected prompt, click it again or press Enter. This will populate the chatbox with the content of the prompt. You can then use it as is or edit it like any other prompt that you would write on your own. If you already know the prompt that you want to use, start typing it, and Bolt will automatically show all prompts with matching names. e.g., typing “dar” will bring up Bolt’s dark mode implementation prompt. Click Use prompt or press Enter. Bolt adds the prompt to the chatbox.Add a prompt
In the chatbox, start typing/create prompt.
Click the blue Create prompt text that appears.
You can edit and delete any prompts that you create. You cannot edit and delete built-in prompts provided by Bolt.
- Choose a category, or create a new one from the dropdown.
- Select an icon.
- Name your prompt.
- Write the prompt in the prompt field.
- Click Create prompt to save it.
Manage a prompt
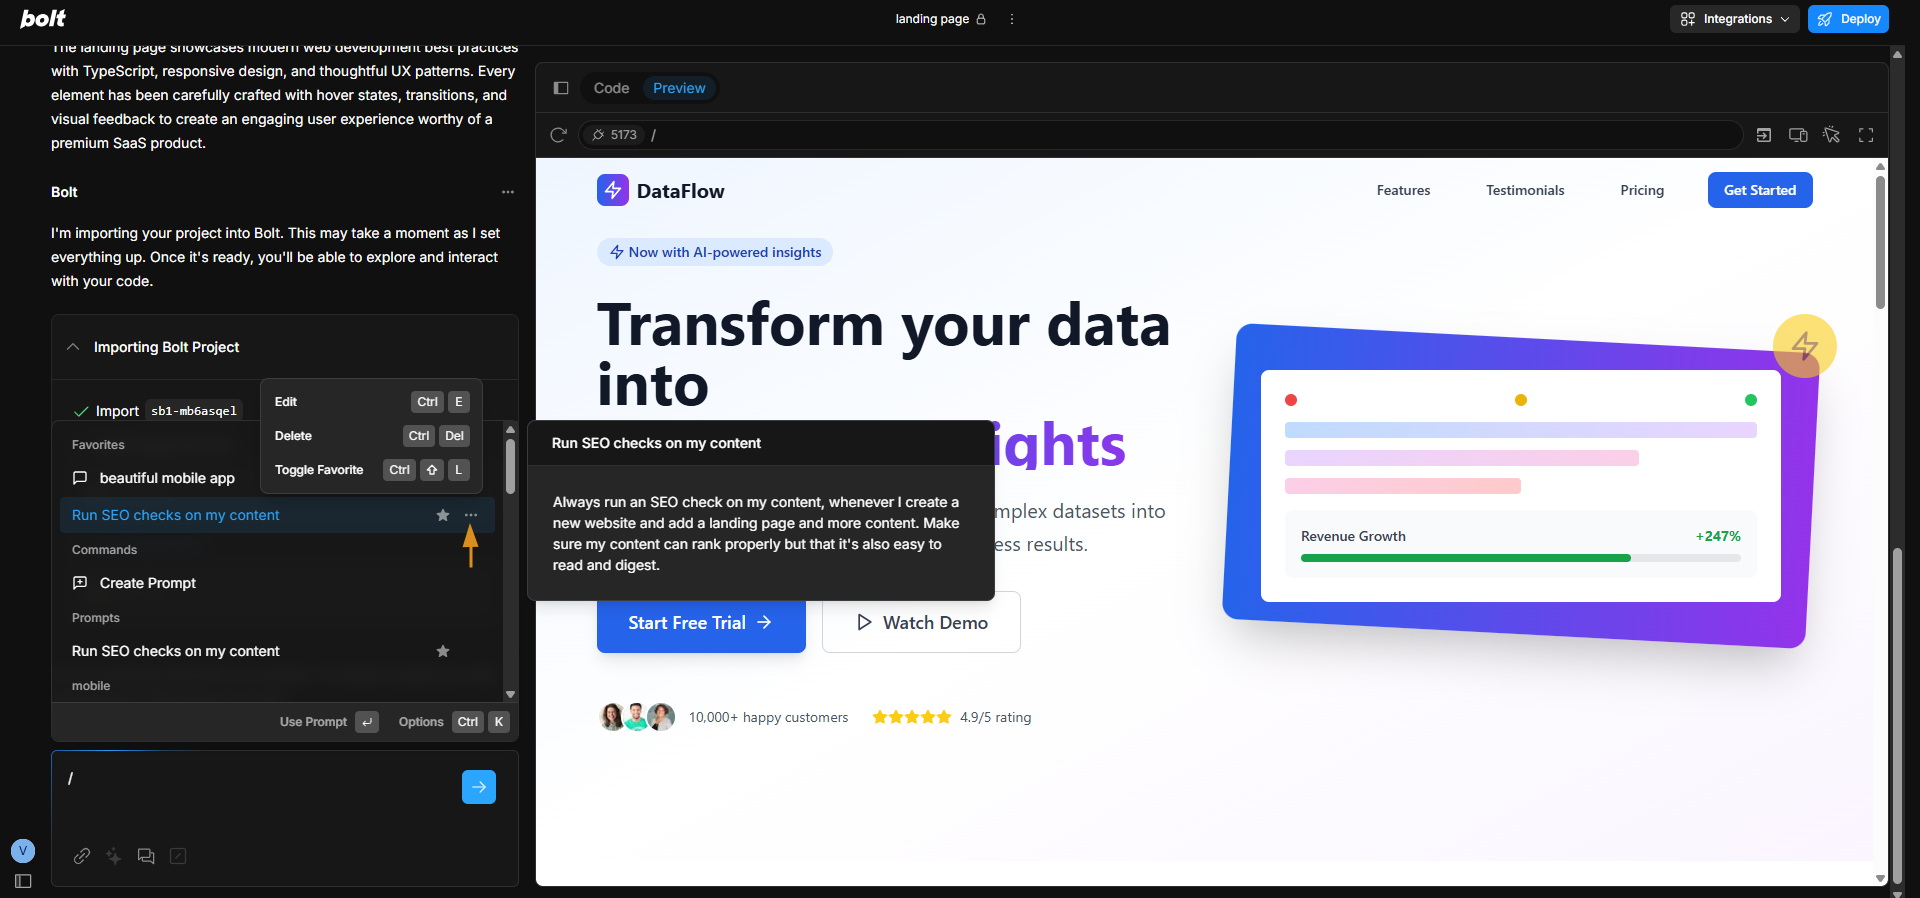
You can favorite any prompt (both built-in and custom). This adds it to the top of the list.- In the bottom-left corner of the chatbox, click the plus icon, then click Open Prompt Library.
- Locate the prompt you want to manage and click on it.
-
Click the three-dot menu.
-
Choose the action:
- Toggle favorite: Adds the prompt to favorites, and it is now at the top of the list. Alternatively, click the star icon next to the prompt to add it to your favorites. Repeat the same if you want to remove a certain prompt from favorites.
- Edit (custom prompts only): Opens the prompt for you to make changes.
- Delete (custom prompts only): Deletes the prompt from the library.