Understanding backups, restoring, and version history
Backups, restoring, and version history all work together to keep your projects safe and flexible.- Backups are saved copies of your project, created automatically or manually, so you always have something to fall back on.
- Version history (which you can see using the View history button) is a timeline of changes, letting you see how your project has evolved and pick out the exact point you want to return to.
- Restoring is the act of bringing back one of those saved states, whether it comes from your history, a dated backup in Project settings, or a manual download.
Ways to restore your projects
Bolt gives you flexibility with multiple backup methods. Here are the different ways you can bring a project back to an earlier state:- Version history (✅ Recommended) – Browse, preview, label, and restore older versions of your project automatically saved by Bolt using the View history button.
- Chat history – Scroll through the chat history and click the version you want to restore.
- Manual Backups – Download a local copy of your project and restore it through your StackBlitz account.
- GitHub Integration – Manage versioning through GitHub repositories.
Restore using version history
You can see a clear visual timeline of your backups and edit their names for clarity. You can also preview a backup before restoring it to make sure it’s the one you want. To restore a backup using version history, follow the steps below: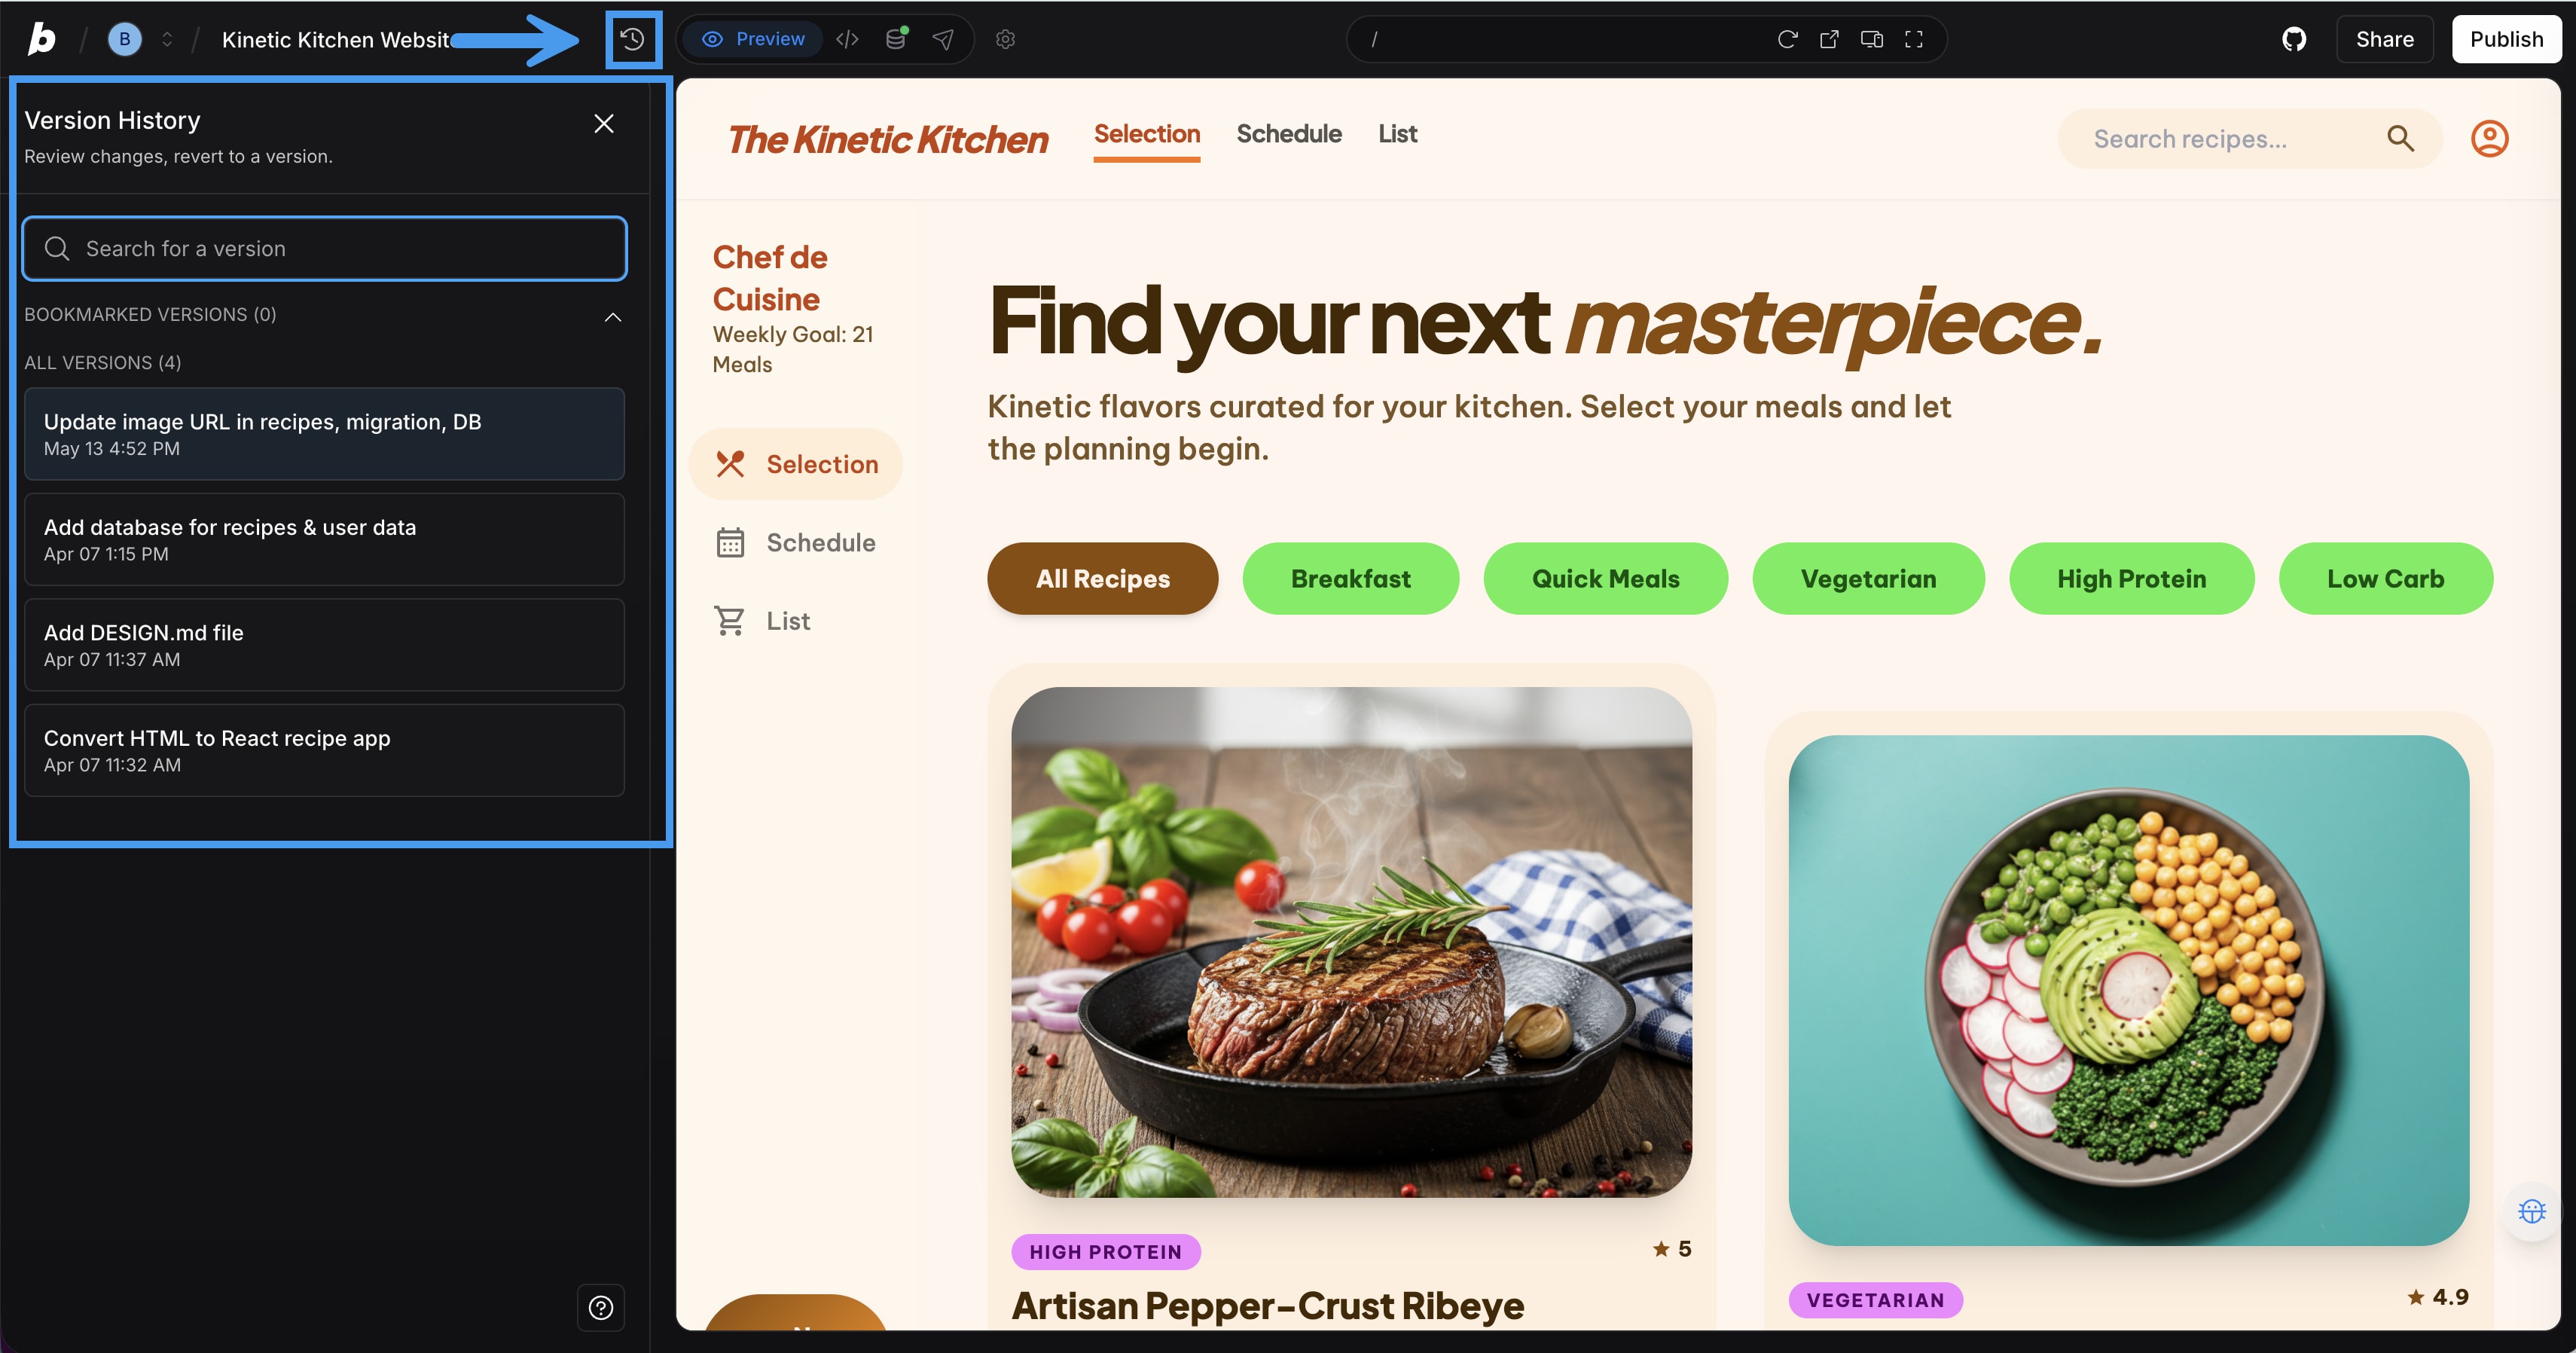
- Open a project that you’ve made changes in.
- In the top menu, click Version history (clock icon).
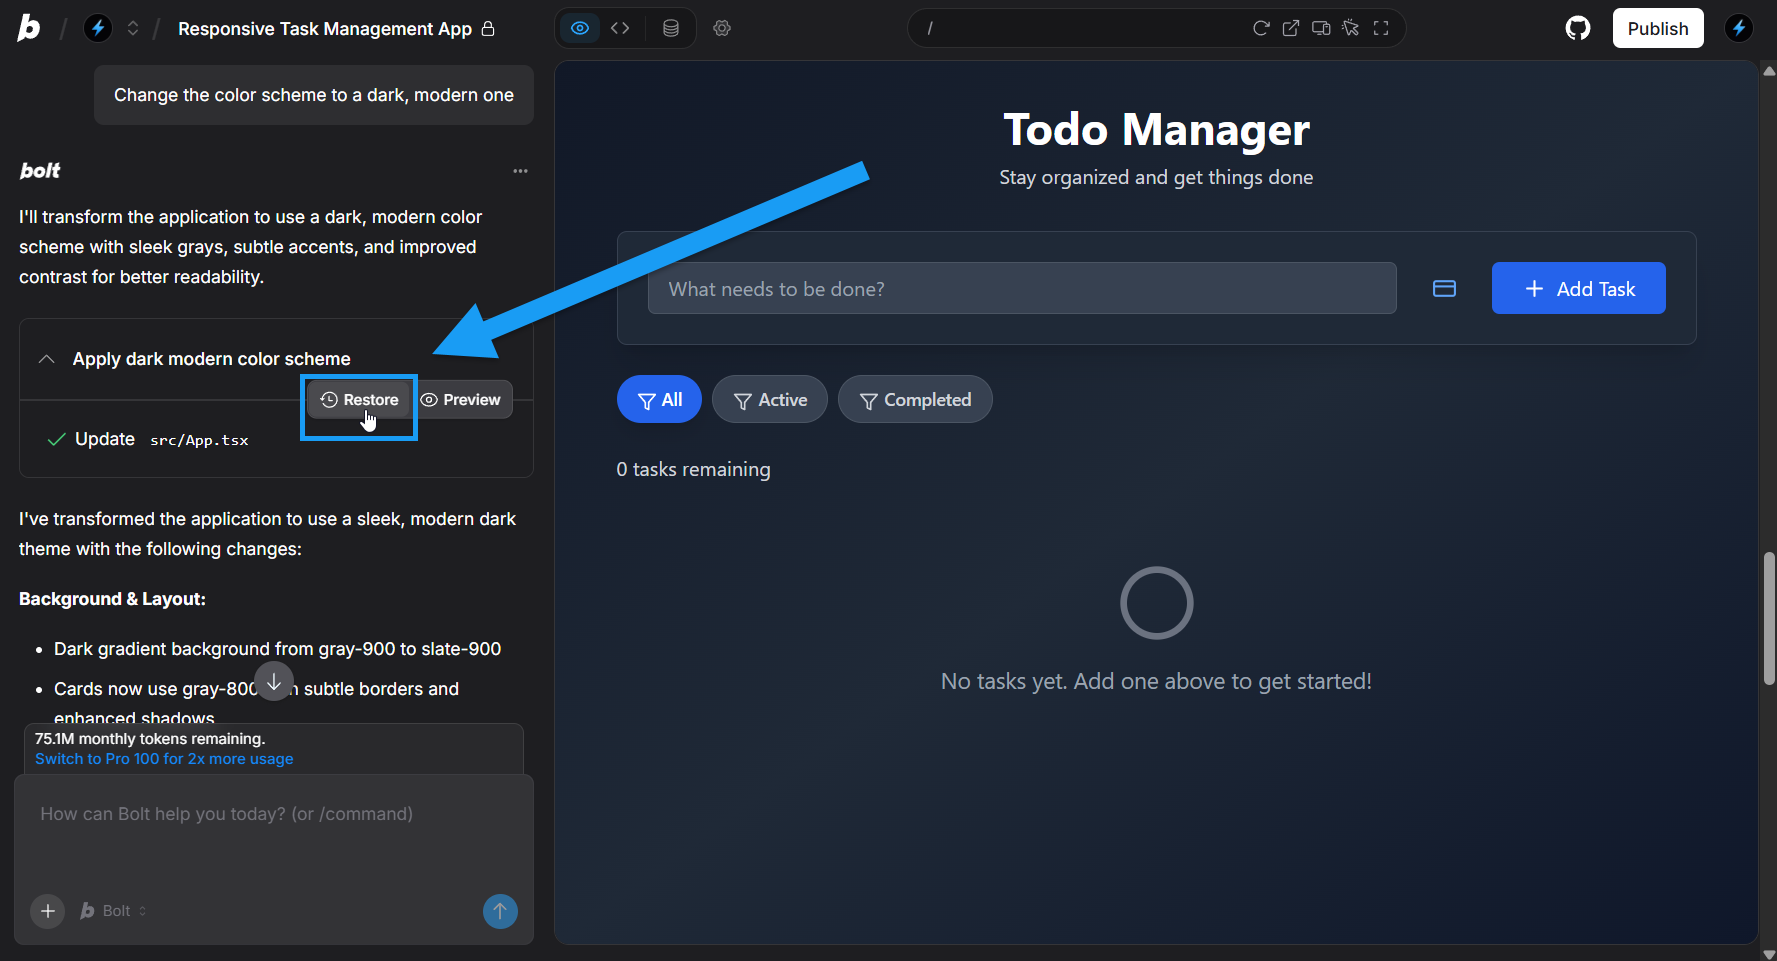
- In the Version history list, click the version you want to restore. Bolt loads a preview of that version.
- In the top-right of your screen, click Restore this version, then click Restore version to confirm.
After following these steps, you should see a success message in the chat history telling you that the version you selected has been restored.
Change a backup name in version history
Version history lets you change the auto-generated name of a backup so it’s easier to recognize. To change a backup name:- Open a project that you’ve made changes in.
- In the top menu, click Version history (clock icon).
- In the Version history list, hover over a version, then click Change name (pencil icon).
- Enter a new name, then press ENTER or click the down arrow to save.
Bookmark a backup in version history
Version history also lets you bookmark backups so you can quickly find important versions later. To bookmark a backup:- Open a project that you’ve made changes in.
- In the top menu, click Version history (clock icon).
- In the Version history list, hover over a version, then click Bookmark.
You’ll now see that version listed in the Bookmarked Versions section of Version history.
Version history and database restores
Restoring to an earlier project version will not change your current Bolt or Supabase databases.Restore using your chat history
Version history gives you a quick overview of your backups so you can easily pick the right one without mixing them up. However, if you already know which backup you want and it’s recent, you may find it easier to restore directly from the chat. To restore from chat, follow the steps below:-
Scroll up in your chat history and find the version you want to restore.
- Click the eye icon to preview the version.
- Click the return arrow icon when you’re sure it’s the version you want to restore.
- Click Restore version to confirm.
Export a local copy of your project
You can download a copy of your site to use locally or to restore it in Bolt later. Follow these steps to export your project: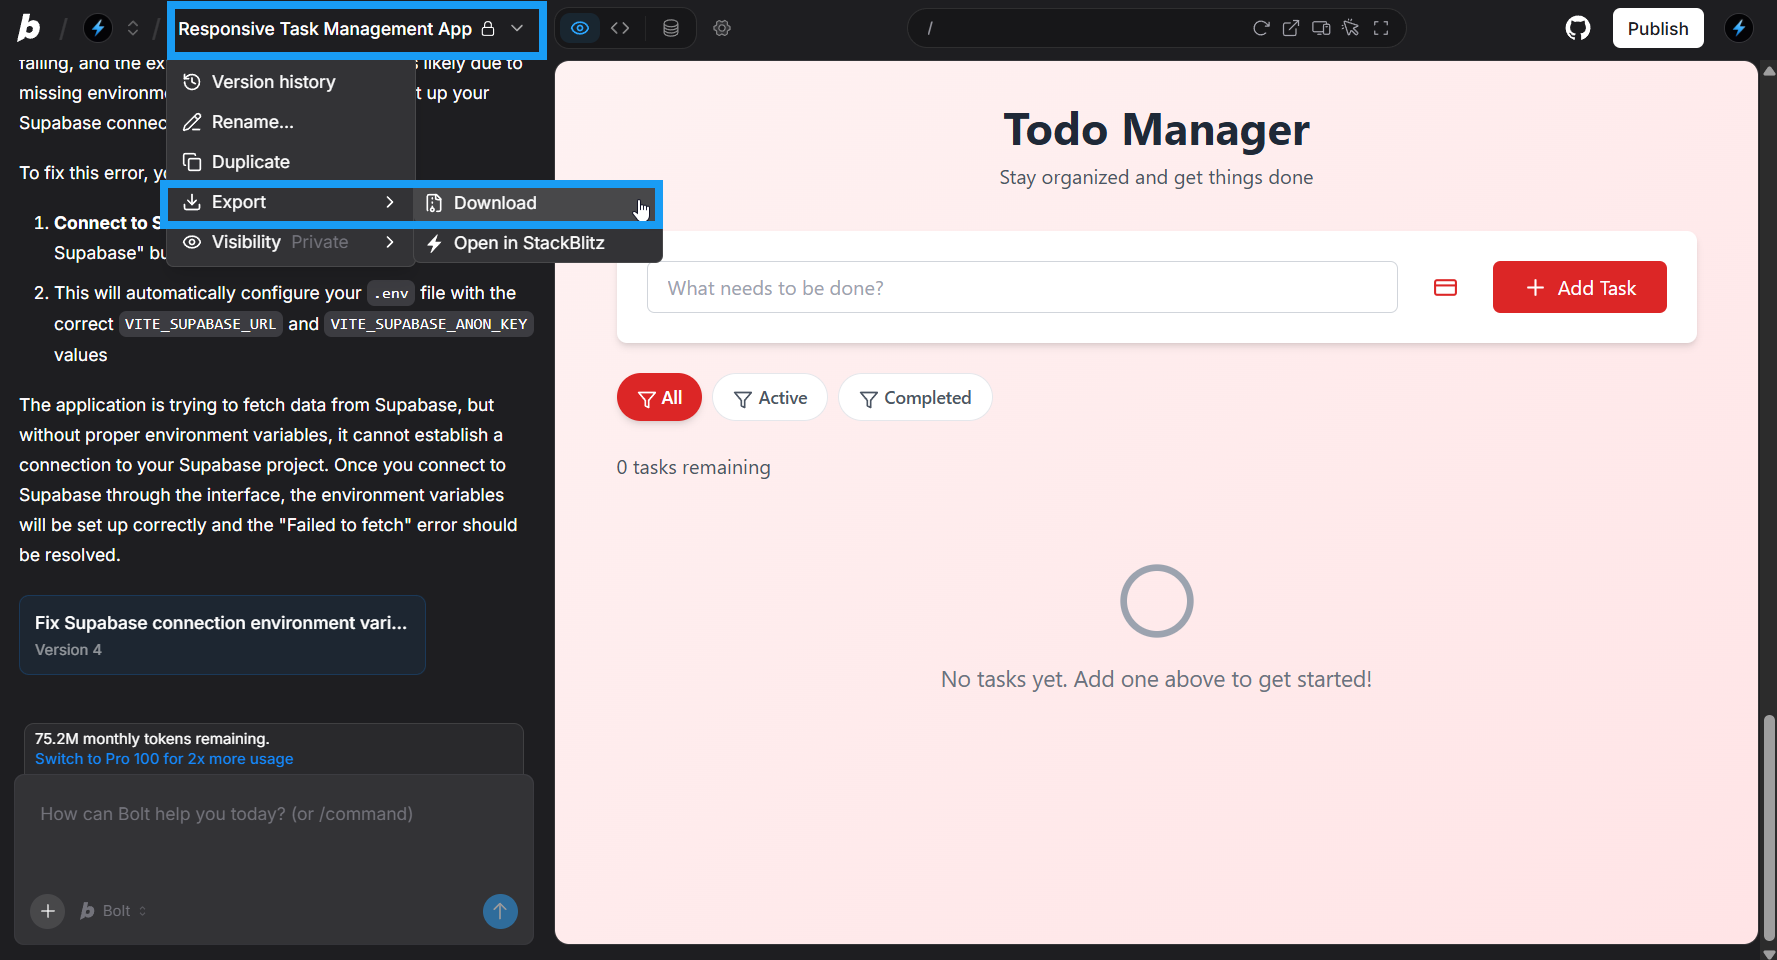
- Log in to your Bolt project.
- In the top left of your screen, click the project title, then click Export > Download.
Restore from a downloaded copy
You can create a new project from a downloaded copy of your Bolt project using your StackBlitz account by following the steps below:- Log in to your StackBlitz account.
- Create a new empty project:
- In your StackBlitz account, go to Projects.
- Click + New.
- Create a new project. It doesn’t matter what type you choose, as you’ll delete the contents.
- Delete all the files in the project.
- On your computer, unzip the downloaded copy of your Bolt project.
- Drag and drop the files from your download into the StackBlitz IDE.
- Click Save.
- Click Open in bolt.new | AI to open the new project in Bolt.