- Keep things simple: Bolt handles the tricky parts of Git for you.
- Keep branches separate: Each branch has its own memory, so nothing “bleeds over” between them.
- Give you control: You decide which projects connect to GitHub.
- Give GitHub organization admins control: Admins can decide which organization repos are available to which organization accounts.
Connect GitHub
To connect your GitHub account to Bolt, you’ll first need an individual GitHub account.If your GitHub organization is connected to Bolt, you can access organization repositories through your org instead. See GitHub organization setup for details.
- Log in to your Bolt account and open a project.
- Click the GitHub icon in the top right of your screen.
- Click Log in to GitHub.
- Click Authorize stackblitz. (StackBlitz is Bolt’s parent company.)
- Follow any further verification steps required.
Create a new repository from a Bolt project
Prerequisite: You must have GitHub connected to Bolt.
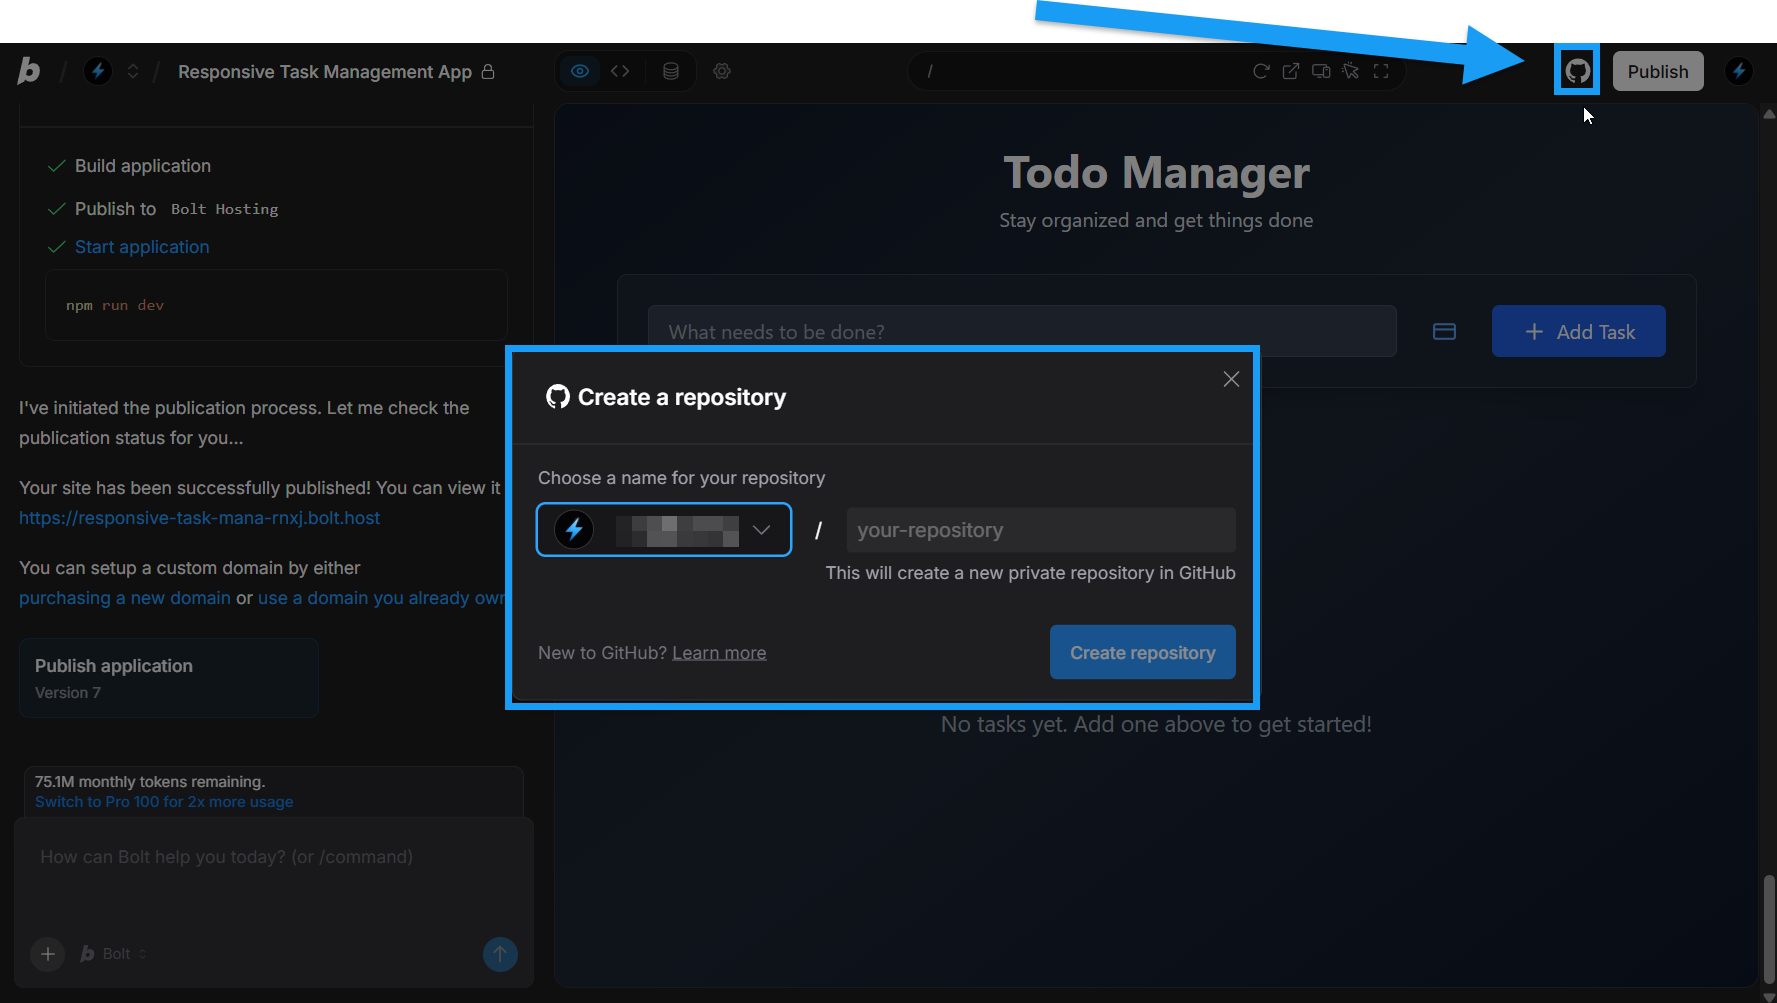
- Log in to your Bolt account and open the project you want to link with a new GitHub repository.
- Click the GitHub icon in the top right of your screen.
- In the Create a repository window that appears, enter a name for your new repository.
- Click Create repository.
- Click Start building to return to Bolt.
main branch. You can set the repository to public in your GitHub settings, and you can create new branches in Bolt or on GitHub. See Branching and merging for more information.
Import an existing repository
To import a project into Bolt from one of your GitHub repositories, follow the steps below:- On the Bolt homepage, click the GitHub icon below the primary chatbox.
- Choose how you want to import:
- Use the drop-down menu to select the repository you’d like to import, or
- Click the Import from URL button, then enter your GitHub repository URL.
- Click Choose this repository.
- Bolt will load your repository as a new Bolt project.
GitHub organizations integration
Bolt supports working with GitHub organizations, which allow teams to install the Bolt app at the organizational level and choose which repositories are visible to members inside Bolt. To learn more, see GitHub organization setup.Disconnect GitHub
Fully removing your GitHub integration is a one-step process if you used your GitHub account to create your Bolt account, or a two-step process if you did not. Either way, start by following the steps below:1
Revoke access in GitHub
- Log in to GitHub.
- Click your profile icon in the top-right corner of your screen.
- Click Settings.
- Click Applications in the left-side navigation menu (likely near the bottom of the menu).
- Click the Authorized GitHub Apps tab.
- Click Revoke in the Bolt/StackBlitz row.
- Click I understand, revoke access.
2
Delete the GitHub connection in StackBlitz
- Log in to StackBlitz.
- Click Settings in the left navigation menu.
- Click the Credentials tab.
- Click Delete in the GitHub section.
Branching and merging
When working with a shared GitHub repository it is a good habit to create a new branch for your changes rather than committing directly to themain branch. This helps keep work isolated, reduces the chance of merge conflicts, and makes it easier to review and collaborate on changes. You can create a branch from the default branch and then open a pull request when your changes are ready to be merged.
When you create or import a repository in Bolt, you’ll start on the main branch. This is usually the live version of your project. You can do all your work on main, or create branches.
Branches allow you to:
- Work with others without overwriting each other’s changes.
-
Work on different features separately, so unfinished work doesn’t go live.
For example, if you’re building three new features on the main branch, you’d have to finish all three before publishing. With branches, you can finish and merge each one into main as they’re ready.
Create a new branch in Bolt
Prerequisite: You must have GitHub connected to Bolt and a repository already created.
- Log in to Bolt and open a project that is already linked to a GitHub repository.
-
Click the GitHub icon in the top-right of your screen.
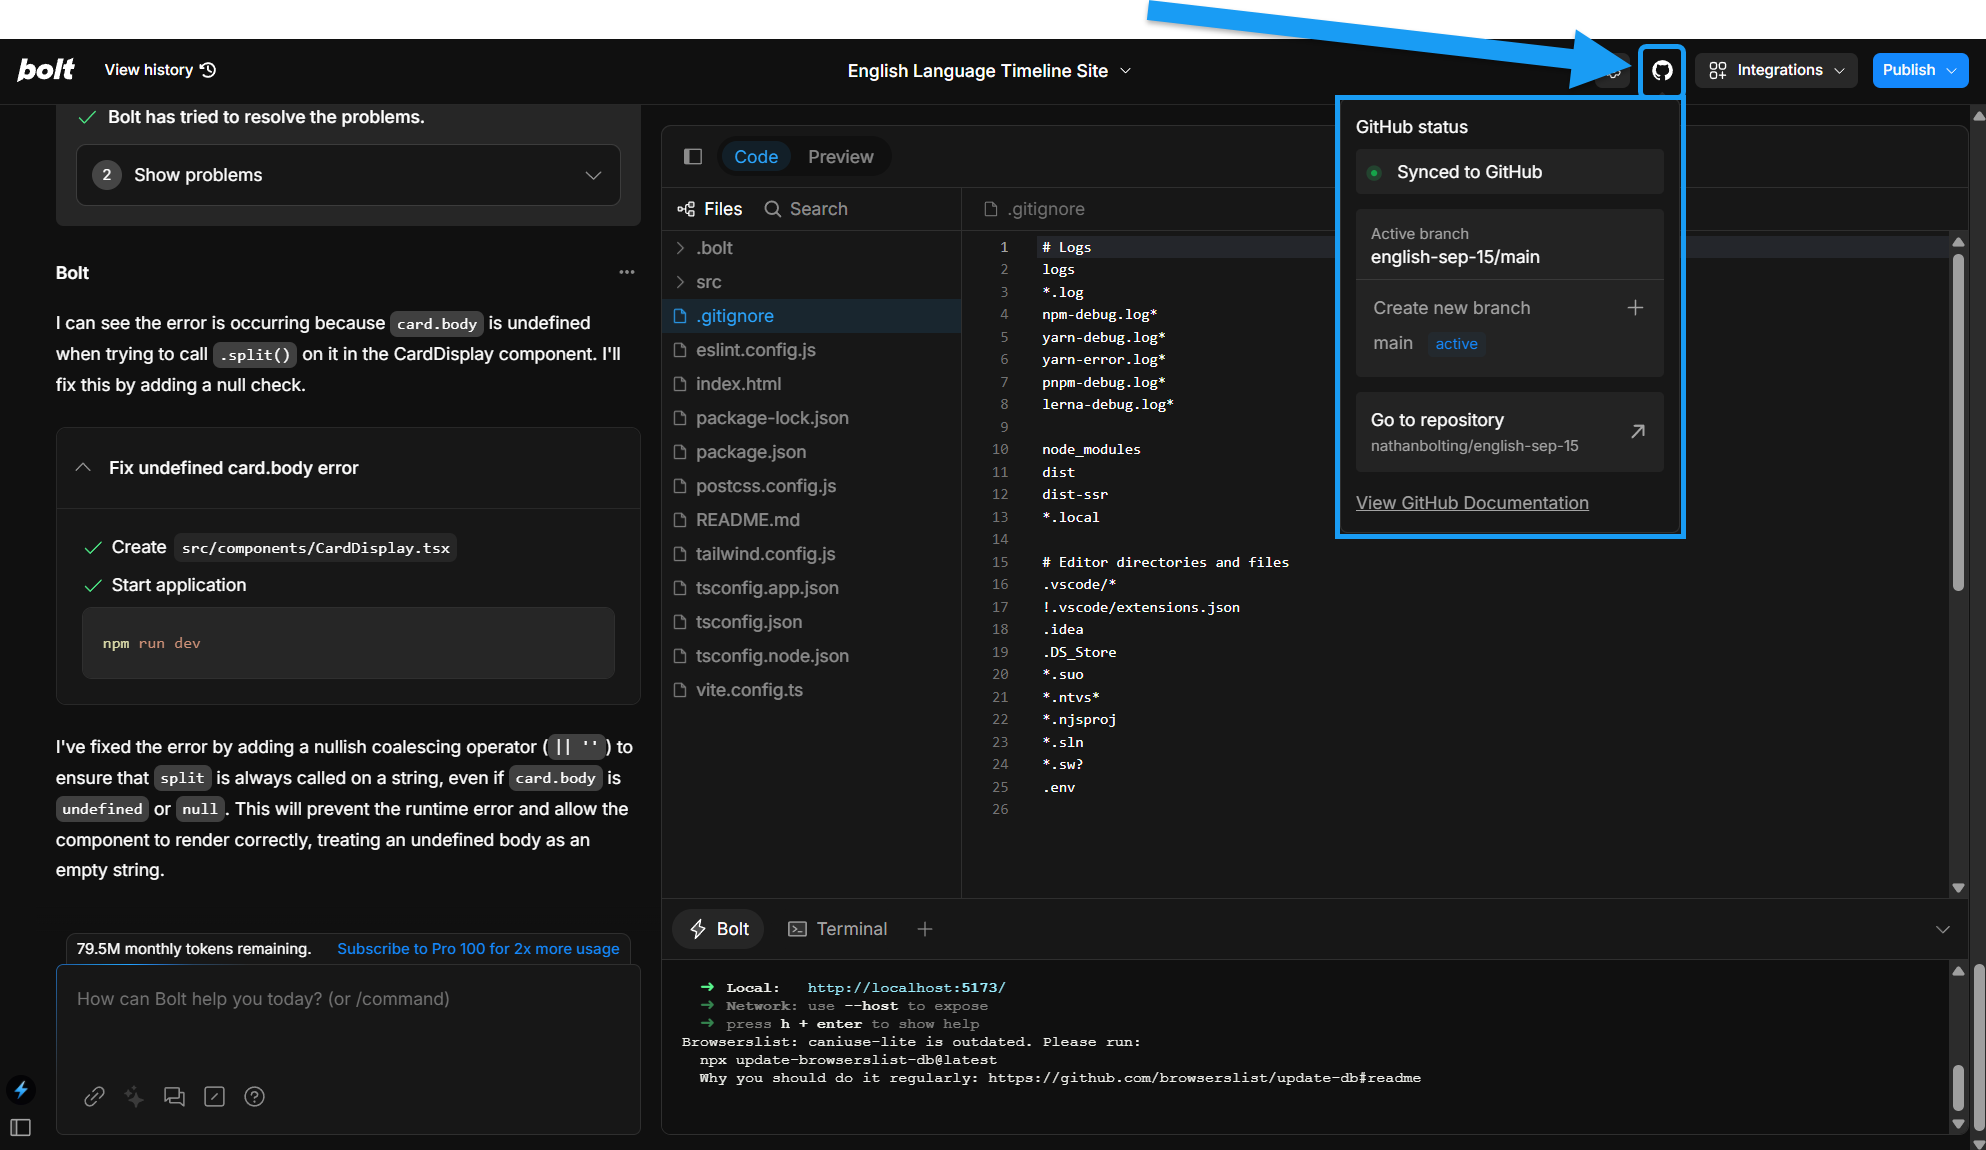
- Click Create new branch.
- Enter a branch name.
- Click Create branch.
You’re now working on your new branch, which is also created in your GitHub repository.
Change branches in Bolt
Prerequisite: You must have GitHub connected to Bolt, a repository already created, and multiple branches created.
- Log in to Bolt and open a project that is already linked to a GitHub repository.
- Click the GitHub icon in the top-right of your screen.
- Select the branch you want to switch to.