Overview
By default, new projects use Bolt Database, though you also have the option to set Supabase as your default project database from the start. You can choose to claim your Bolt Database in Supabase if you want to work there, or connect an existing Supabase database to your project. Supabase provides:- A hosted SQL database, which you can connect your application to. You don’t need to worry about managing your database.
- Authentication services, for adding user login and user management to your application.
- Edge functions: Bolt uses these if your application needs to include an API. They’re also used for communicating with other applications, such as Stripe for payment handling.
Connect Bolt to Supabase
To start working with Supabase, you’ll first need to connect Bolt to Supabase. You can do this in your Account settings, under Applications.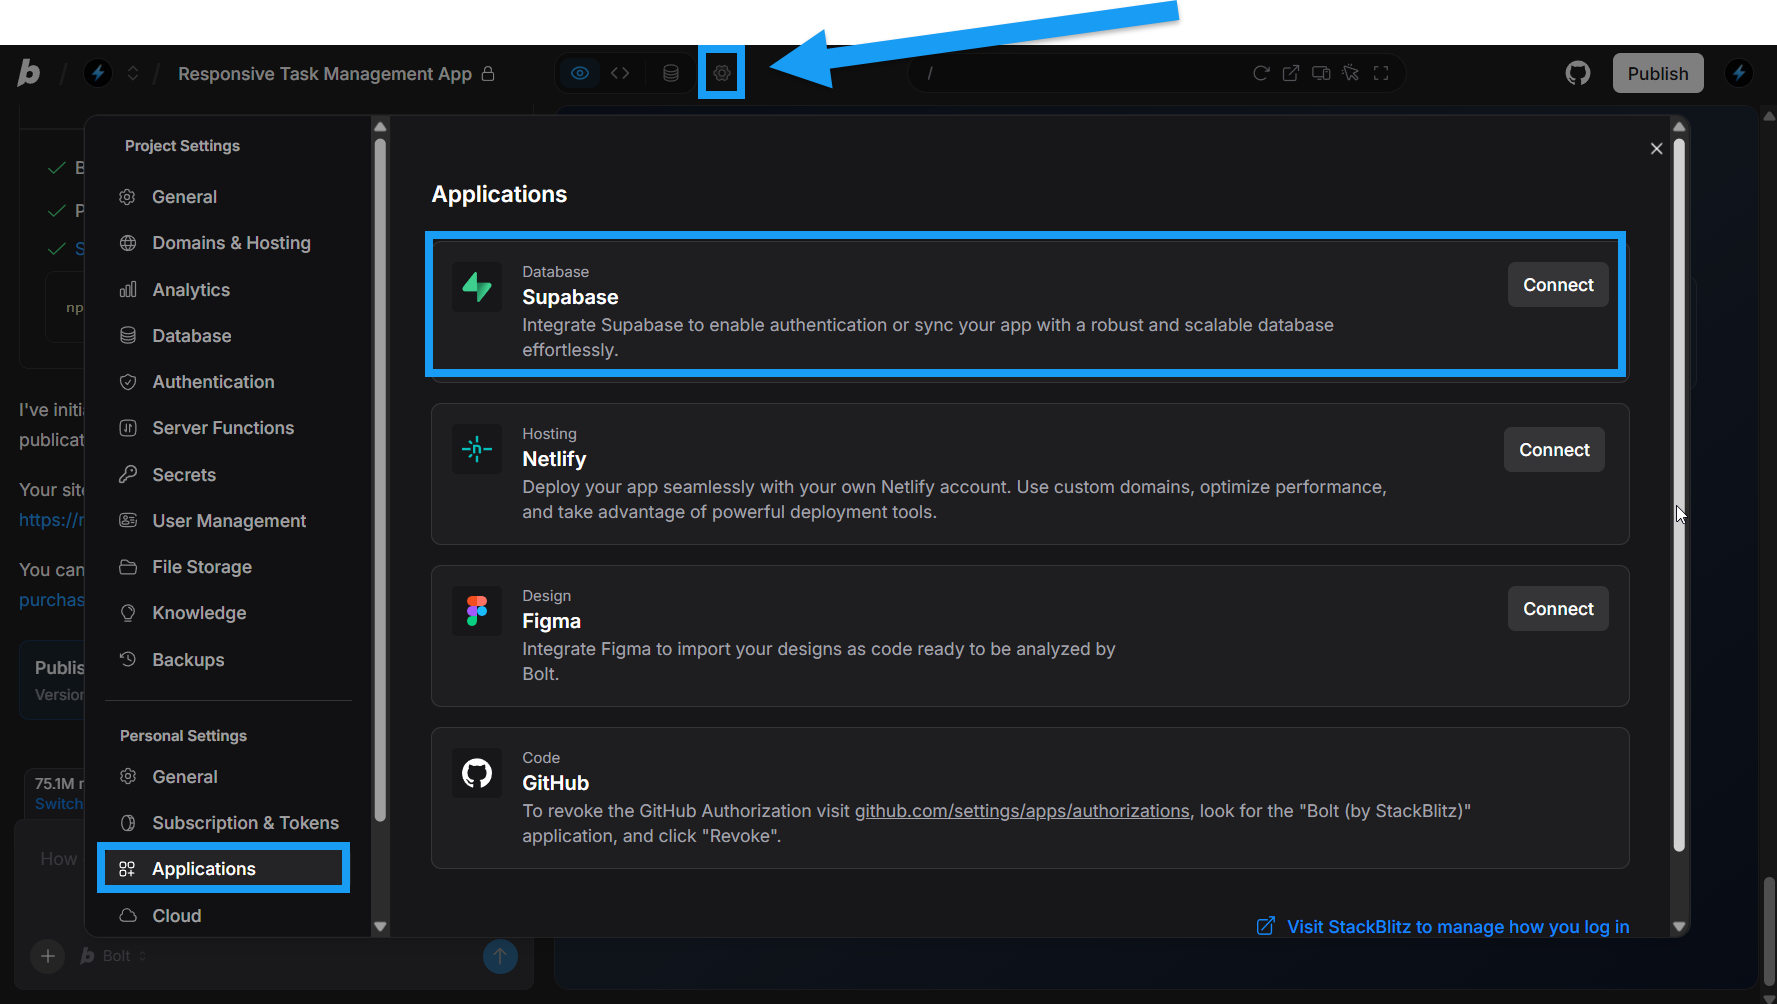
- Log in to Bolt and open any project.
- Click the gear icon in the top center of your screen, then click All project settings.
- Under Account, click Applications.
- In the Supabase row, click Connect.
- Log in with your Supabase credentials.
- Follow the steps to authorize Bolt.
Start a project using Supabase
When you create a new project from the Bolt homepage, you can select Supabase as your database during setup.This feature is available on all paid plans and requires a Supabase application connection. If Supabase is not yet connected to your Bolt account, selecting this option will guide you through the connection process.
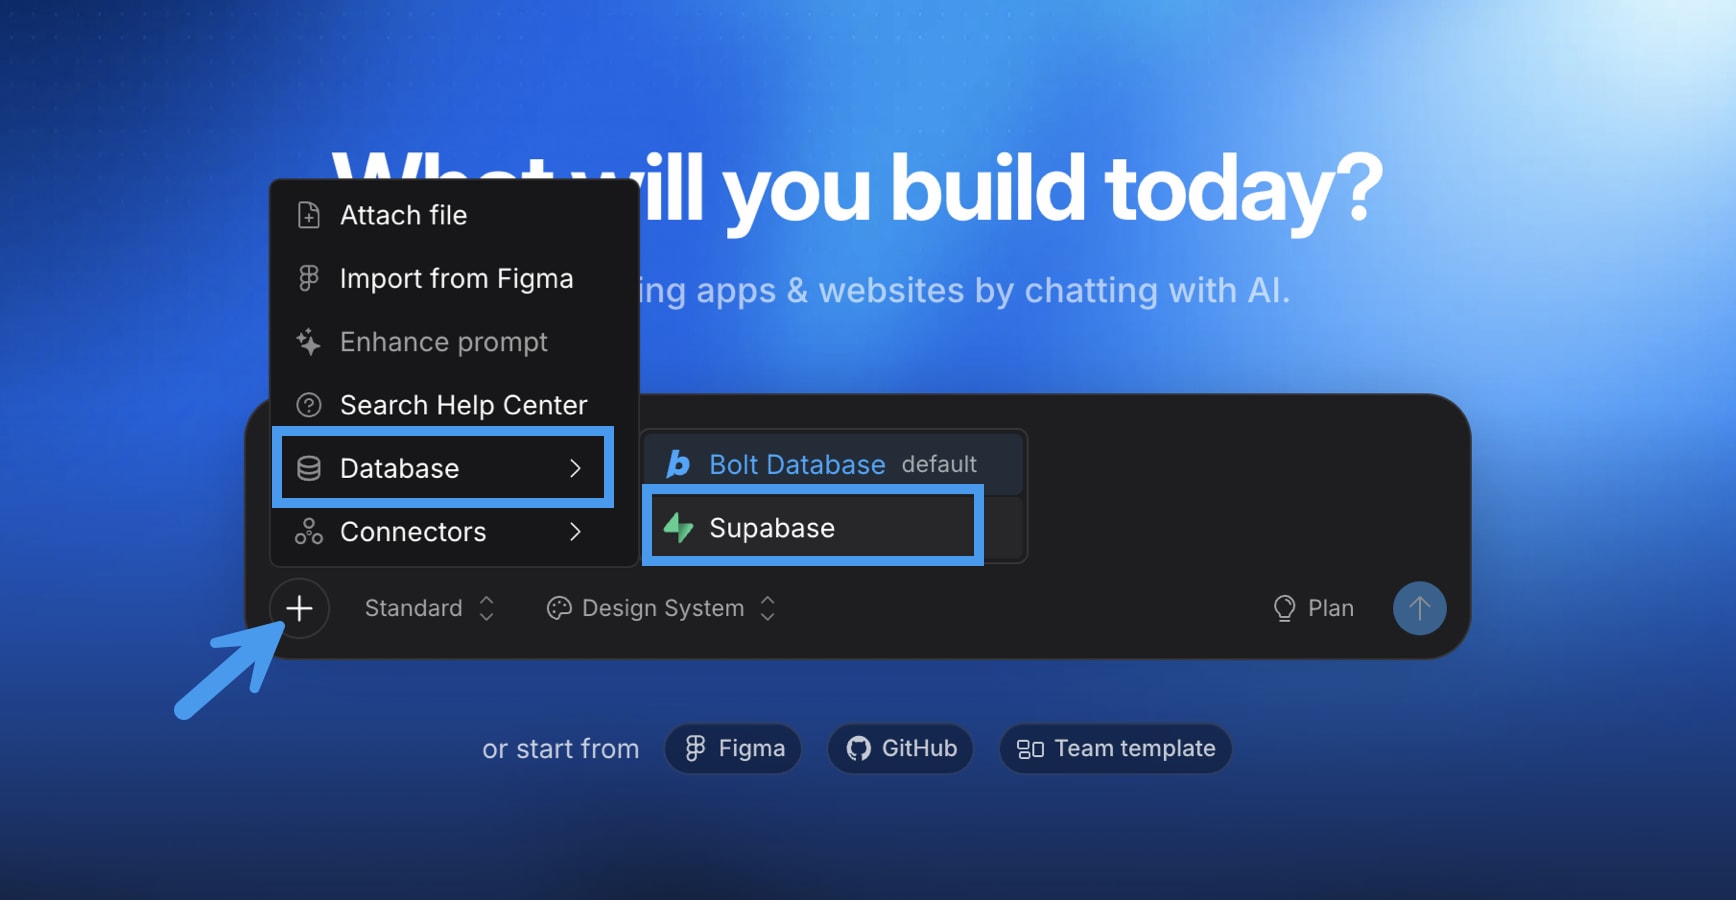
- Log in and open the Bolt homepage.
- Click the plus icon.
- Hover over Database, then click Supabase.
View Supabase data in your Bolt settings
When managing a project with Supabase in Bolt, your Supabase data appears in the database-related Bolt Project Settings. Click the database icon at the top center of your screen to view general database information. To access settings like Authentication, Server Functions, or Secrets, use the gear icon and select from the menu.Version history and database restores
Bolt’s Version History feature currently does not support Supabase database restores.
Connect a Supabase database
If you already have a Supabase database you want to use in your Bolt project, or want to create a new one, follow the steps below to connect it.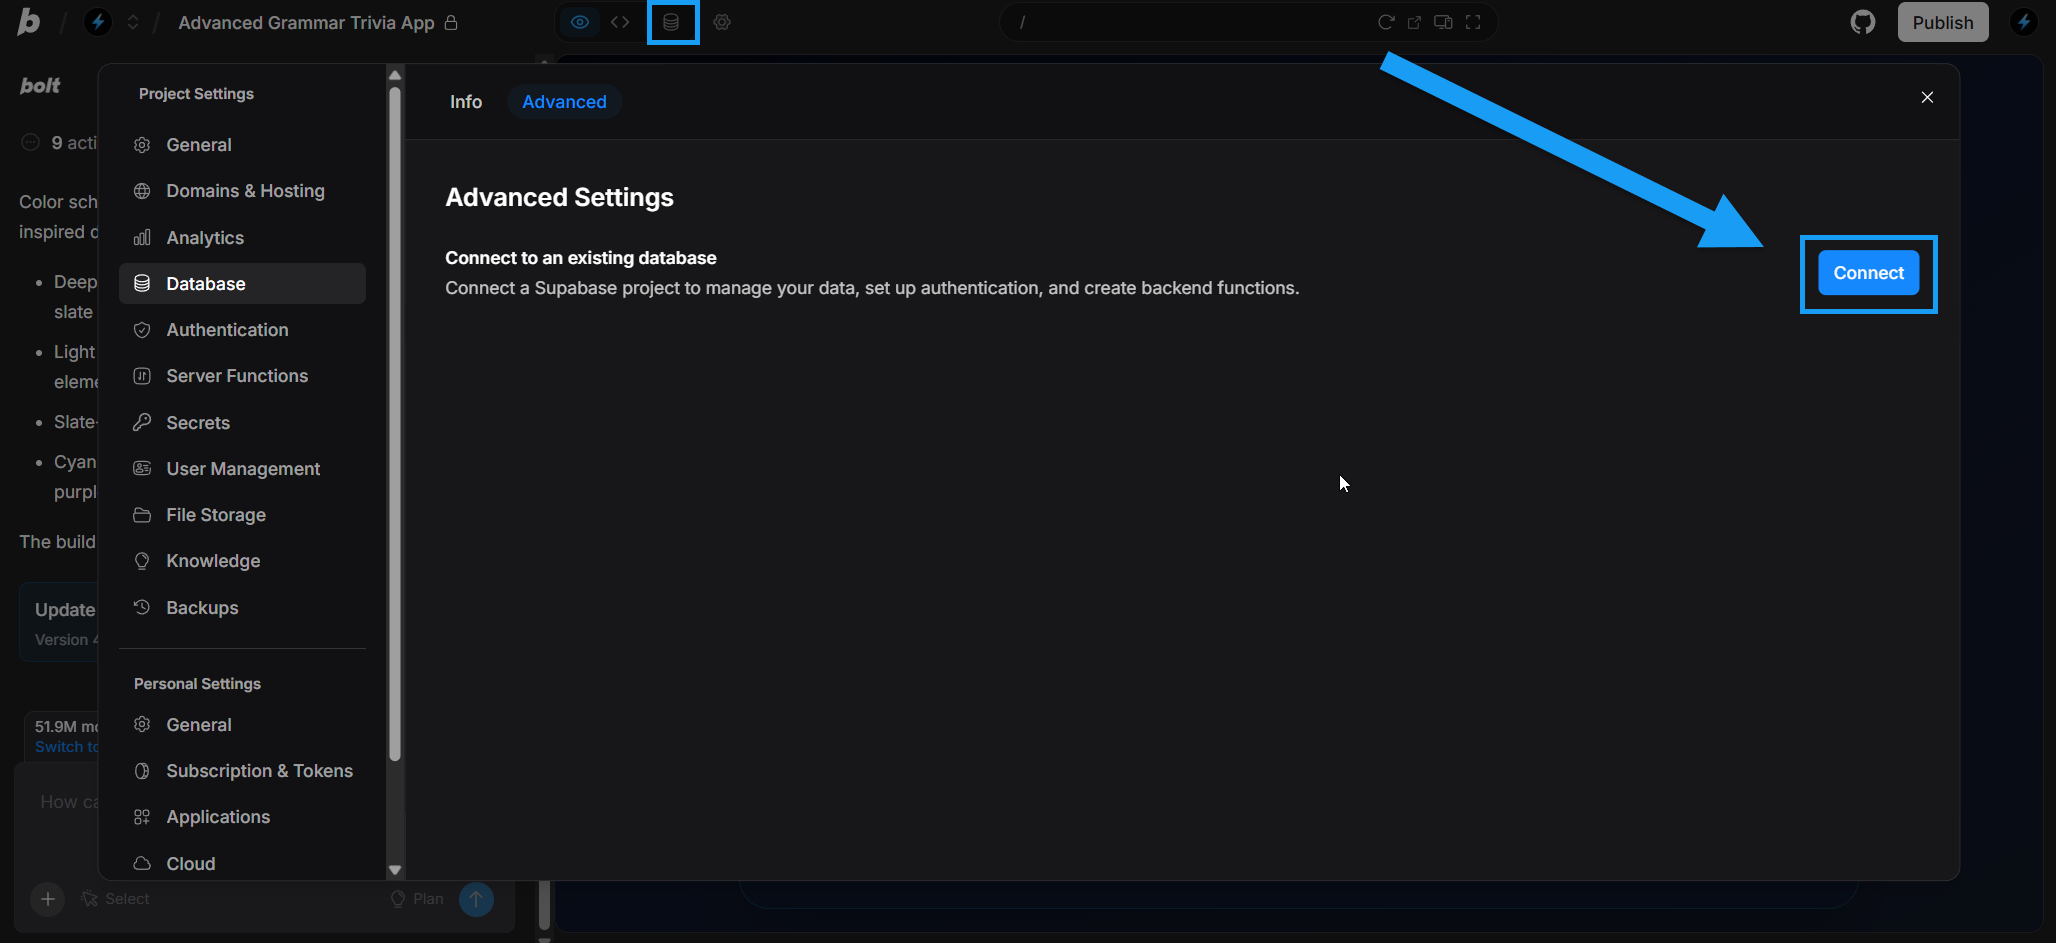
- Make sure you’ve connected Bolt to your Supabase account.
- Log in to Bolt and open the project with the database you want to claim.
- Click the Database icon in the top center of your screen.
- Click the Advanced tab.
- Click Connect.
- Select an existing Supabase project or create a new one.
- Click Connect project.
Claim your Bolt Database in Supabase
Claiming your database lets you migrate an existing Bolt database to Supabase. If you already have a Supabase database and want to connect it to your Bolt project, see Connect a Supabase database instead. The main reason you may want to claim a Bolt database in Supabase is to access advanced Supabase features. For most use cases, using a Bolt database is simpler and gives you unlimited free databases. However, if you need external management tools, SQL editing, or advanced monitoring, you may need to use Supabase.To claim your database in Supabase, you must be a Supabase org owner. These permissions are controlled through your Supabase account, not through Bolt. If you’re not the org owner, ask the org owner to claim the database or adjust your permissions.
- Make sure you’ve already connected Bolt to your Supabase account.
- Log in to Bolt and open the project with the database you want to claim.
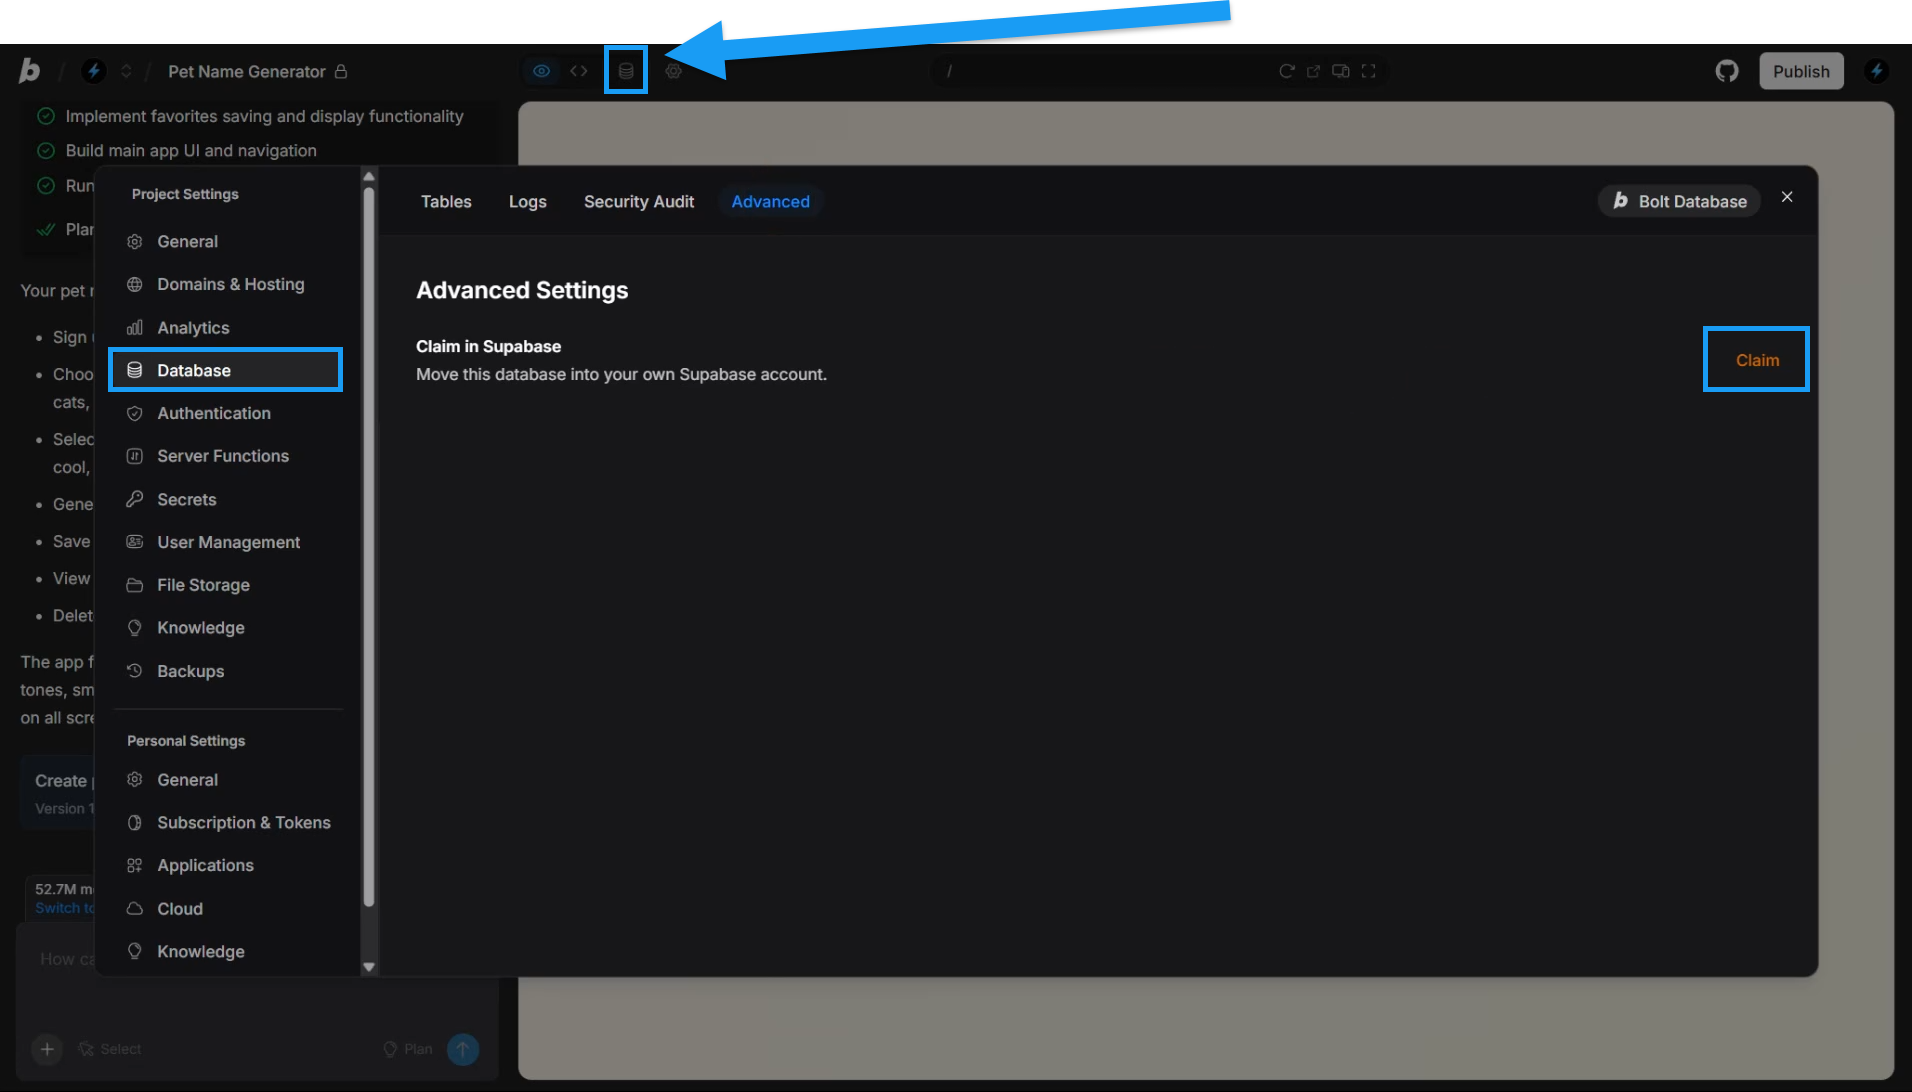
- In the top center of your screen, click the Database icon.
- Click the Advanced tab.
- Click Claim.
- Complete additional steps in Supabase.
You should now see your claimed database appear as a Supabase project. If you don’t see the connected database, refresh the Supabase Projects page in your browser.
Use Supabase in a v1 Agent (legacy) Bolt project
Use this section only if your project doesn’t yet have a Bolt database and is working with the v1 Agent (legacy). If your project does have a Bolt database, you must claim the database in Supabase.
- Make sure you’ve connected Bolt to your Supabase account.
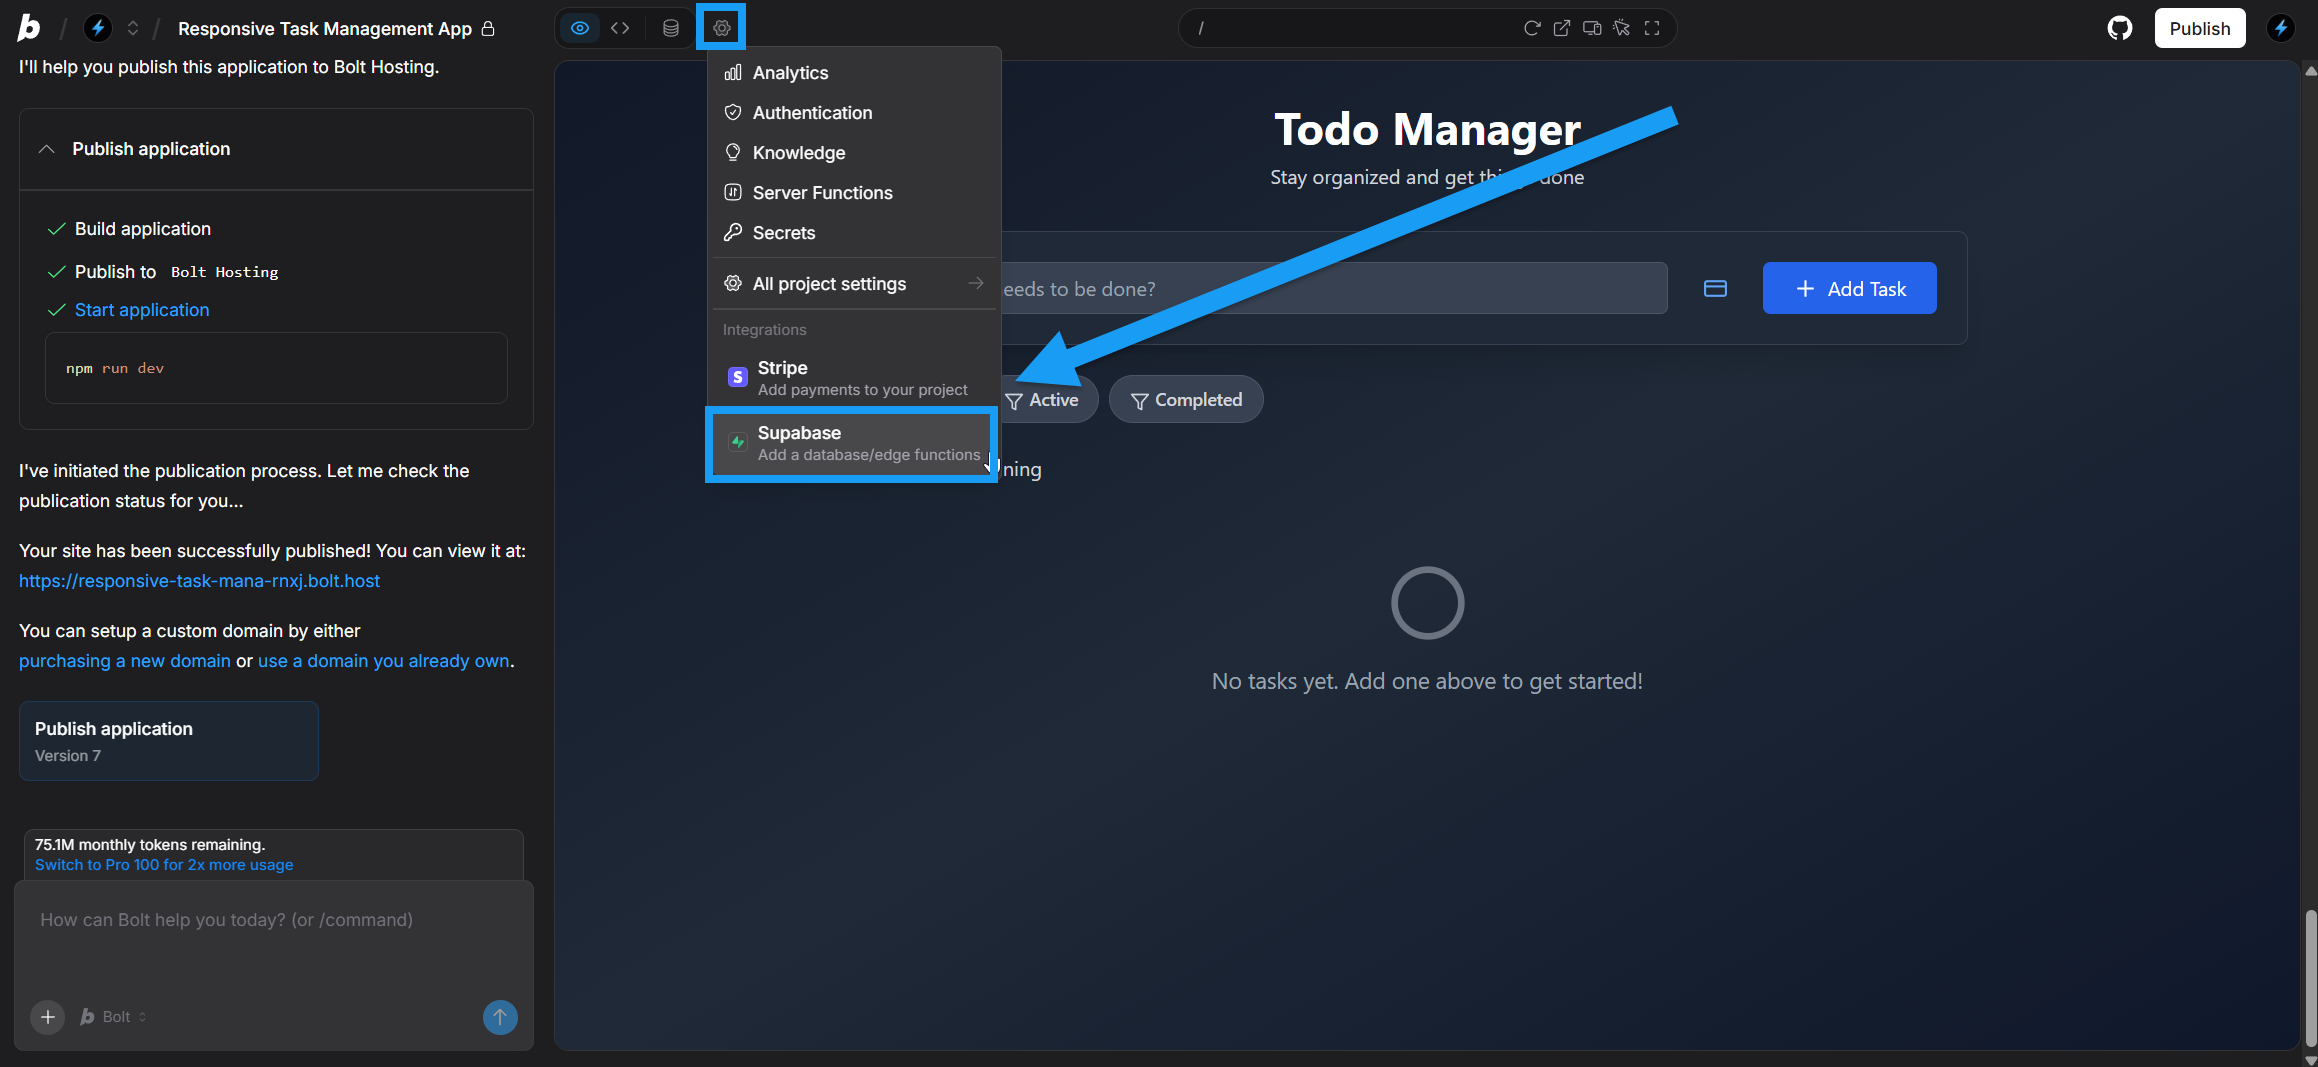
- Click the gear icon in the top center of your screen, then click Supabase.
- Choose an existing Supabase project to connect to, or create a new one.
- Refresh your Bolt project in your browser.
Bolt now uses your connected Supabase project for database operations.
Disconnect Supabase
- Log in to any project.
- Click the gear icon in the top center of your screen, then click All project settings.
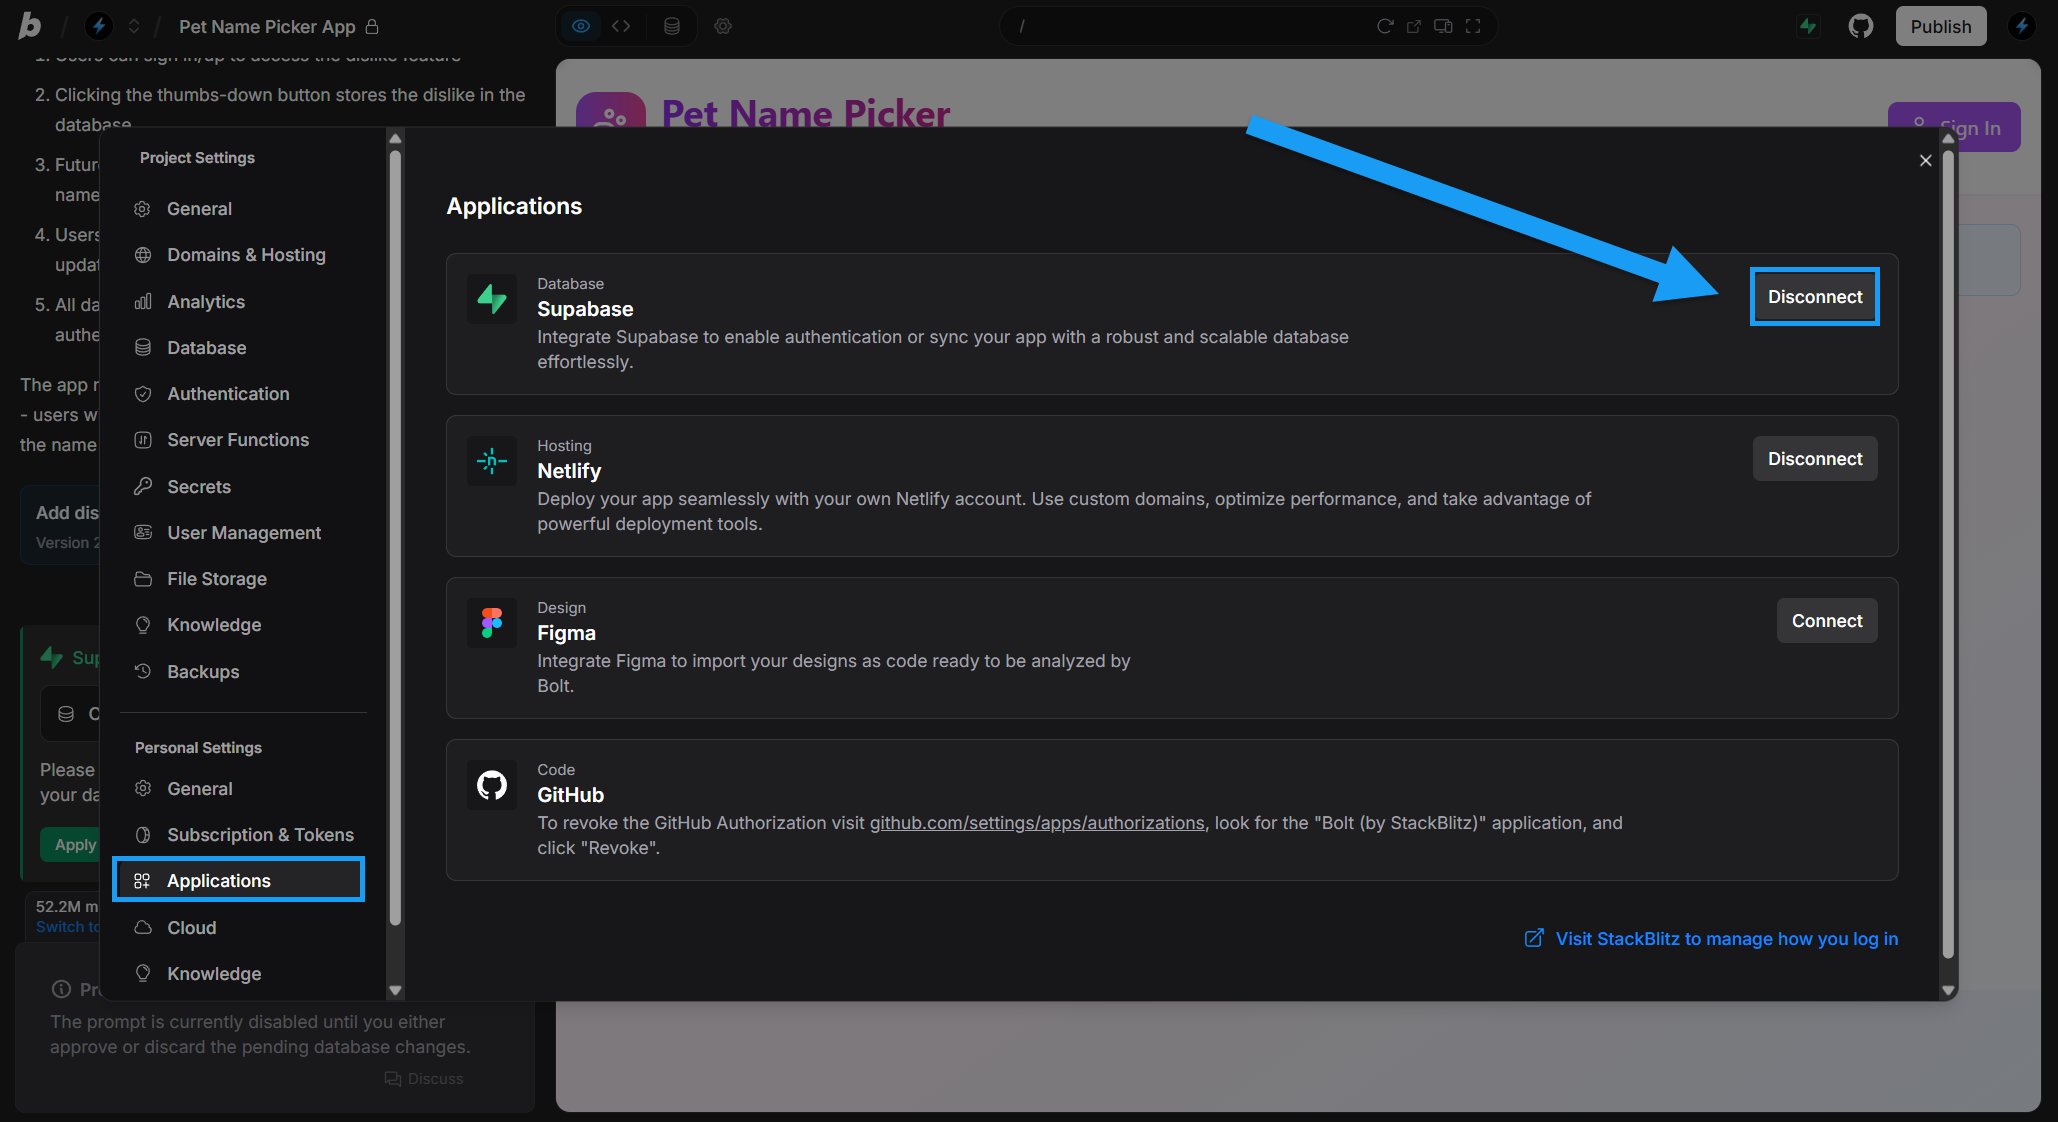
- Click Applications under Account settings.
- In the Supabase row, click Disconnect.
- In Supabase, remove Bolt from your authorized applications:
- In the Supabase dashboard, make sure you’re in the organization that you connected to Bolt.
- In the left menu, click Organization settings.
- Go to the OAuth Apps tab.
- Next to Bolt, click Delete.
Using authentication
If you tell Bolt to add authentication with Supabase, users will be able to sign up for your application and log in using Supabase’s user management service. To use authentication:- Make sure you’ve connected your Supabase account.
- Prompt Bolt to add authentication with Supabase, including adding a signup and login screen to your application.
- In your app, go through the signup process.
- Supabase should send you an email to confirm your email address.
- In Supabase, open your project.
- In the left navigation menu, select Authentication.
- Check the Users list to confirm that the user you just created was added there.
Using edge functions
Edge functions in Bolt rely on databases. Before you begin, make sure you’ve connected your Supabase account. To get started, prompt Bolt to create the edge function you are interested in. For example:Create an edge function to handle a conversation with an AI Bot (OpenAI). From here, Bolt generates the edge function.
Edge functions can be complex, as they connect up services and involve authentication steps. For help with common errors, see Integrations issues | Supabase edge functions.
FAQs and troubleshooting
My database isn't showing in the Select your database dialog
My database isn't showing in the Select your database dialog
If a claimed database doesn’t appear in the Select your database dialog when you click Connect, try disconnecting and reconnecting Supabase in Settings > Applications. This should restore the project list.
Bolt doesn't connect to my Supabase database when I prompt it to
Bolt doesn't connect to my Supabase database when I prompt it to
The most common reasons Bolt cannot connect to Supabase are that your Bolt account is not connected to Supabase or that your Bolt database has not been claimed in Supabase.
Can I switch from Supabase to Bolt database?
Can I switch from Supabase to Bolt database?
There’s currently no supported flow for migrating Supabase databases to Bolt databases.