- Make visual edits to change text, formatting, and colors directly on your slides.
- Prompt to add interactive content like charts and models or live data.
If you created your Slides project before the most recent Slides update, it won’t have the controls described in this article, like reordering slides or speaker view. Create a new Slides project to use them.
Build a presentation in Bolt
- On the Bolt homepage, below the chatbox, click Slides.
- In the chatbox, describe the presentation you want to create.
-
To establish an overall visual style for your deck, you can:
- Describe a look and feel: Describe a color palette, tone, or mood to explain the visual style you want.
- Add images: Upload images as inspiration or to display in your slides. On paid plans, you can also ask Bolt to generate images that match a specific style.
- Use your team’s design system: If your team has a design system set up, select it in the chatbox so Bolt builds the deck using your components and brand styles.
- Send your prompt.
Reorder, duplicate, or delete slides
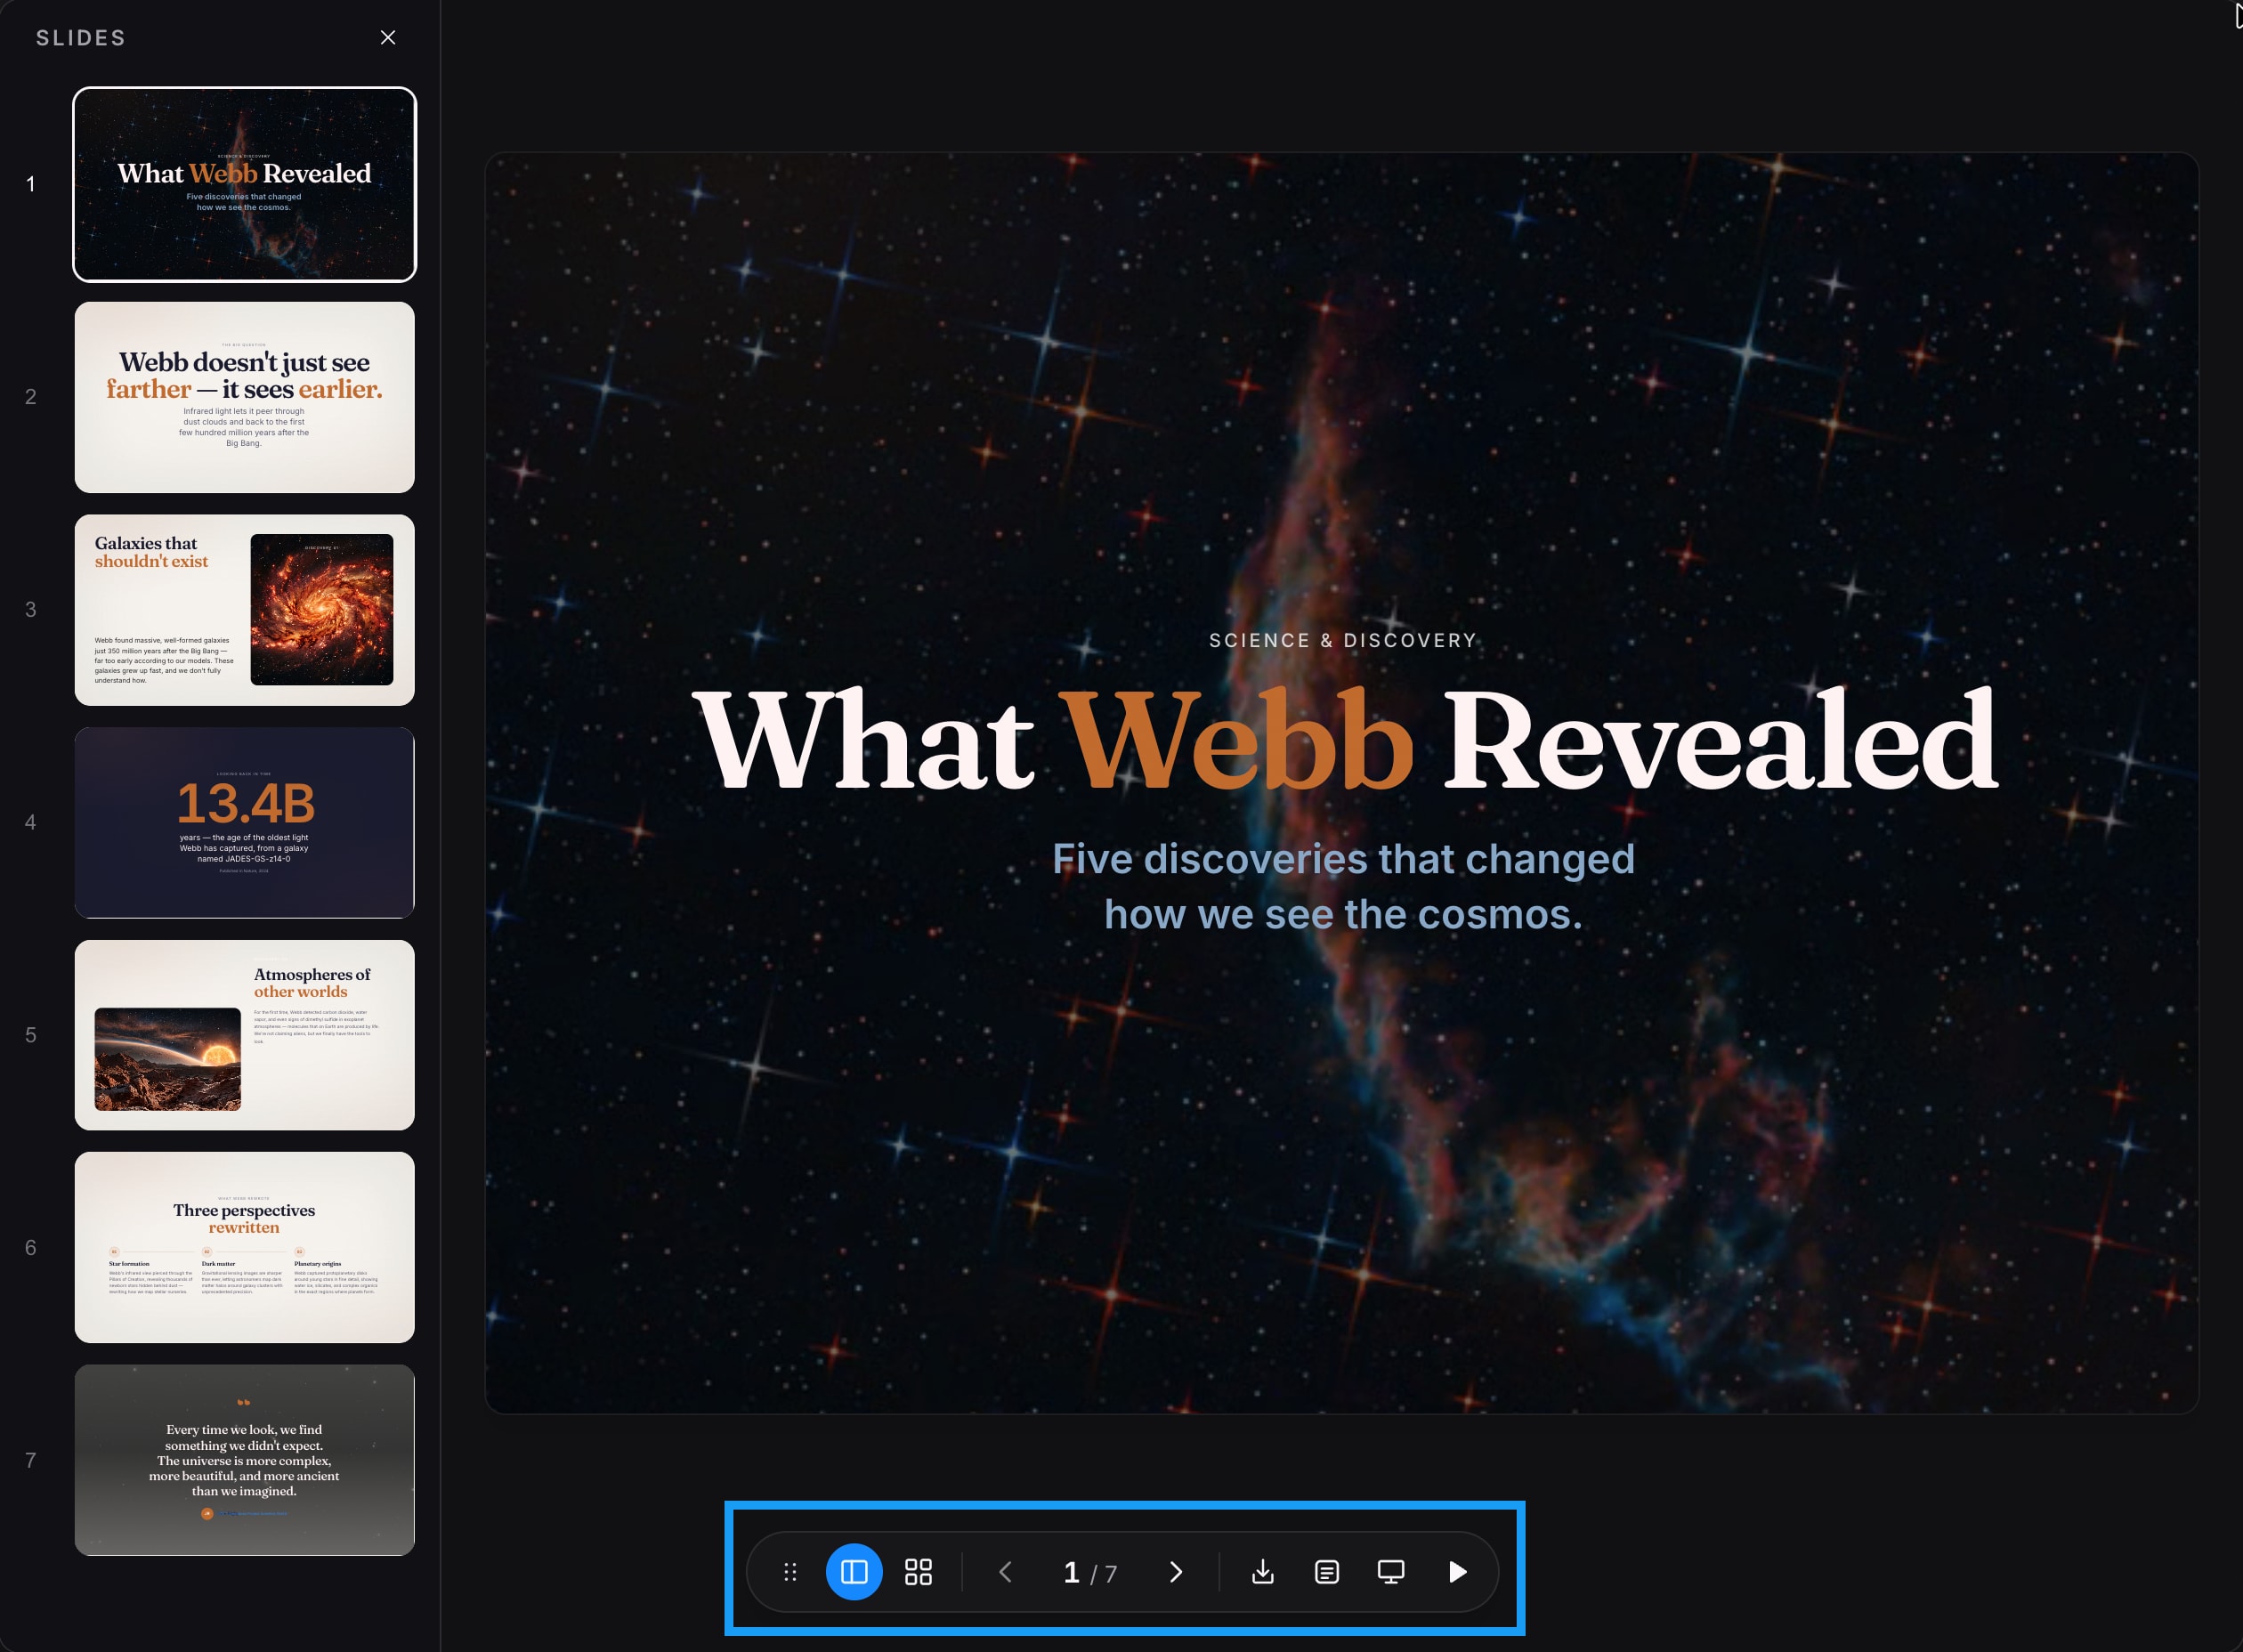
You can reorder, duplicate, or delete slides from the side panel or grid overview.The side panel is open by default when your deck is created and shows a scrollable vertical list of your slides alongside your deck preview.To view your slides in a horizontal layout, click Grid overview in the Slide deck toolbar.
- Reorder: In the side panel or grid overview, drag a slide’s thumbnail to a new position.
- Duplicate or delete: Right-click a slide’s thumbnail, or click its three-dot menu, then select Duplicate or Delete.
Update the styling of your deck
To change the appearance of your deck, you can make individual edits directly on the slides or prompt Bolt to make larger changes across your whole deck. You can also combine these approaches as needed to get the look you want.Make visual edits to your slides
Click text, images, and other elements directly on a slide to edit them and see how they look before saving them to your deck.Update your whole deck at once
Your deck’s colors, fonts, and spacing are controlled from one place, so a single prompt can update all of them together. Try a prompt like this:Update the slide theme to a dark background with blue accents.
Alternatively, if you made a visual edit you want to apply across your whole deck, add a note in the chatbox when sending your edits to have Bolt apply that same change to every slide.
Add interactive content
Here are a few examples you can try to add interactive elements to individual slides. Make sure to update the placeholder information in these sample prompts so they’re specific to what you’re building.Write and format speaker notes
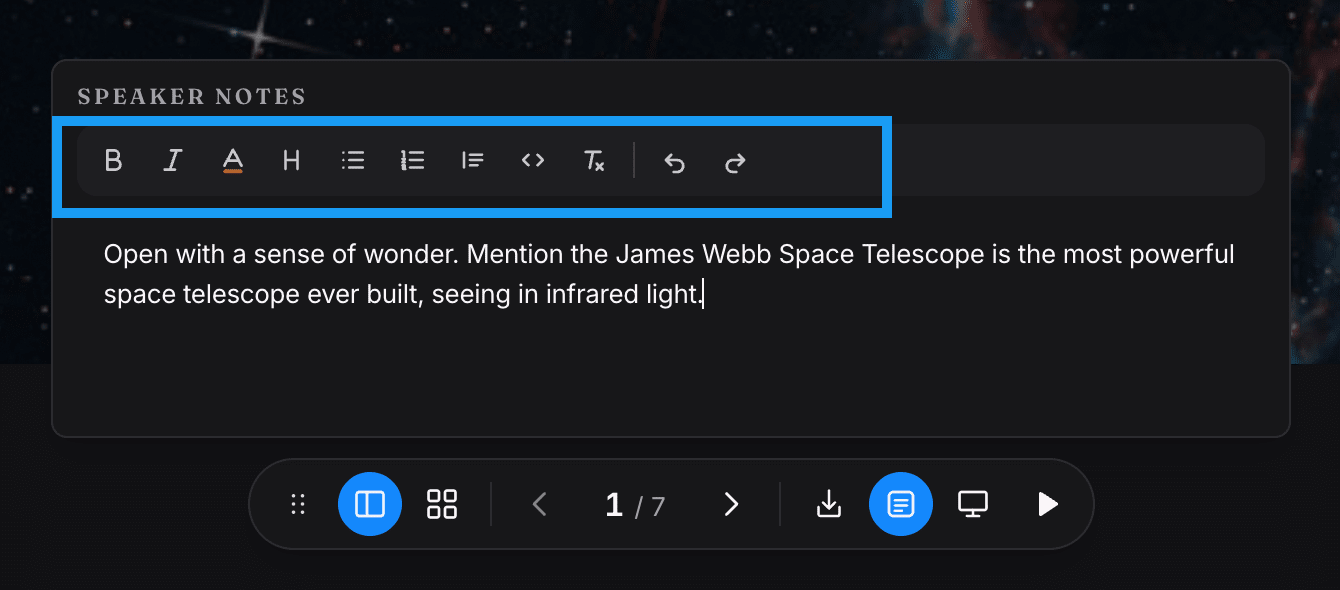
Bolt generates speaker notes for every slide when it creates your deck. To view, edit, or delete these notes, click Speaker notes in the slide deck toolbar. Speaker notes support rich text editing, so you can format your notes for emphasis and readability. See Speaker notes toolbar for the full list of formatting options and shortcuts. Speaker notes are visible in speaker view. They’re not visible to your audience when you present or when someone views your published deck.Share your deck with collaborators
To let others view or edit the deck while you’re working on it, share your project. You can control the level of access each collaborator has:- Viewer: Can see content to provide feedback.
- Editor: Can prompt and edit the deck alongside you.
- Co-owner: Can prompt, edit, or publish the deck.
Like with other Bolt projects, collaborators need to have a Bolt account and sign in to see your deck. Editors and co-owners who prompt or make visual edits use tokens from their own accounts.
Present your deck
Present and speaker view work together to help you show your deck to a group. Present is the view of your slides that your audience sees. Speaker view is your own tab, with your notes, a preview of the next slide, and a timer. To present your deck, click Present in the Slide deck toolbar. This opens a new tab with your deck in presentation mode. Present works directly from your project preview, so you can rehearse or show your deck anytime, whether or not you’ve published it. To open speaker view, click Speaker view in the slide deck toolbar or the presentation toolbar. To present to a group, show your Present tab, for example by sharing your screen in a video call. Then open speaker view on a second device or window. See Presentation toolbar for the full list of controls available when you’re presenting.Annotate your presentation
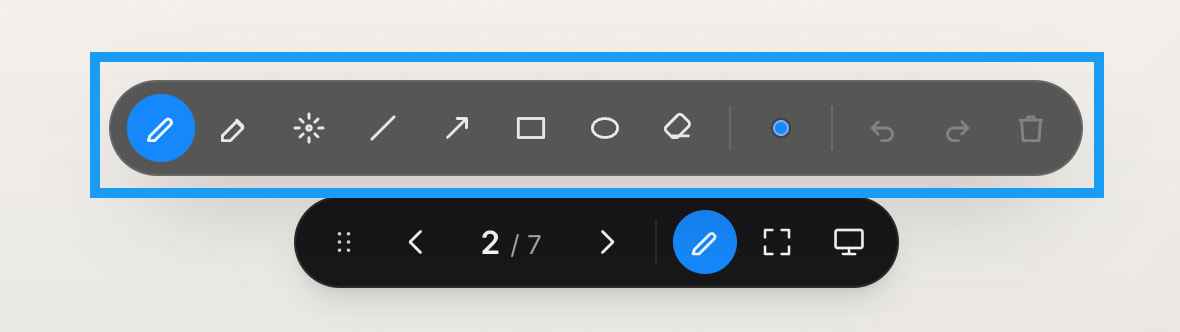
Annotations let you draw on your slides freehand, create shapes, or use a laser pointer. In the presentation toolbar, click Annotate, then click the tool you want to use. See the Annotation toolbar for the complete list of tools and controls. Annotations save on your slides and stay there even if you change slides or reload the deck. When presenting, annotations appear on the shared screen. When viewing a deck on your own device, they’re visible only to you.Publish your deck
To create a link people can open on their own devices, publish your project to a live website. After your deck is published, anyone with the link can see it and move through it independently. Moving between slides doesn’t affect what anyone else sees, and viewers can’t edit the deck. Viewers don’t need a Bolt account to visit the published URL. People who view your published deck can also see the deck in fullscreen and annotate the deck on their own device, but they won’t see your speaker notes. See the Presentation toolbar for the full list of controls available on a published deck. If you want to limit who can view your published deck, add a password screen that appears before the presentation loads. Try a prompt like this:Add a password screen before the presentation loads. Generate a random password and show it to me in the chat so I can share it with viewers.
Download your deck
Downloading as a PDF saves a copy of your deck, including text and images, that you can send to others to share the deck’s content. Interactive content, like a live chart or model, is included as a static image. Downloading as JSON saves your deck’s data as a portable file. Select this format if you want to import the deck into a different project. Then, attach the file in the chatbox and ask Bolt to build the deck from it. To download your deck, click Download in the slide deck toolbar, then select PDF or JSON.Toolbars
Learn about the controls you can use in the Bolt Slides editor, presentation, and annotation toolbars.Slide deck toolbar
Speaker notes toolbar
Presentation toolbar

Annotation toolbar