DNS records are instructions that define how your domain name works on the internet. They control things like where your website loads from, how your emails are routed, and which services can connect to your domain. They are essential for making sure everything linked to your domain functions correctly.
Bolt gives you the ability to add and manage custom DNS records right in your Project Settings, so you can easily configure your domain to match your needs.
DNS Record types
Bolt supports the creation and management of the following types of records:
- AAAA: IPv6 Address record, which is used to map host names to their IPv6 address.
- CAA: Certificate Authority (CA) Authorization, which is used to specify which CAs are allowed to create certificates for a domain. If subdomains don’t have their own records, they inherit the same records from the apex domain.
- CNAME: Canonical name record, which is used to specify alias names.
- MX: Mail exchange record, which is used in routing requests to mail servers.
- NS: Name server record, which delegates a DNS zone to an authoritative server. If subdomains don’t have their own records, they inherit the same records from the apex domain.
- SRV: Service locator record, which is used by some voice over IP, instant messaging protocols, and other applications.
- TXT: Text record, up to 255 characters. It can contain arbitrary text and can also be used to define machine-readable data, such as security or abuse prevention information.
View your records
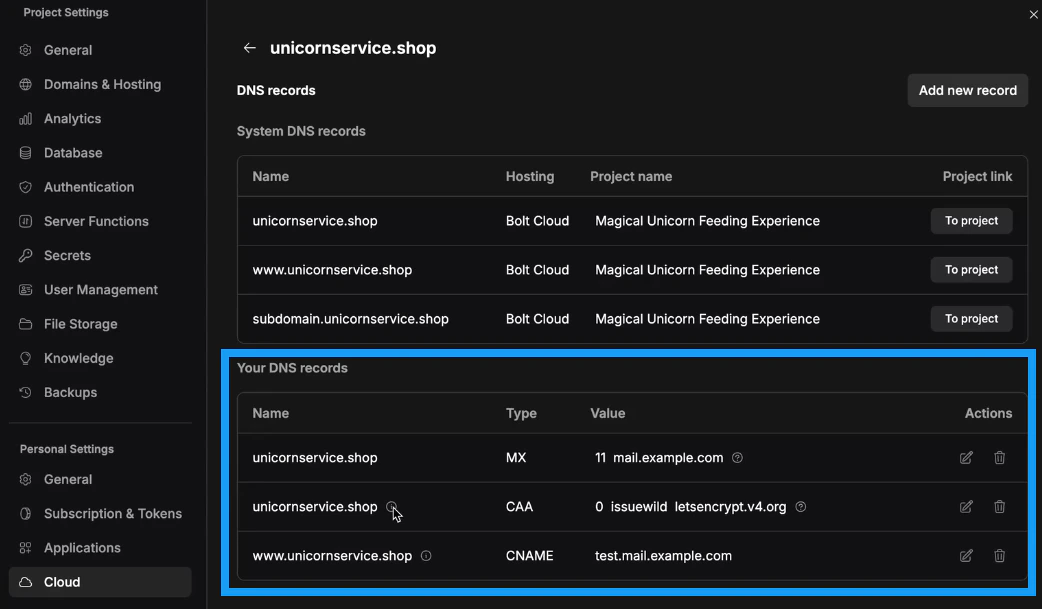
Bolt shows you two types of DNS records: system records and records you’ve created.
To view your records, follow the steps below:
- Log in and open any Bolt project.
- Click your profile icon in the top right of your screen, then click Settings.
- Click Cloud in the left navigation menu.
- Scroll down to the Custom domains section and identify the domain you want to change.
- Click the three dots on the right side of the domain’s row, then click Open domain settings.
System Records
When you add a domain or subdomain, a system record is automatically created to confirm it has been added. These records cannot be viewed in detail or modified.
The screenshot below shows example system records for a primary domain and multiple subdomains:
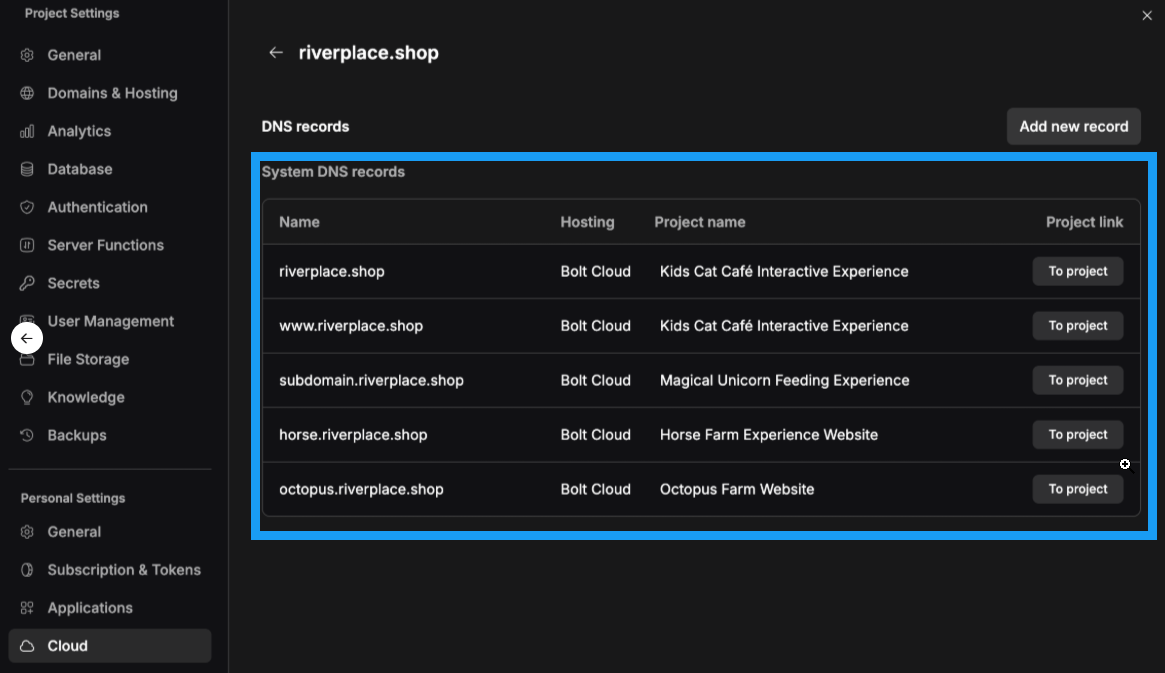
Click To project to open the associated project in Bolt.
 The sections below explain how to add, edit, and delete your DNS records.
Add a DNS record
To add a DNS record to a domain purchased through Bolt, follow these steps:
- Log in and open any Bolt project.
- Click your profile icon in the top right of your screen, then click Settings.
- Click Cloud in the left navigation menu.
- Scroll down to the Custom domains section and identify the domain you want to change.
- Click the three dots on the right side of the domain’s row, then click Open domain settings.
- Click Add new record.
- Select your record Type, then fill in its values.
- Click Save.
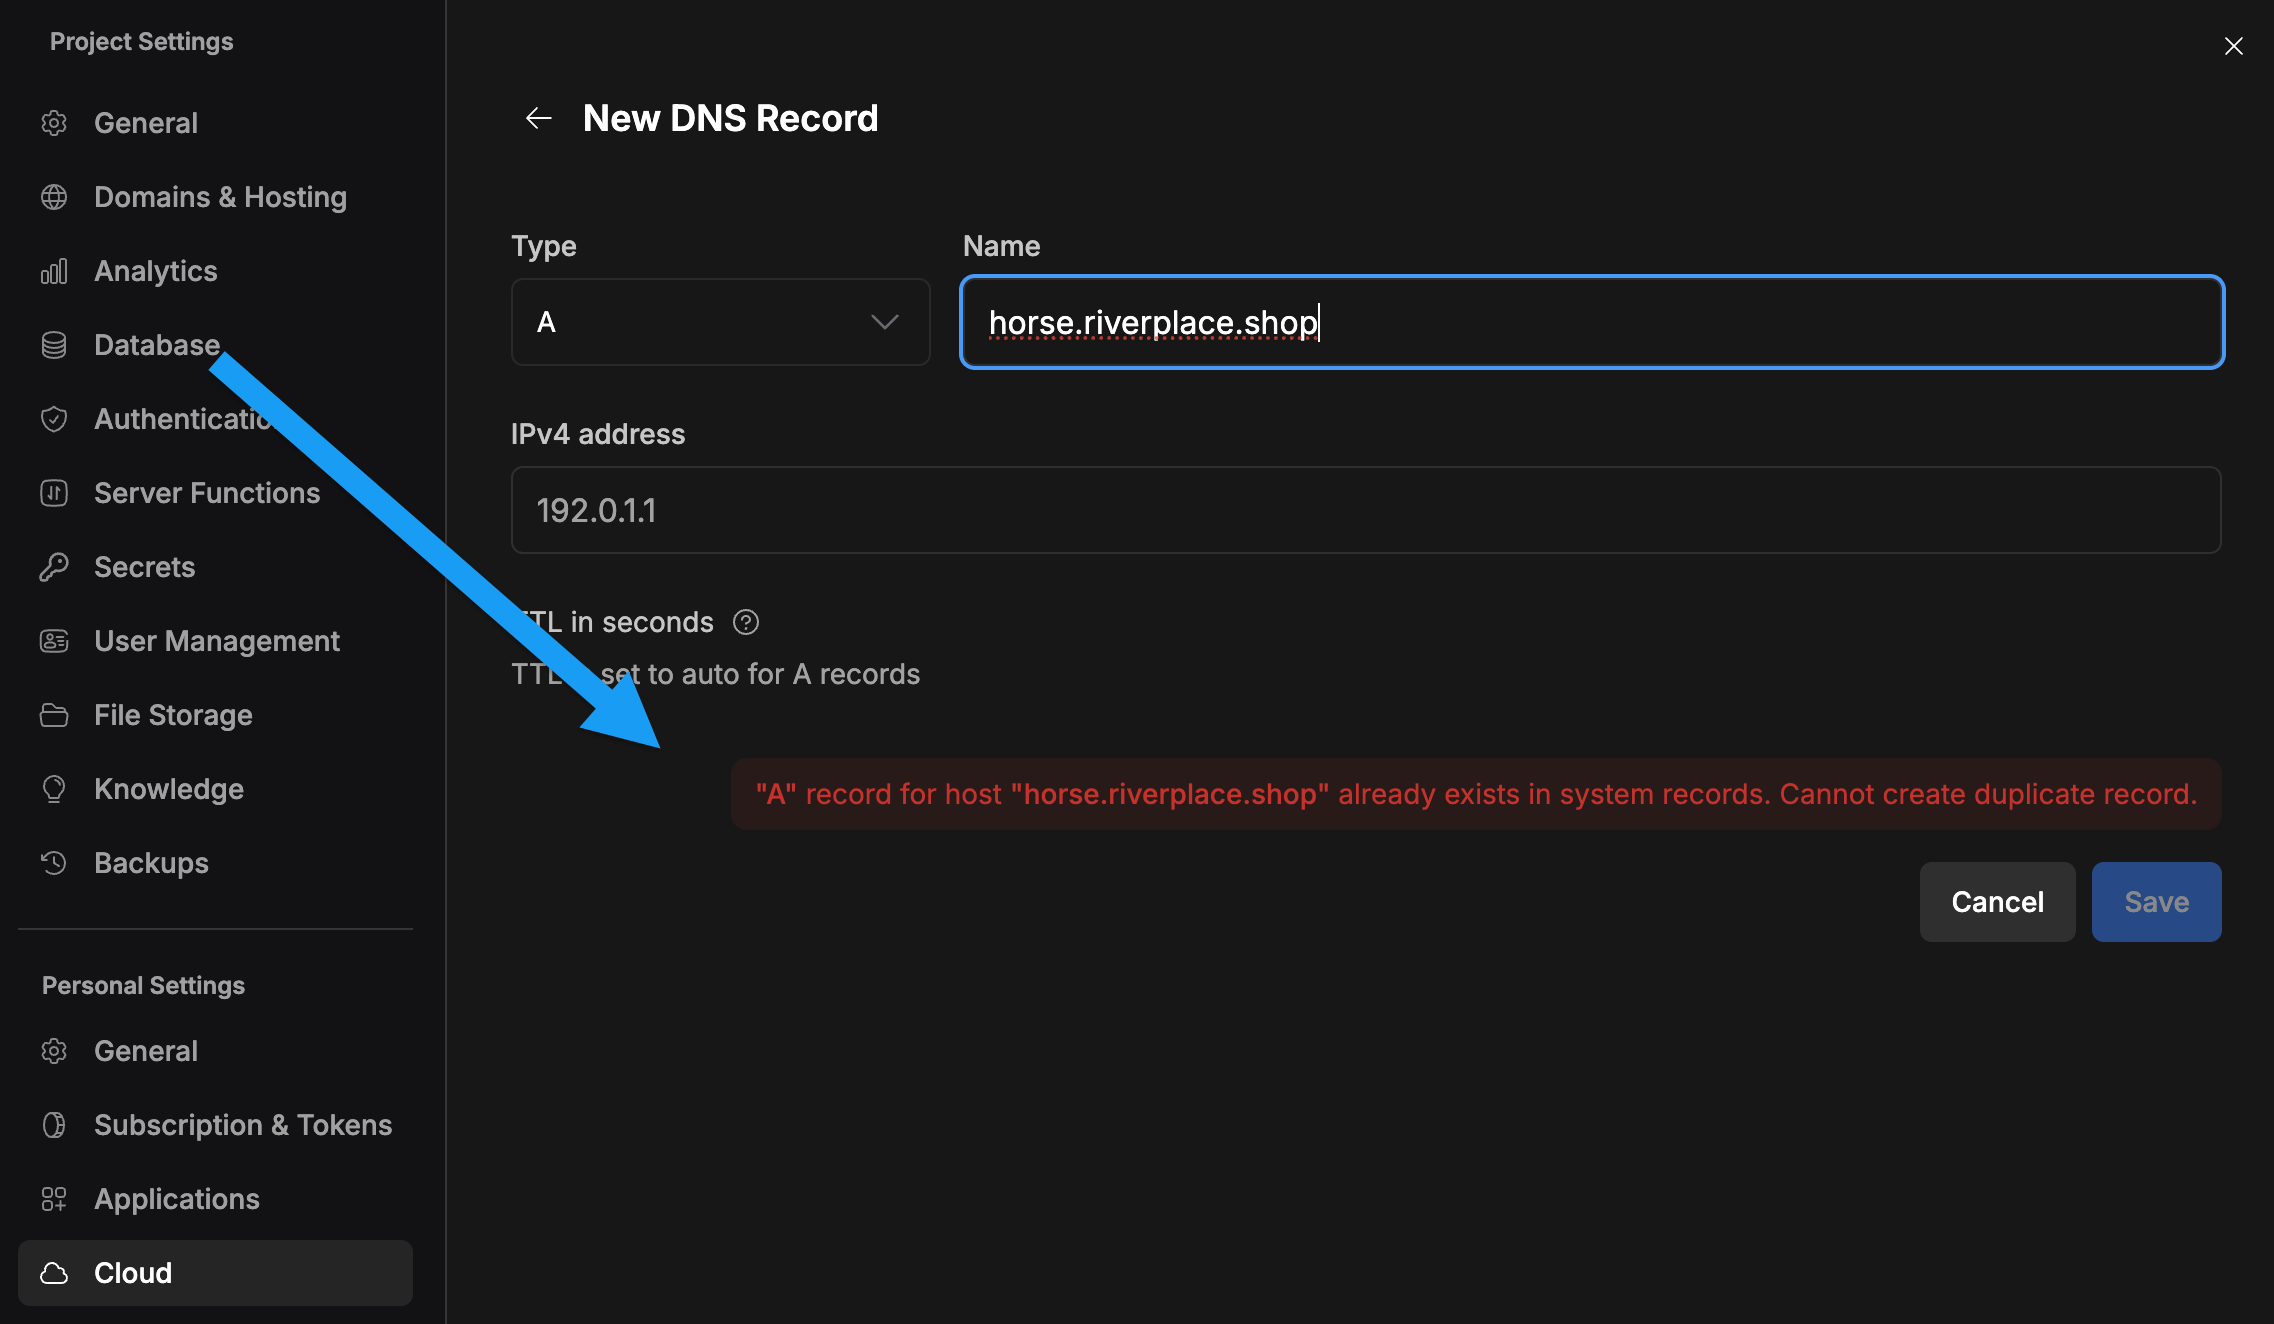
Limitations on creating records
You cannot create an A or AAAA record for a domain/subdomain if a system DNS record already exists for that domain/subdomain. You cannot view system record details, but you will see an error message that lets you know if you’ve attempted to add a record that already exists. See the example screenshot below:
 You also cannot create A, AAAA, or CNAME records for domains/subdomains that already have a user-created DNS record. In these situations, you should update the existing record or delete it and create a new one.
Edit a DNS record
To make changes to an existing record, follow the steps below:
- Log in and open any Bolt project.
- Click your profile icon in the top right of your screen, then click Settings.
- Click Cloud in the left navigation menu.
- Scroll down to the Custom domains section and identify the domain you want to change.
- Click the three dots on the right side of the domain’s row, then click Open domain settings.
- Click the pencil icon in the Actions column for the record you want to edit.
- Make your changes, then click Update.
Delete a DNS record
To delete a DNS record that you previously created, follow the steps below:
- Log in and open any Bolt project.
- Click your profile icon in the top right of your screen, then click Settings.
- Click Cloud in the left navigation menu.
- Scroll down to the Custom domains section and identify the domain you want to change.
- Click the three dots on the right side of the domain’s row, then click Open domain settings.
- Click the trash icon in the Actions column for the record you want to delete.
- Click Delete to confirm.
