example.com and example.net can both take visitors to your Bolt project.
Your primary domain is the one that will appear in the browser’s address bar, while any aliases simply forward visitors to it. This ensures that your site is always accessed under a single, consistent domain, helping with SEO and avoiding duplicate content issues.
Add a domain alias to your published project
To add a domain alias, follow these steps:Add your domain name in Bolt
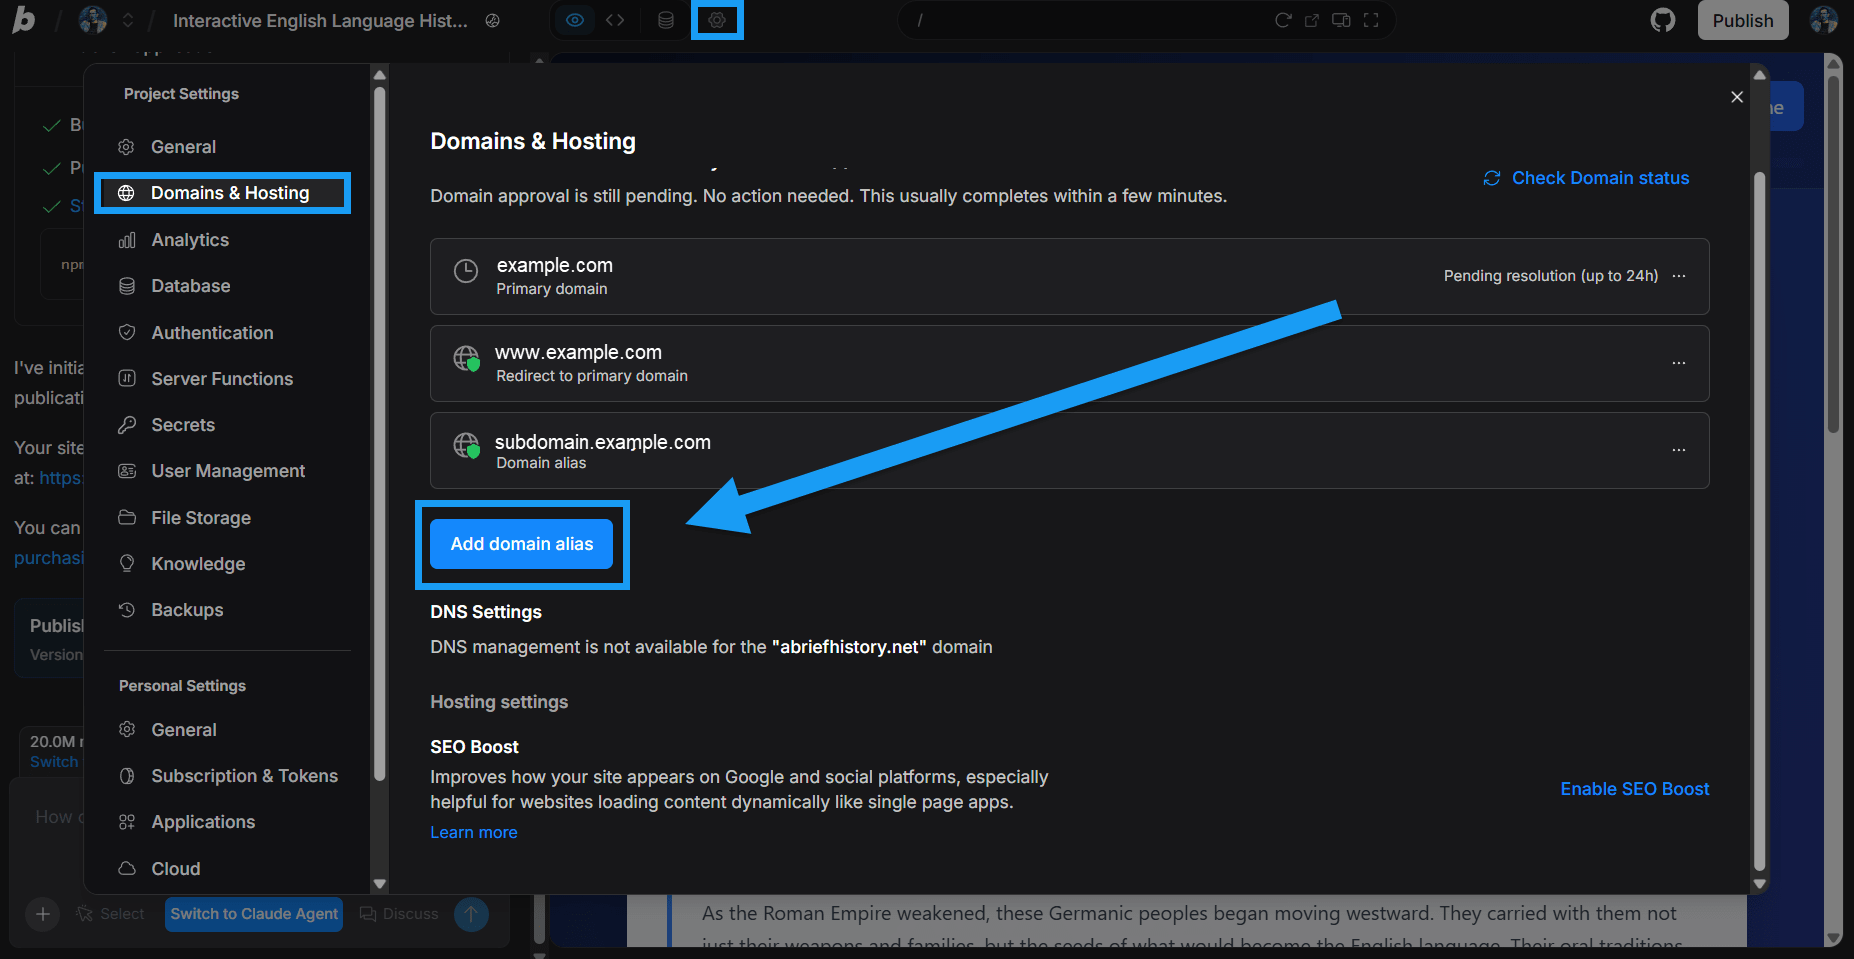
- Click the gear icon in the top center of your screen, then click All project settings.
- Click Domains & Hosting.
- Click Add domain alias.
- Enter the domain alias.
- Click Save.
Update your DNS settings
After completing Step 5 in the section above, you will be returned to the Domains & Hosting window. Follow the steps below to point your domain from your registrar to Bolt.
- Click Resolve DNS issues.
- Keep this DNS Configuration window open. (You’ll need this information.)
- In a new tab, log in to your domain registrar account. (This is the company you registered your domain with.)
- Find the area that allows you to manage your DNS settings.
- Create an ALIAS record as instructed in the DNS configuration window.
Wait for the changes to take effect
It can take time for your DNS changes to update across the internet. Most domains connect within a few hours, but in some cases, it may take up to 24 hours before your site is fully accessible on the new domain.
Verify status
After giving the domain some time to make the change, you can return to Bolt and verify its status by following the steps below:
- Click the gear icon in the top center of your screen, then click All project settings.
- Click Domains & Hosting.
- Verify that your domains show a green shield over the domain icon next to them, meaning that the domain is registered and connected with a working SSL certificate in place.