- Connect to Notion to let Bolt read or edit your Notion pages
- Connect to Linear to pull in context from your Linear tasks
- Connect to GitHub to let Bolt read or create issues and pull requests
New to MCP? To learn how it works in-depth, visit the official MCP documentation. For an introduction to MCP’s uses and benefits, try What is MCP? The Universal Connector for AI Explained.
Before you start
Most connectors require you to prove that you have access to an external app or data source, either by entering a key or by signing in to the app. Before you connect, make sure you have the necessary credentials from the app or service provider. Bolt verifies these credentials when you set up your connection.Authentication methods
Bolt supports these authentication methods:API key: Get an API key from the app you’re connecting to. You can usually find this in the app’s developer or account settings. An API key is like a password, so keep it secret and don’t share it with others.MCP OAuth: Sign in to the app you’re connecting to. This works the same way as signing in to an app using Google or another third-party account.
None. This is uncommon, and in most cases you need to use either an API key or MCP OAuth.
Add a connector
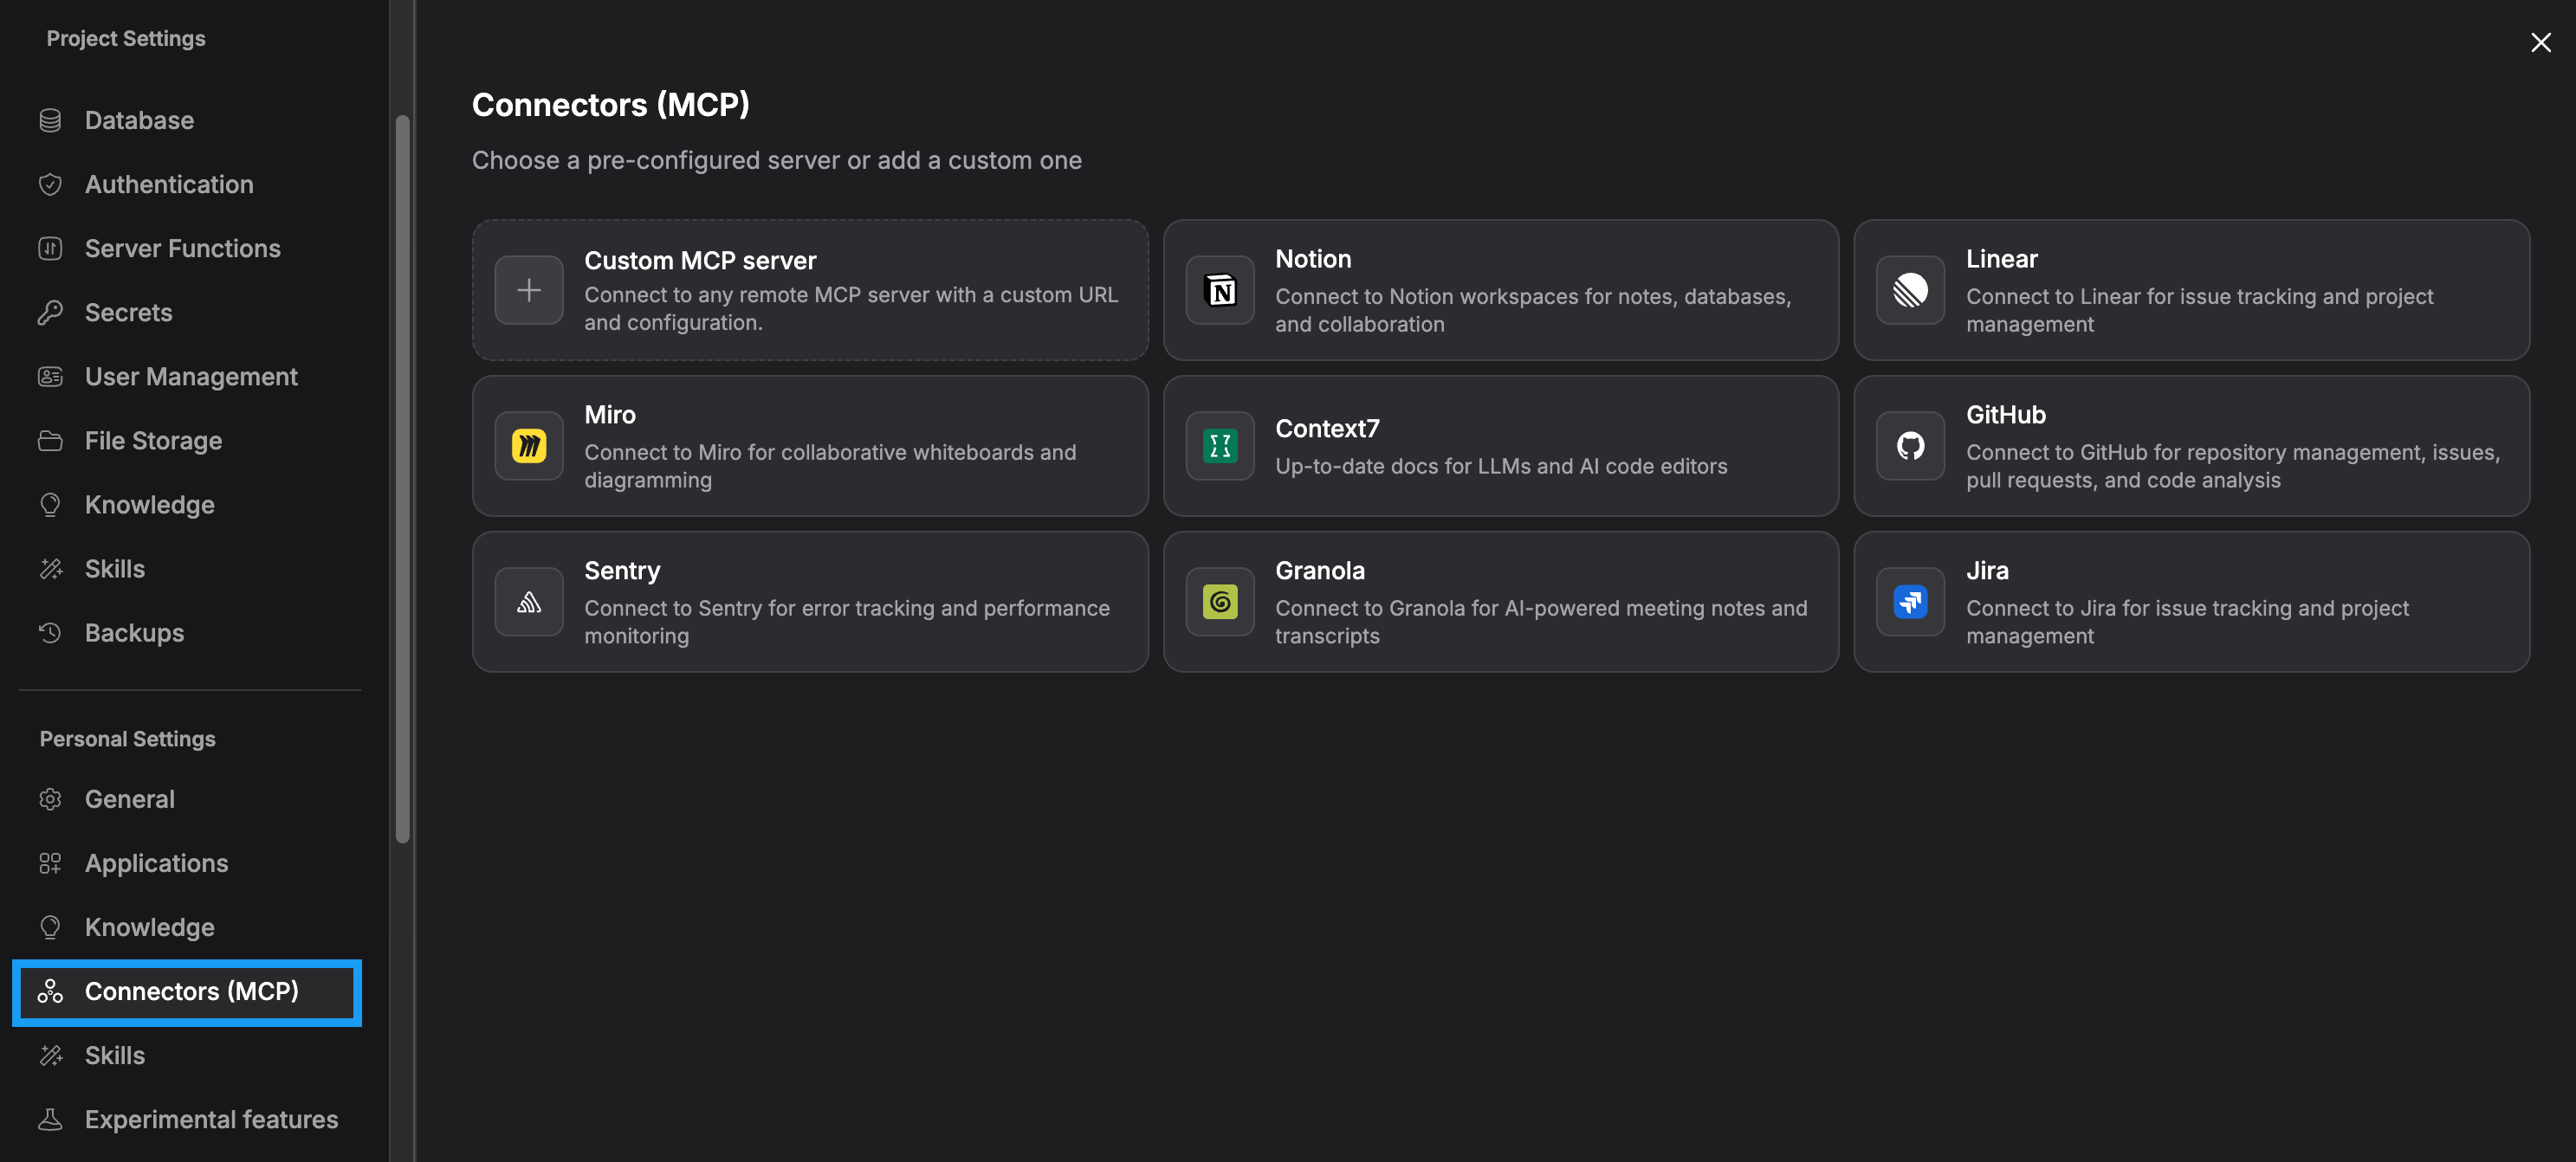
Bolt offers built-in connectors for several tools, including Notion, Linear, GitHub, and others. To add a connector to a different tool, like Slack, Google Workspace, or another tool you use, set up a custom MCP server.Access your connector settings
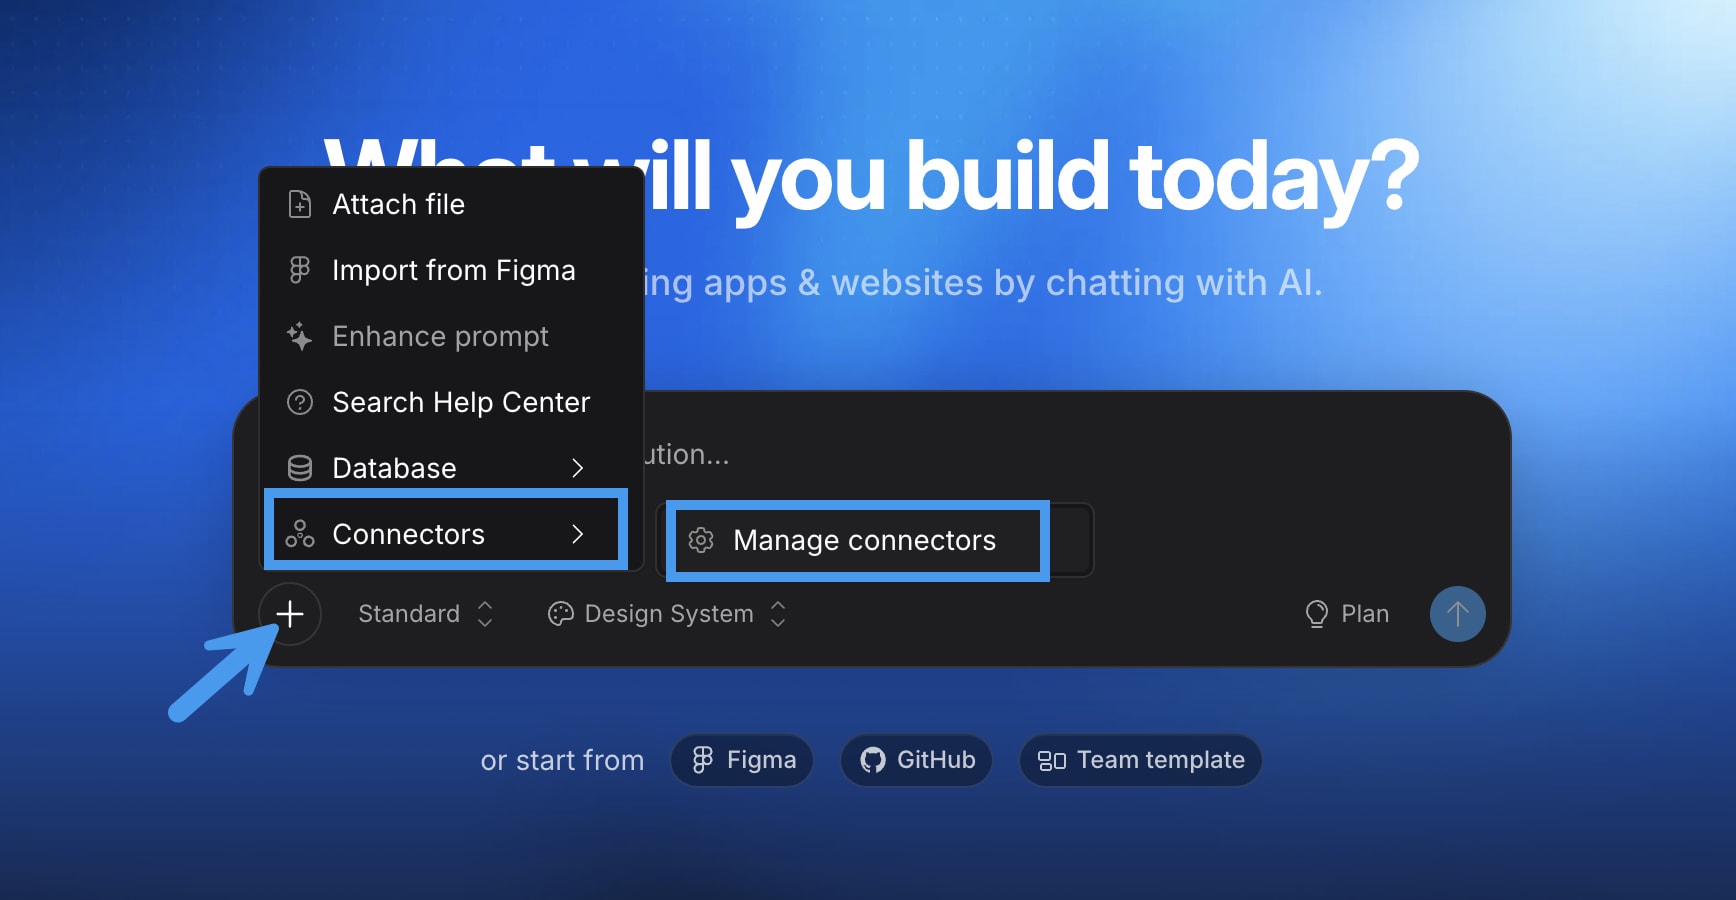
- From the Bolt homepage, in the chatbox, click the plus icon.
- Click Connectors, then click Manage connectors.
Add a built-in connector
When you choose a built-in connector, the server information is added for you, and you only have to provide your credentials.1
Set up a built-in connector
- From the Connectors (MCP) page, click a built-in connector (like Notion or GitHub).
- Click Connect.
-
When prompted, enter your API key or log in to the application. The type of authentication Bolt asks for depends on the connector.
Once Bolt confirms you have access to the server, a
Connectedstatus appears in the upper-right corner of the screen.
2
Manage how the connector is turned on for projects
The Auto-enable for all projects setting controls whether or not a connector is turned on automatically when you create a new project.
- If you want a connector to be turned on automatically, select Auto-enable for all projects.
- If you prefer to turn on the connector for each project as you need it, leave Auto-enable for all projects deselected.
Add a custom connector
To add a custom connector, you need the server URL, transport type, and authentication method. Most apps that support MCP publish documentation with this information. If you’re not sure where to find it, try searching the web for the app’s name and “MCP server.”1
Set up a custom connector
- From the Connectors (MCP) page, click Custom MCP server.
-
Enter the following information.
-
Click Connect.
Once Bolt confirms you have access to the server, a
Connectedstatus appears in the upper-right corner of the screen.
2
Manage how the connector is turned on for projects
The Auto-enable for all projects setting controls whether or not a connector is turned on automatically when you create a new project.
- If you want a connector to be turned on automatically, select Auto-enable for all projects.
- If you prefer to turn on the connector for each project as you need it, leave Auto-enable for all projects deselected.
Manage which tools are turned on
Each connector includes tools, which are actions the server allows Bolt to do, like reading, creating, or editing data on your behalf. The number and type of tools available vary by app. When you add a connector, all available tools are turned on by default. We recommend that you review these tools and turn off any that you don’t want or need. For example, if you want Bolt to be able to create data but not delete it, turn off any tools that can delete files or information.The tools you enable in the connector apply to all projects. You can’t turn on and off tools individually by project.
- From the Connectors (MCP) page, select a connector, then click the three dots in the upper-right corner of the screen.
- Click Edit.
- In the Tools list, deselect any tools you don’t want to use. You can select them again later if you change your mind.
- Click Save changes.
Turn connectors on or off for a project
To optimize performance, we recommend that you turn on a connector for a given project only if you need it. To turn on a connector for your Bolt project:- Log in to the project.
- In the chatbox, click the plus icon.
- Click Connectors. A list appears that shows connectors you’ve added.
- Turn on the toggle next to the connector’s name.

Best practices for using connectors
When you turn on a connector, Bolt adds its data to your project’s context, which is the information Bolt processes when thinking or building. This is what makes connectors powerful, but it also means that having multiple connectors turned on, each with multiple tools, can slow Bolt down and reduce the quality of its output. It can also increase your token consumption. To make sure you use connectors effectively, follow these guidelines:- Turn off connectors for projects where they don’t add relevant information.
- Turn off tools you don’t need in the connector settings. Tools you turn on apply across all projects. To adjust your available tools, see Manage which tools are turned on.
- Turn on and off connectors for a project as needed while building, rather than leaving connections on all the time.
Refresh a connector
When a service provider updates their MCP server, Bolt automatically discovers new tools. You don’t need to make any updates to your connector for new tools to work. However, you can refresh your connection to check for new tools and review or turn them off before Bolt uses them. If a connector is showing as offline, refreshing the connection can help confirm whether it’s back online. To refresh a connector:- From the Connectors (MCP) page, select a connector, then click the three dots in the upper-right corner of the screen.
- Click Edit.
- Click Refresh connection.
Edit or delete a connector
- From the Bolt homepage, in the chatbox, click the plus icon.
- Click Connectors, then click Manage connectors.
- Click the connector you want to change.
- In the upper right corner of the screen, click the three dots.
- Do one of the following:
- To edit the connector, click Edit, make your changes, then click Save changes.
- To delete the connector, click Delete, then click Delete server to confirm.