Sharing lets you invite collaborators to your Bolt project and control the level of access they have. You can give collaborators view-only access, let them edit and prompt, or invite them to own the project with you. Sharing is available on paid plans. Once you’ve invited collaborators, see Collaborate with others to learn about working together in real time and sharing integrations.Documentation Index
Fetch the complete documentation index at: https://support.bolt.new/llms.txt
Use this file to discover all available pages before exploring further.
Access by role
By default, you’re the owner of any project you create. Assign collaborators a role that matches the level of access you want them to have. The Co-owner role is only available to other members of your team. If you’re on a Teams plan and invite members outside your team, or if you’re on a personal plan, only the Viewer and Editor roles are available.| Permission | Viewer | Editor | Co-owner |
|---|---|---|---|
| Open the project | ✓ | ✓ | ✓ |
| Duplicate the project | ✓ | ✓ | ✓ |
| View the preview and code | ✓ | ✓ | ✓ |
| View environment variables | ✓ | ✓ | |
| Prompt and edit code | ✓ | ✓ | |
| Invite users outside your team to collaborate | ✓ | ||
| Publish the project and manage the published site | ✓ |
Environment variables are values your project uses to store sensitive information, like API keys and authentication tokens, without exposing them in your code. To keep your project secure, Bolt only allows Editors and Co-owners to view environment variables.If a project relies on environment variables, parts of it may not load or work as expected for Viewers, because there’s no way to run the project in the browser while keeping those values hidden. In that case, Viewers see this message:
You have view-only access to this project. Environment variables aren't available in view-only mode, so some features may not work.Share your project on a Teams plan
When you’re part of a team, you can manage access separately for:- Your entire team (options are No access, Viewer, Editor, or Co-owner)
- Individual members of your team (options are Viewer, Editor, or Co-owner)
- Invited collaborators who aren’t members of your team (options are Viewer or Editor)
- Anyone else with the link (options are No access, Viewer, or Editor)
Inviting collaborators outside your team requires external sharing to be turned on in your team settings. If you’re a team admin, you can manage this in your
Team settings.
Share an invite link
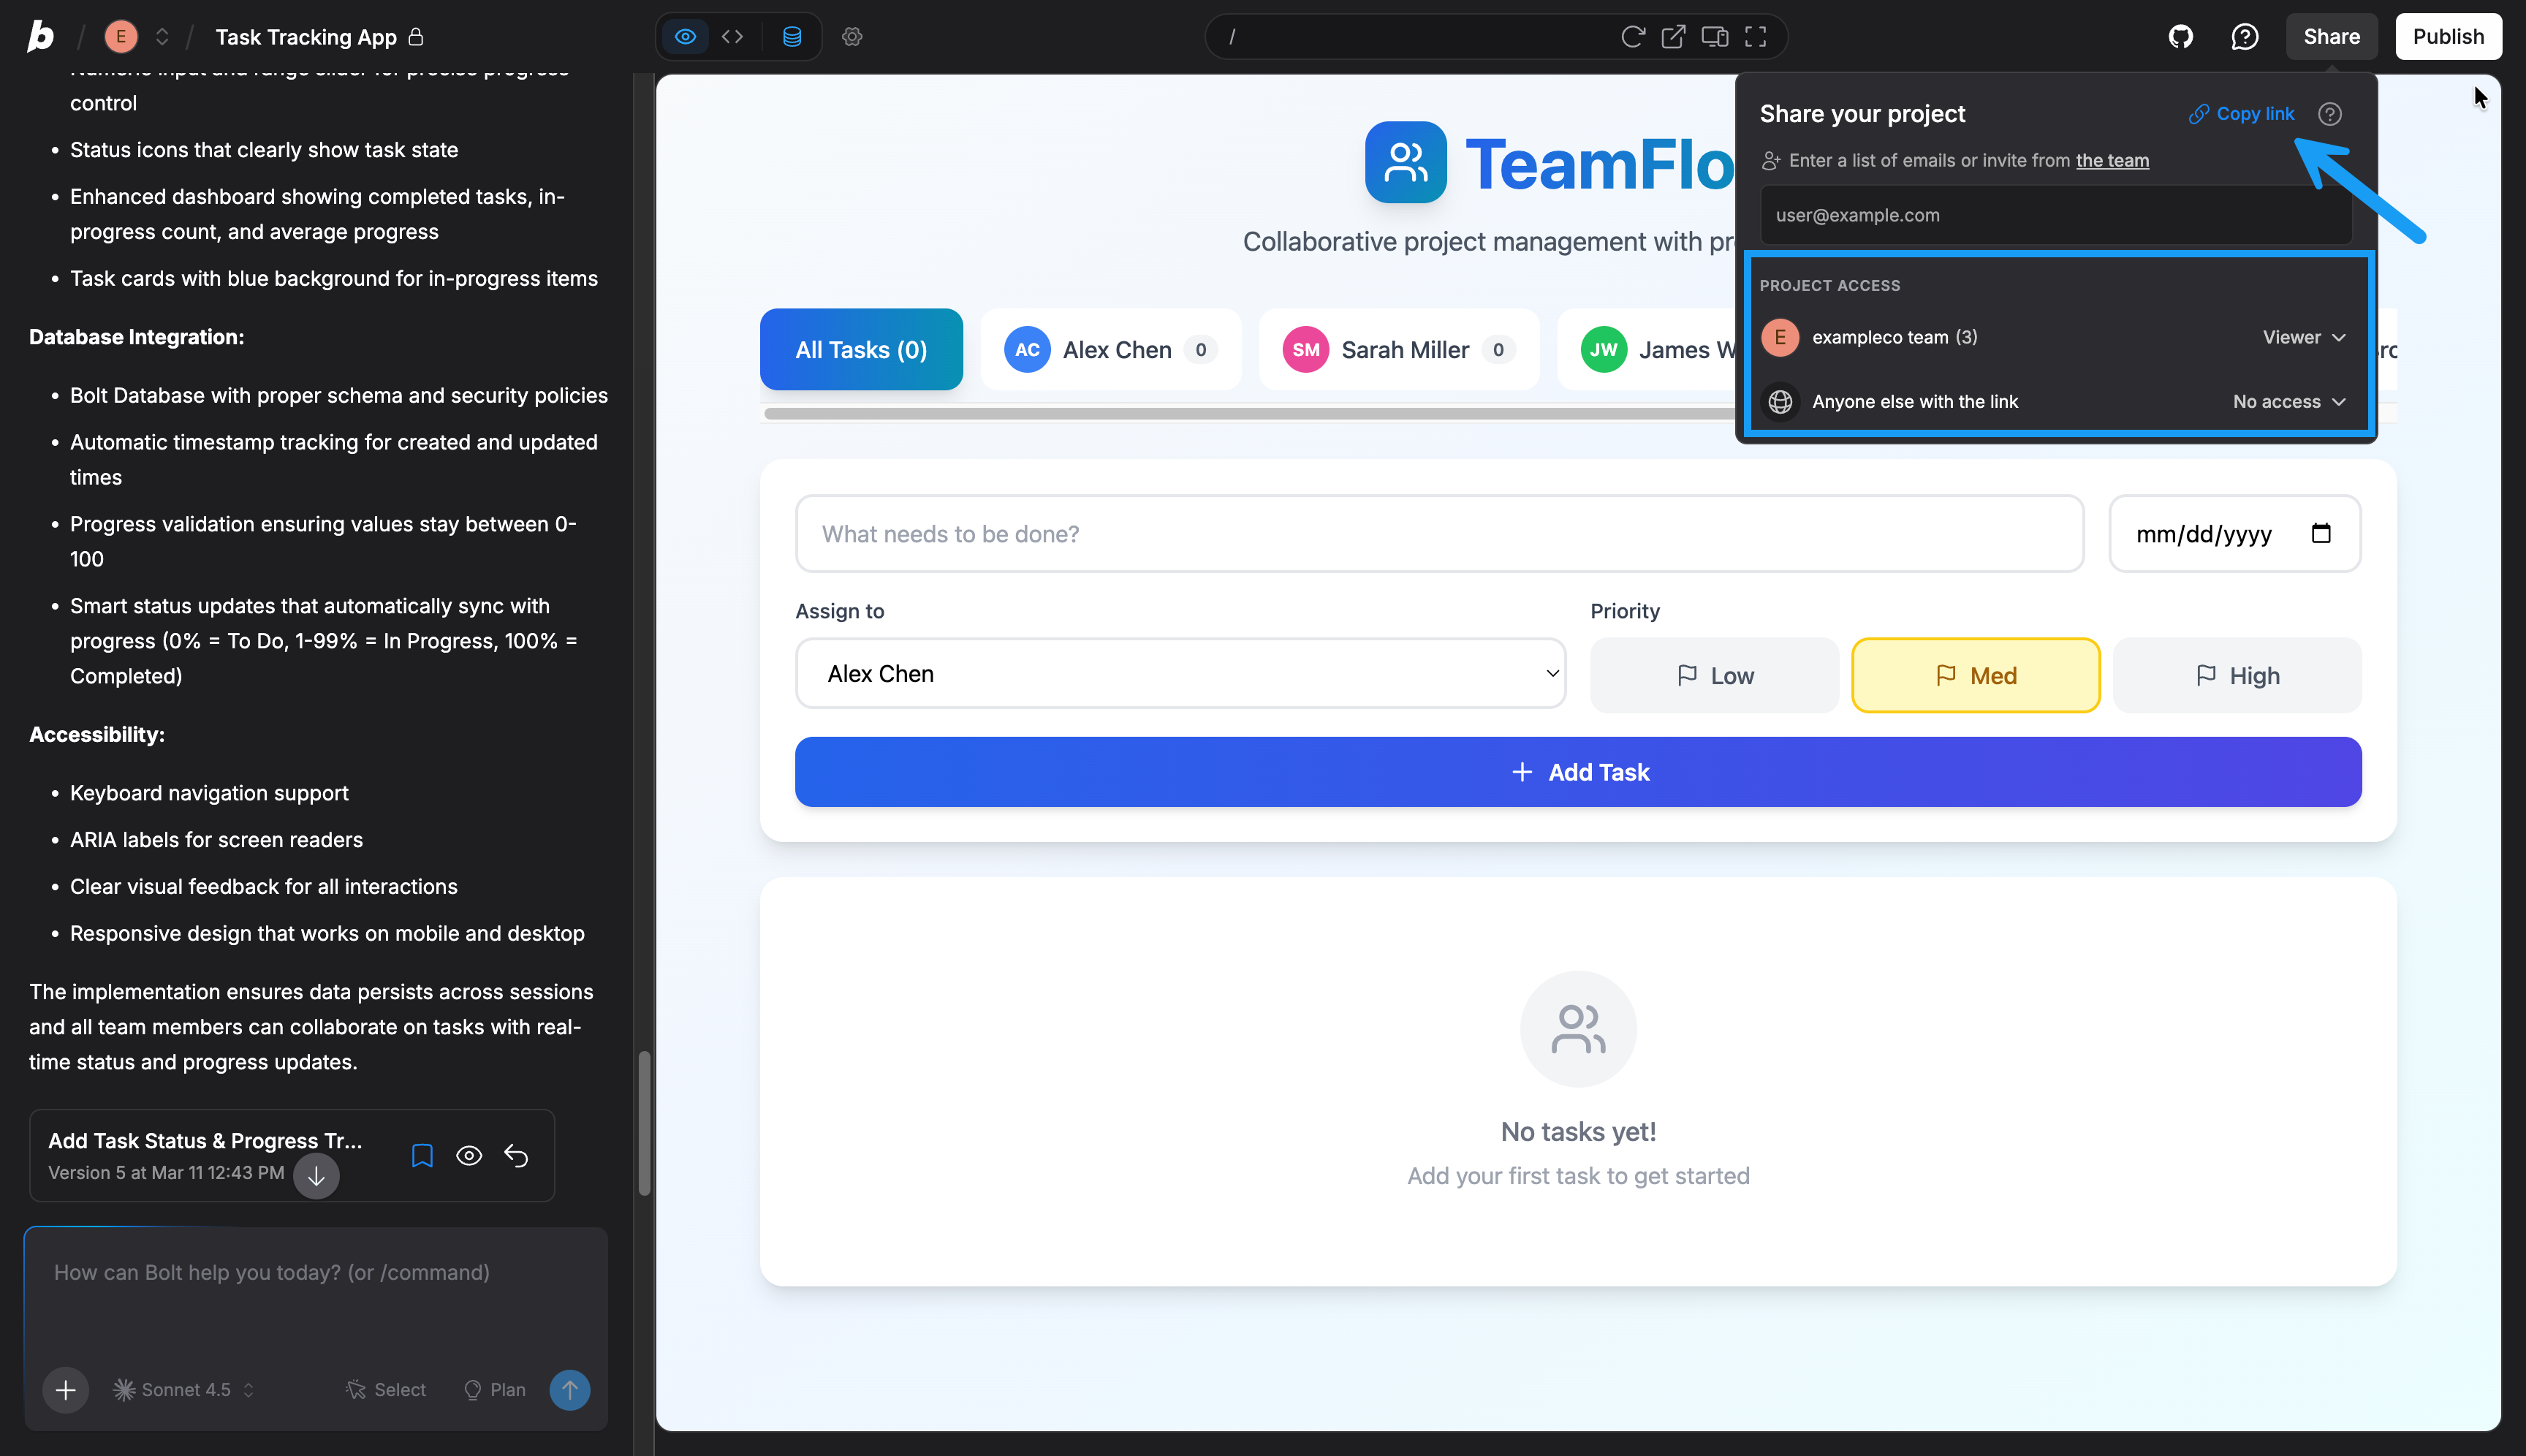
- In Bolt, open your project.
- In the upper-right corner of the screen, click Share.
- Under Project Access, set the following permissions:
- To define team access, find your team name, then select the level of access you want to give your team. Unless you change it, this is set to the default member role defined in your project settings, which is Viewer by default.
- To define general access, set Anyone else with the link to the level of access you want to give other collaborators.
- Click Copy link, then share the link with anyone you want to invite.
Team members are automatically assigned the access level you select in step 3. You don’t need to send them the link.
Invite individual collaborators by email
Inviting collaborators by email lets you share with people outside your team or give specific team members a different access level than the rest of the team.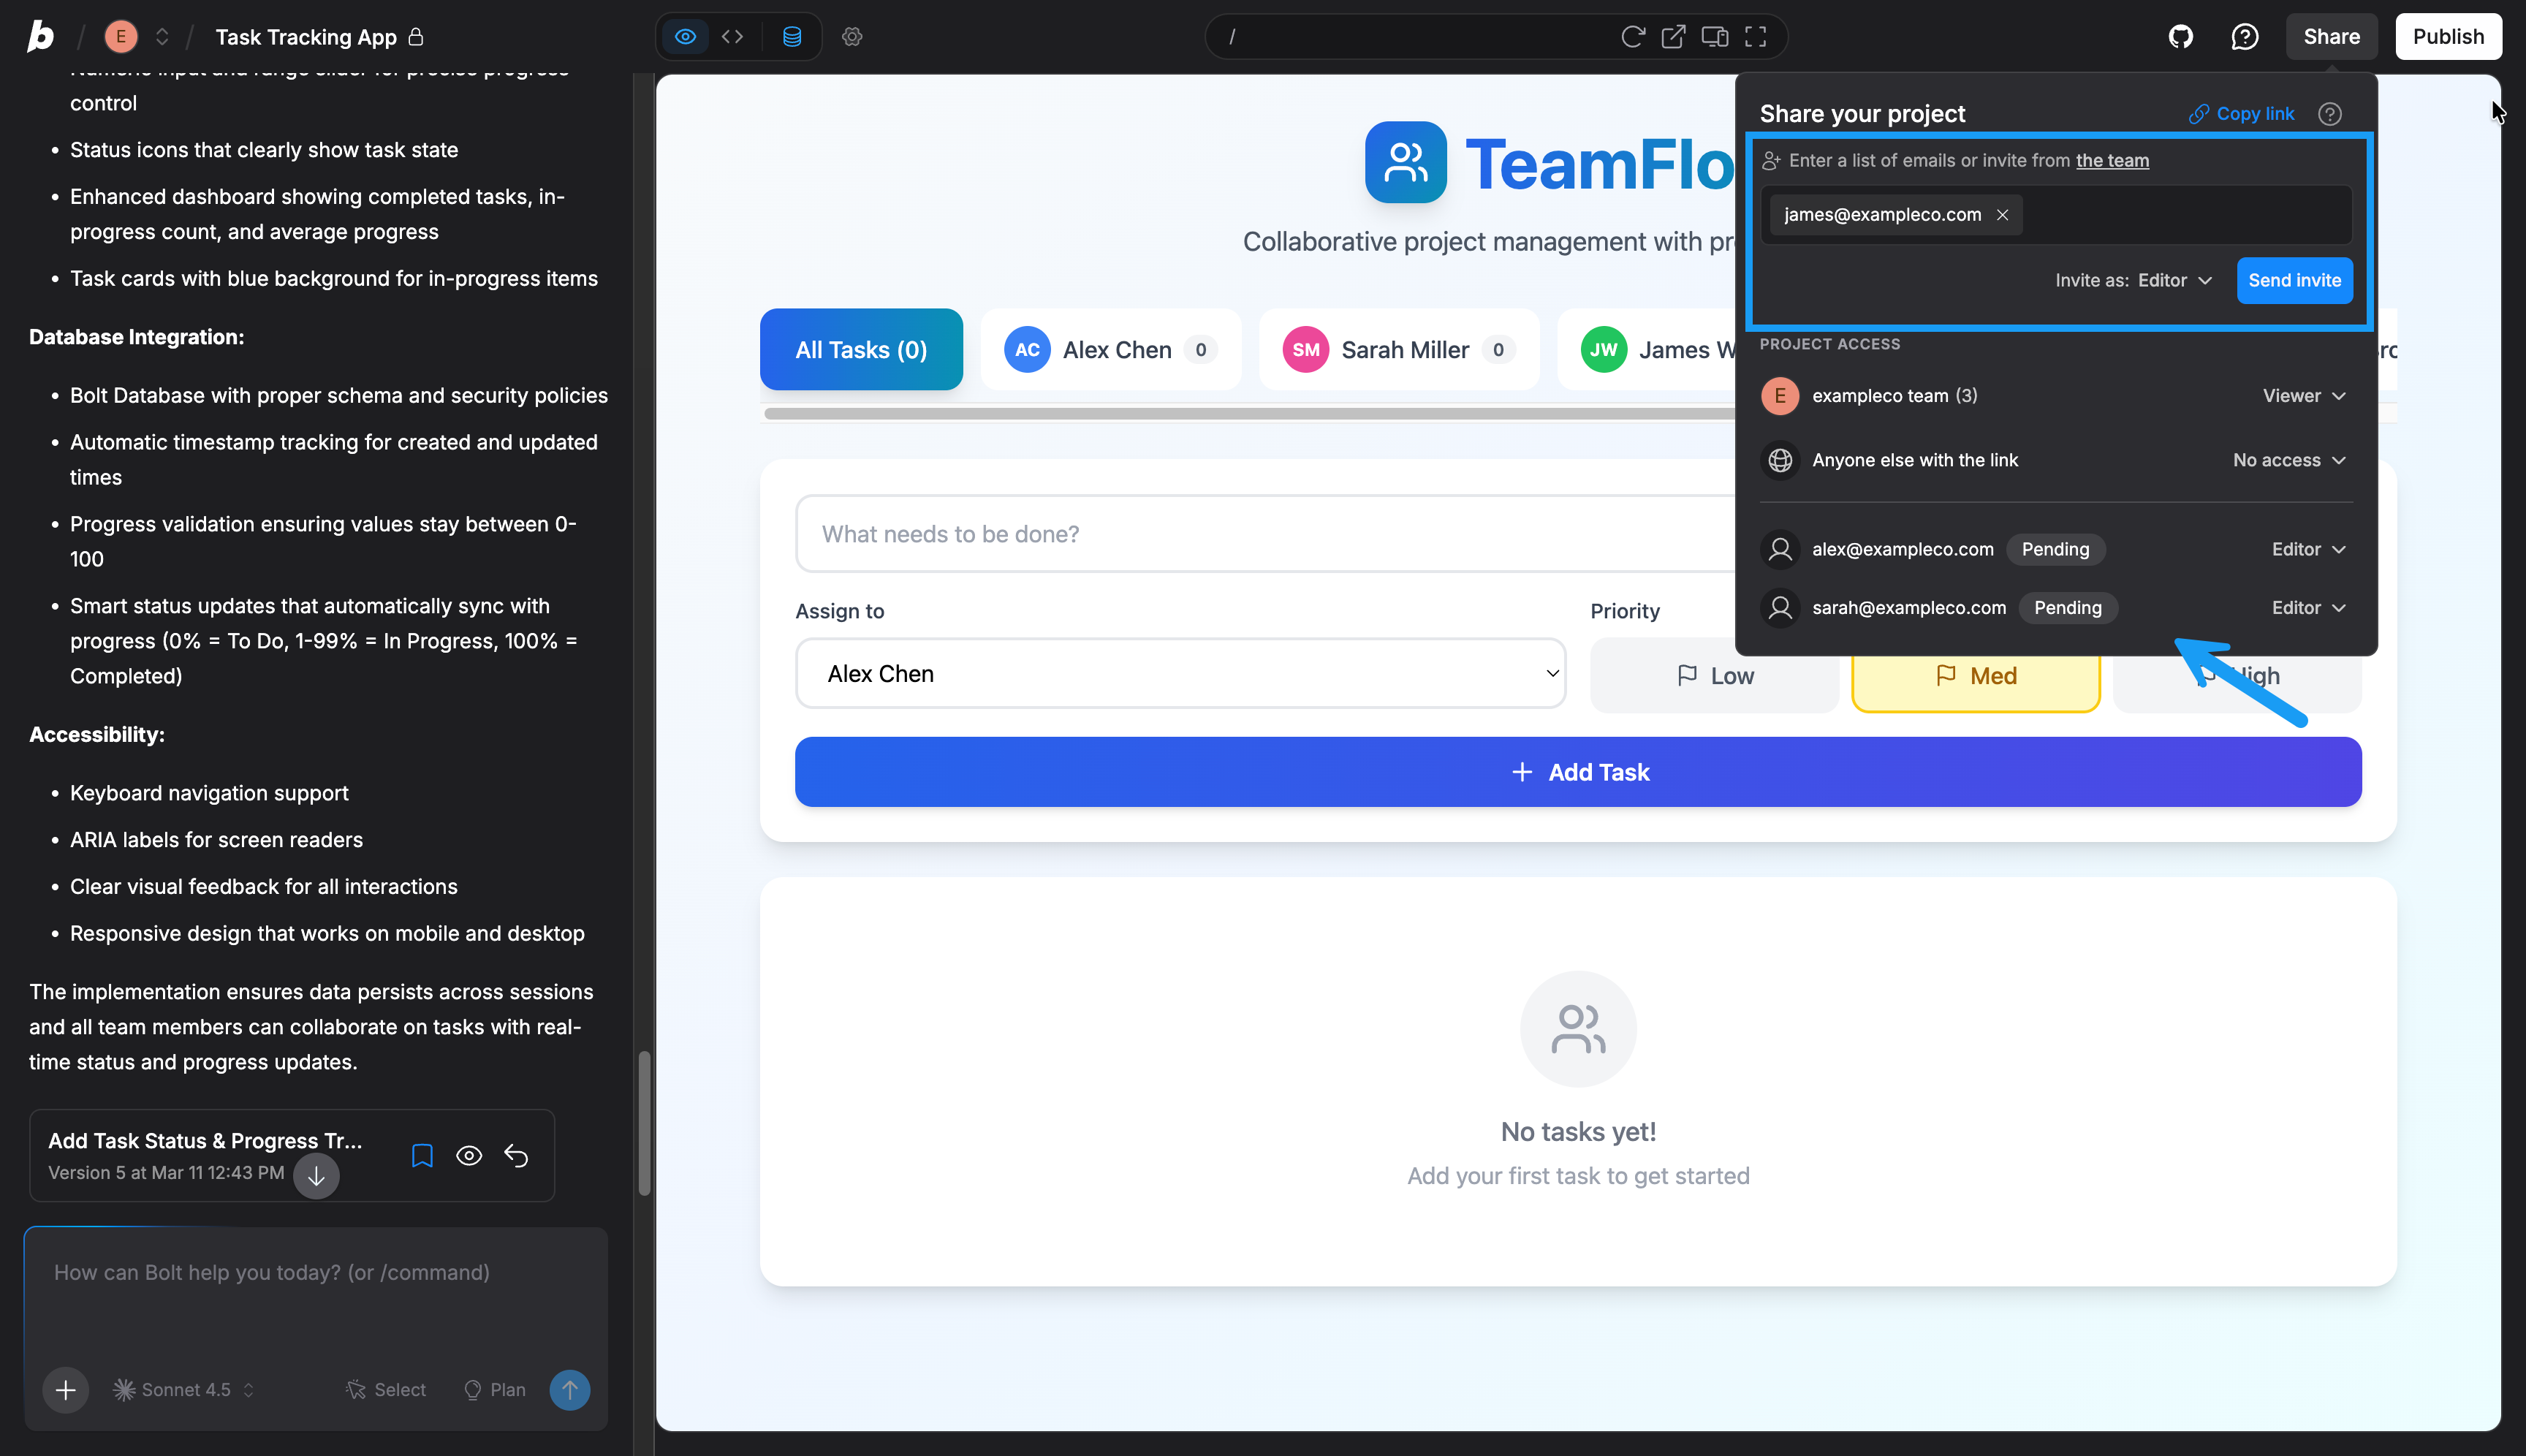
- In Bolt, open your project.
- In the upper-right corner of the screen, click Share.
- In the email field, enter the address of each collaborator you want to invite, or click the team to select from your team members.
- Set Invite as to the level of access you want to give them, then click Send invite.
Pending until they accept the invite.
Share your project on a personal plan
On a personal plan, you can manage access separately for anyone with the link and for individual collaborators you invite.Share an invite link
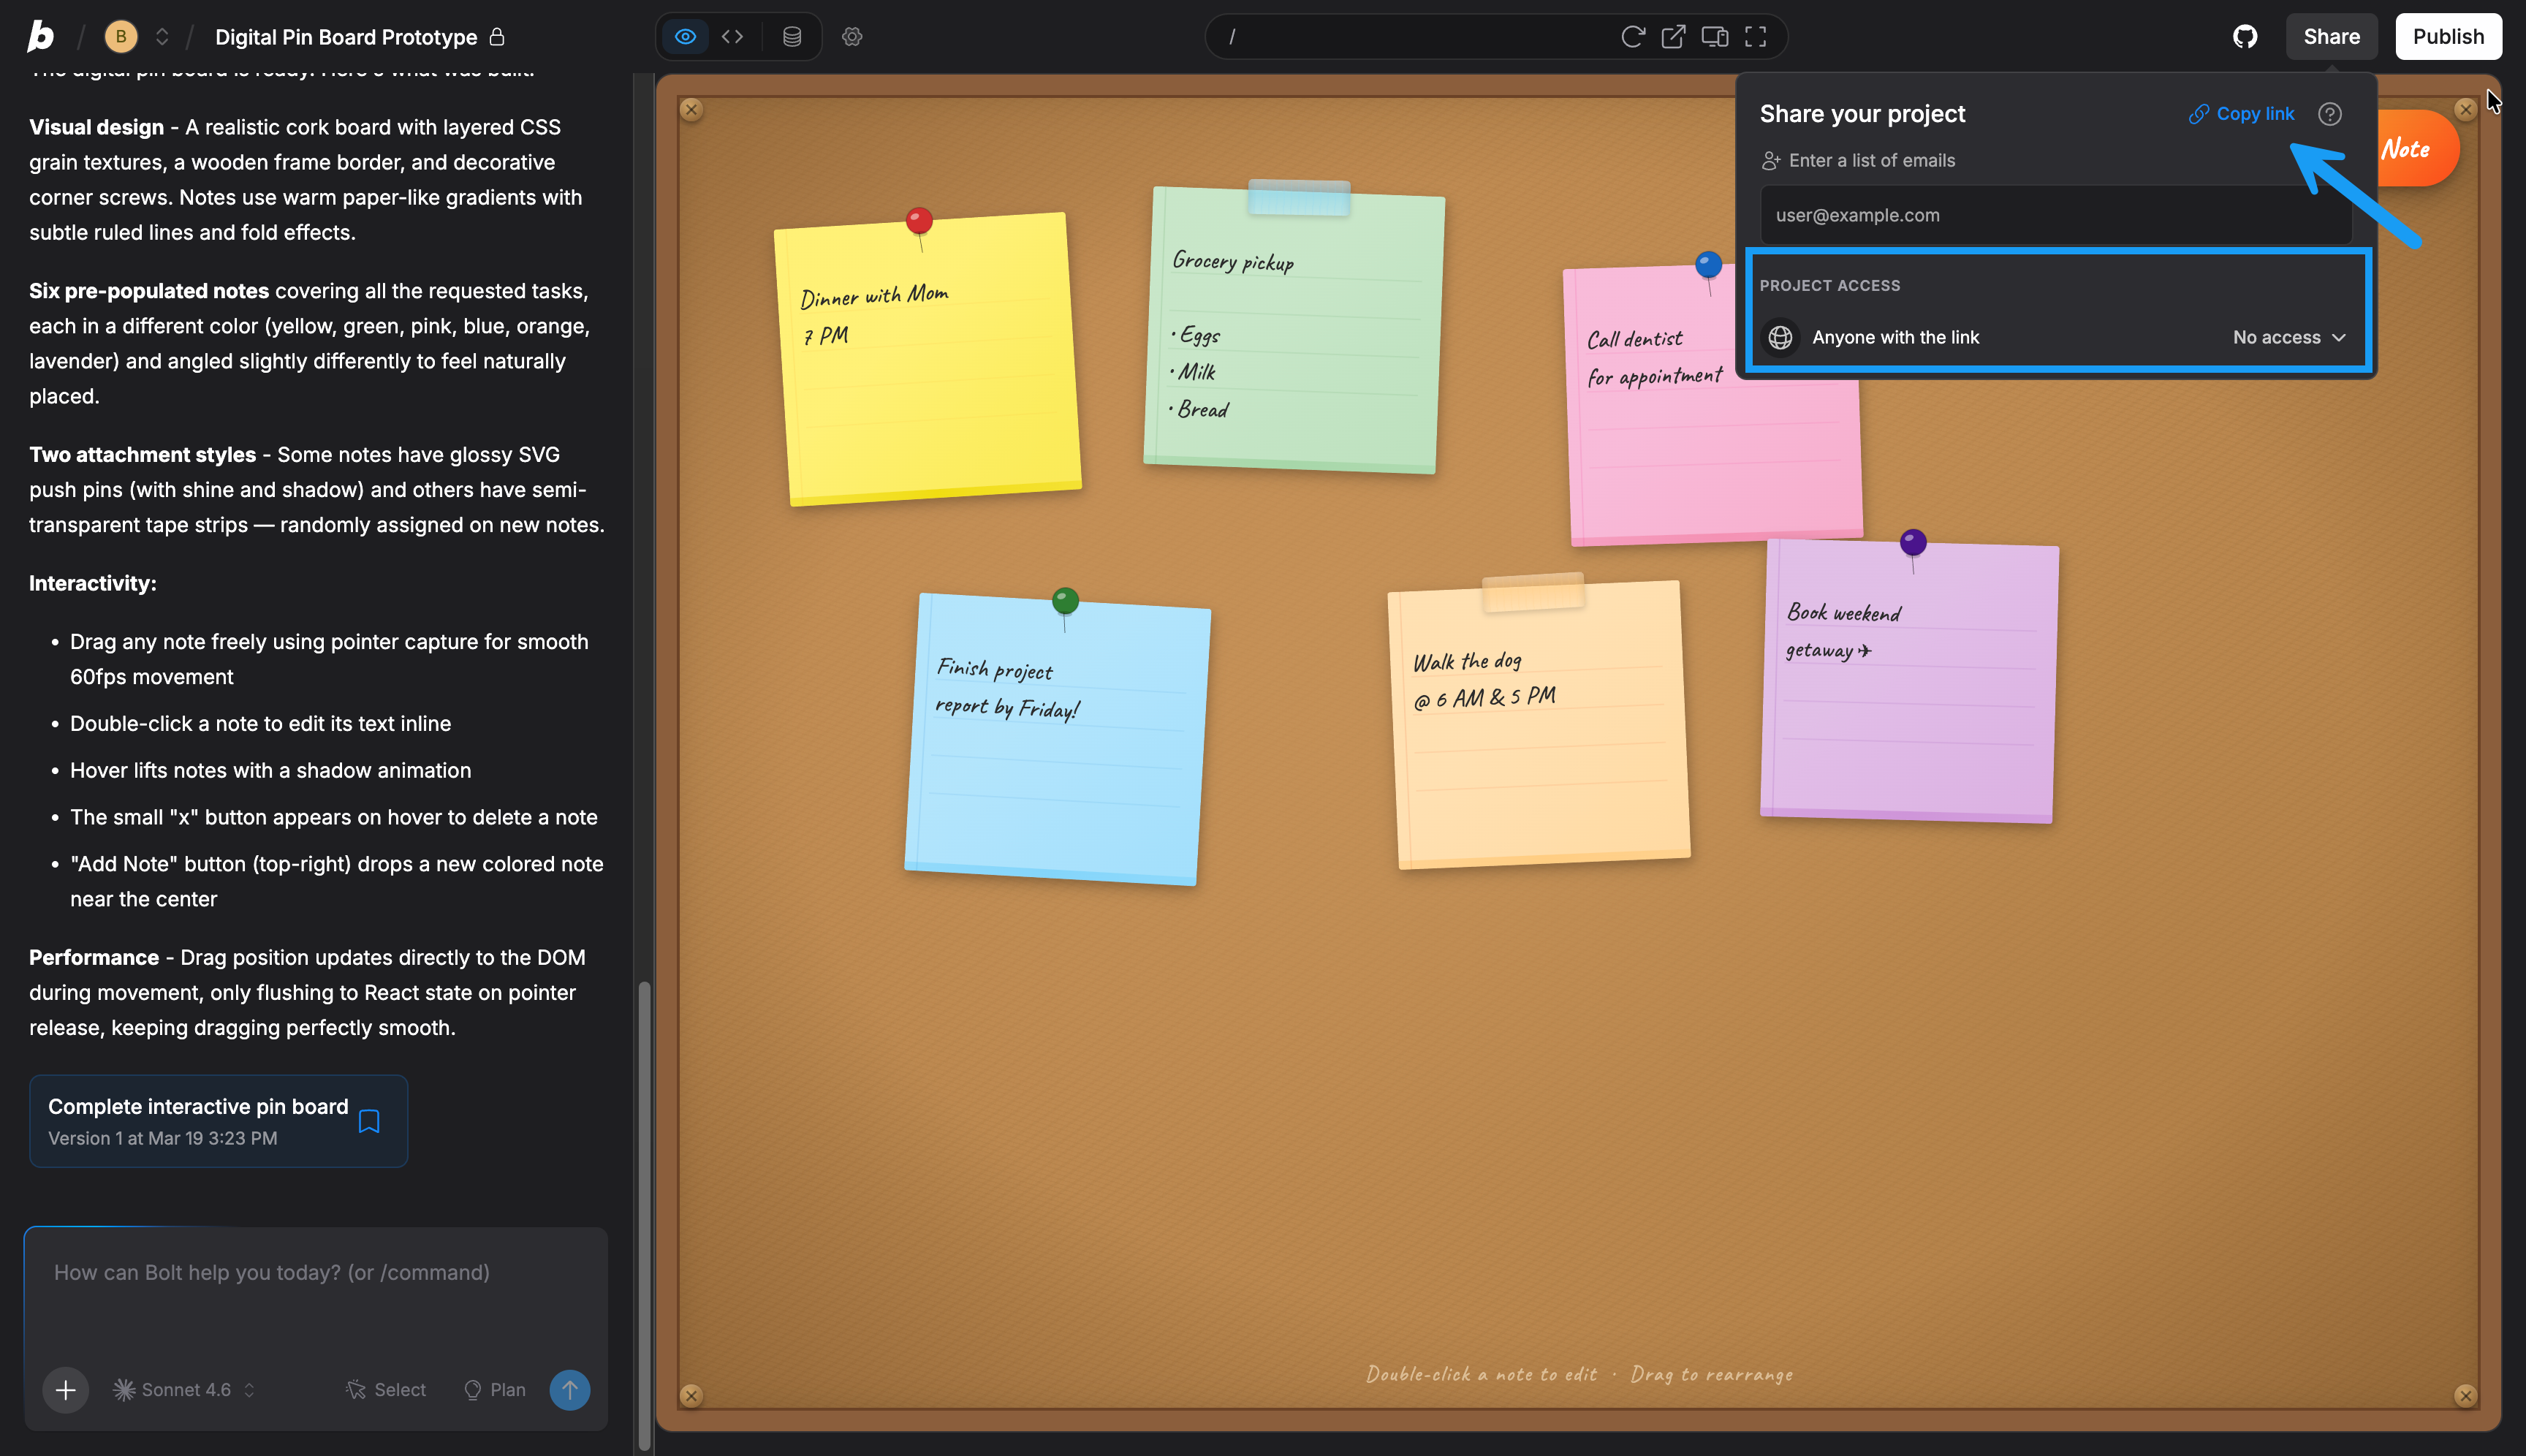
- In Bolt, open your project.
- In the upper-right corner of the screen, click Share.
- Under Project Access, set Anyone with the link to the level of access you want.
- Click Copy link, then share the link with anyone you want to invite.
Invite individual collaborators by email
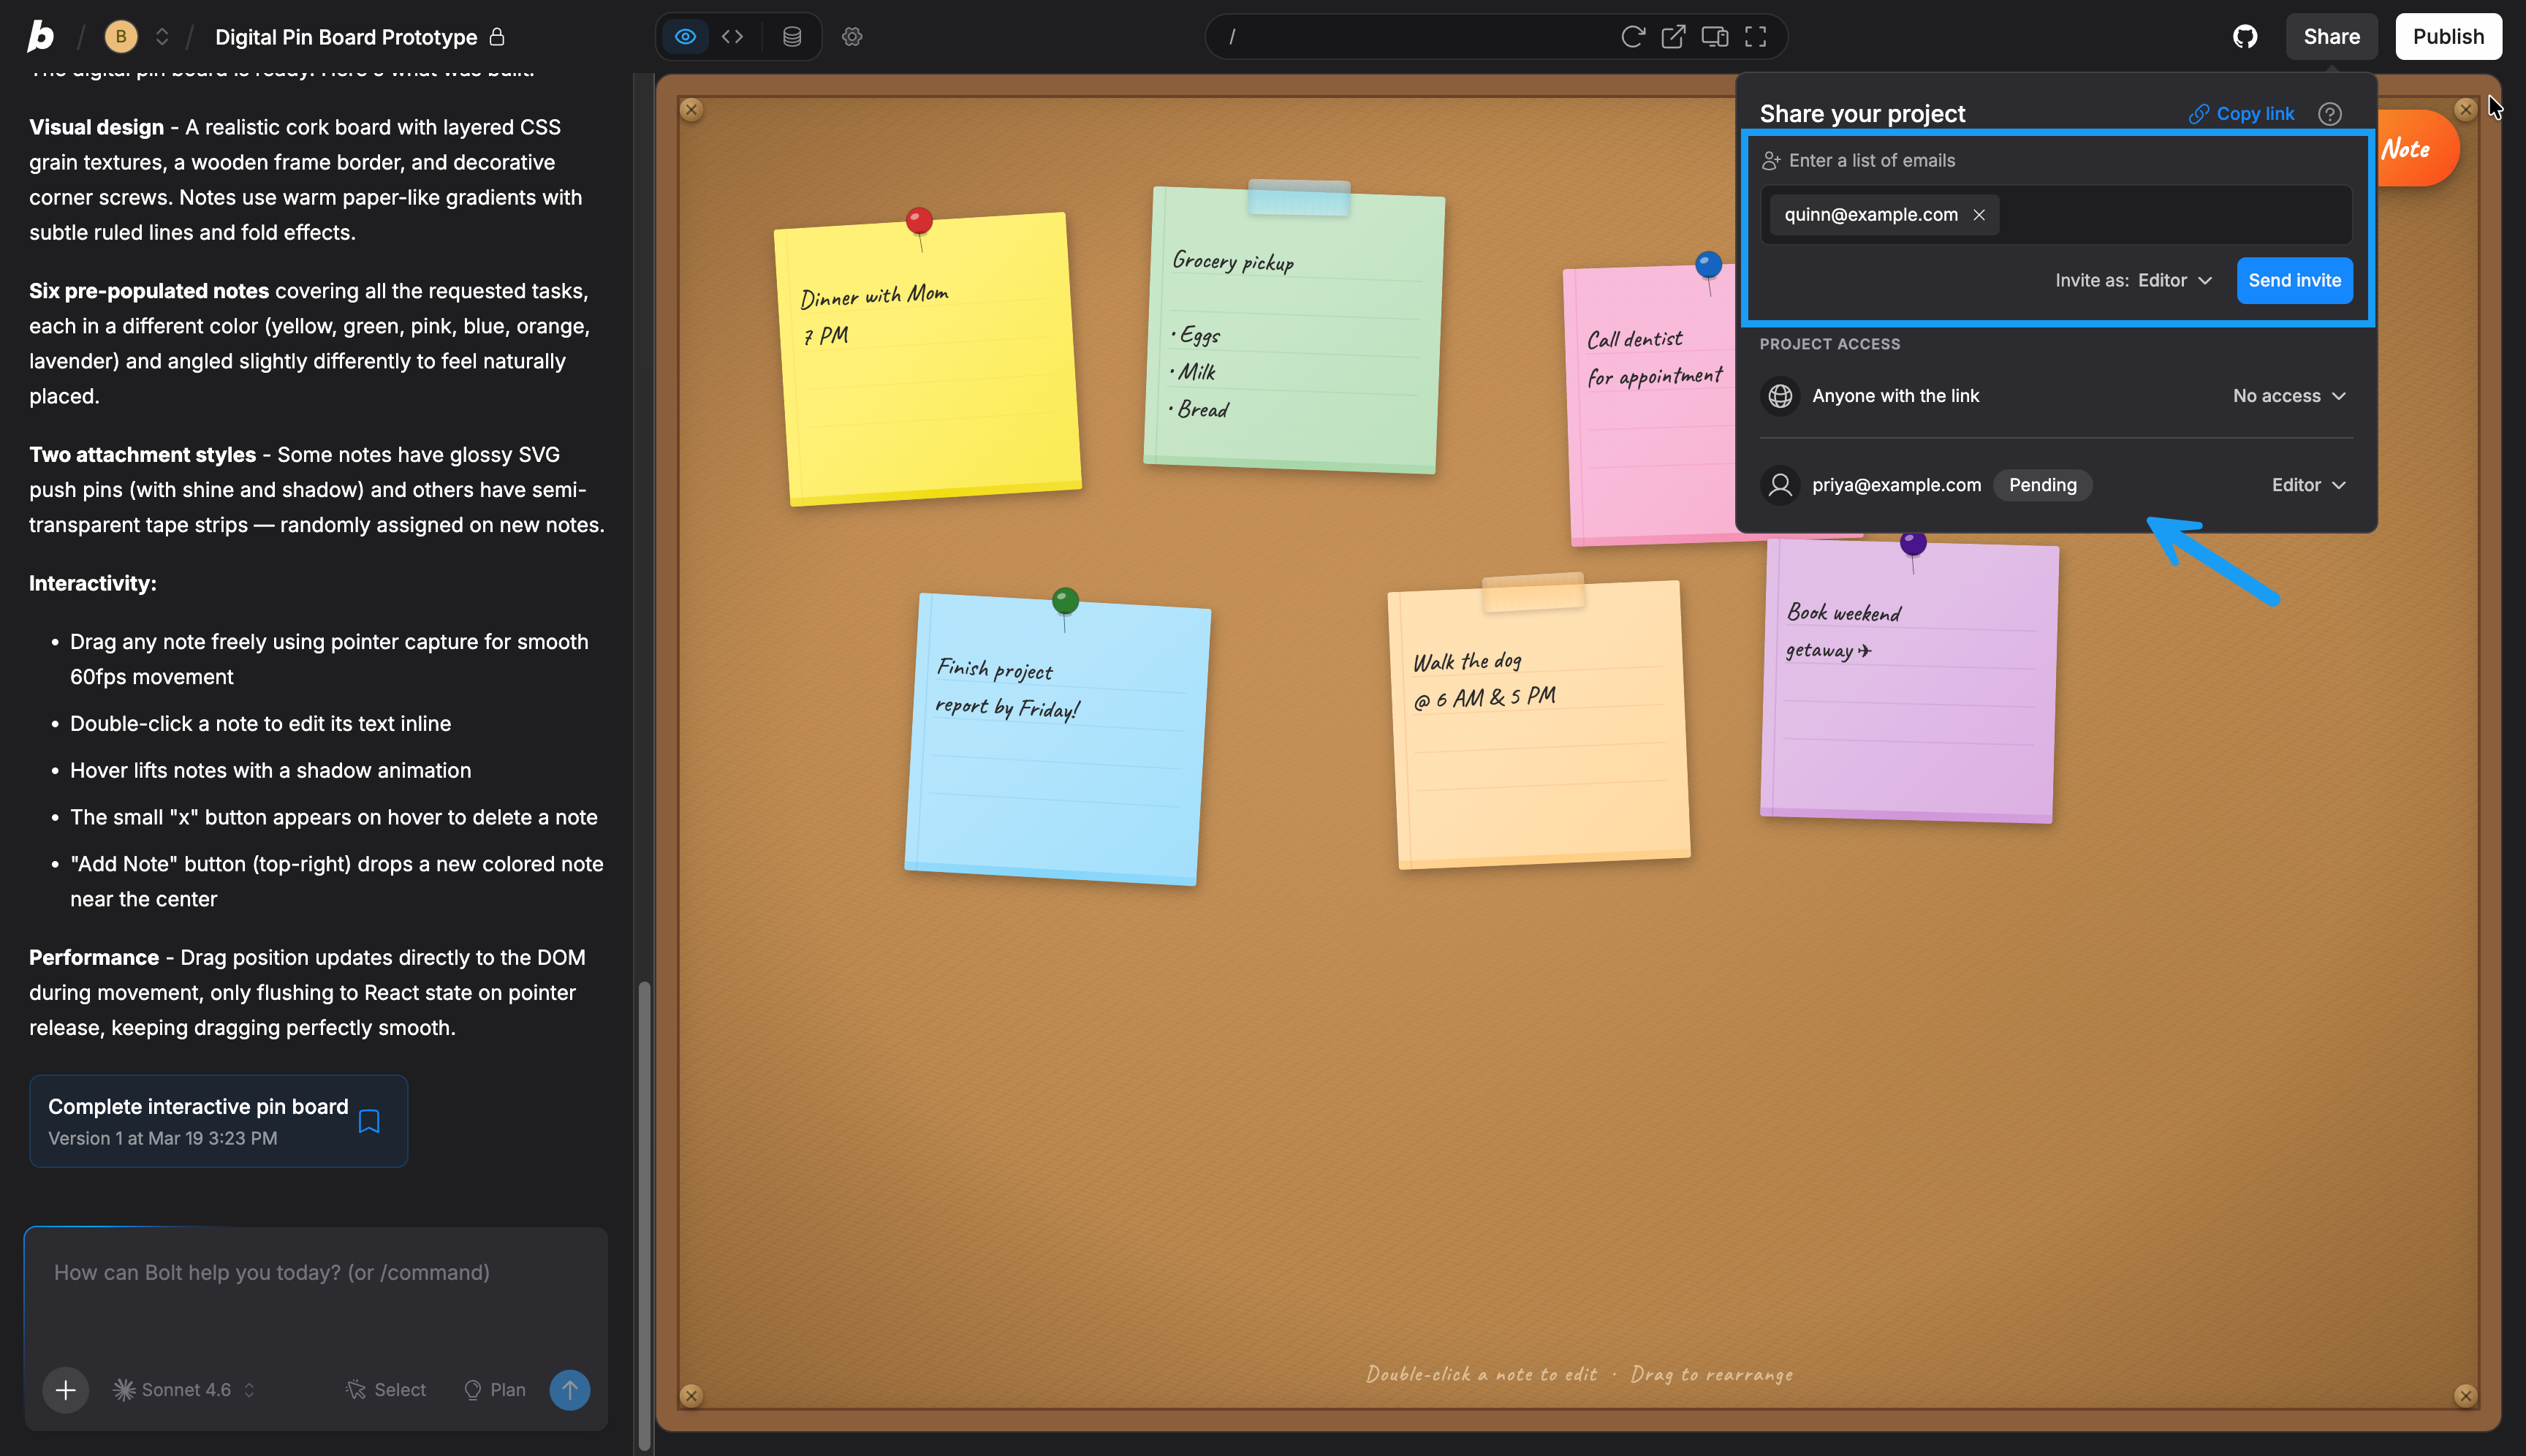
- In Bolt, open your project.
- In the upper-right corner of the screen, click Share.
- In the email field, enter the address of each collaborator you want to invite.
- Set Invite as to the level of access you want to give them, then click Send invite.
Pending until they accept the invite.
Resend an invitation or remove a collaborator
- In the upper-right corner of your screen, click Share.
- At the bottom of the menu, next to the collaborator you want to manage, select the menu that shows their current role (for example, Editor).
- Do one of the following:
- To resend a pending invitation, click Resend invite.
- To remove their access, click Remove.
Restrict access for collaborators
To change a collaborator’s permissions or remove their access to your project:- In the upper-right corner of your screen, click Share.
- Next to the collaborator you want to update, select the menu that shows their current role (for example, Editor).
- Select the role you want them to have, or select No access to remove their access entirely.