View Authentication settings
To open the authentication settings for your project’s database, follow these steps: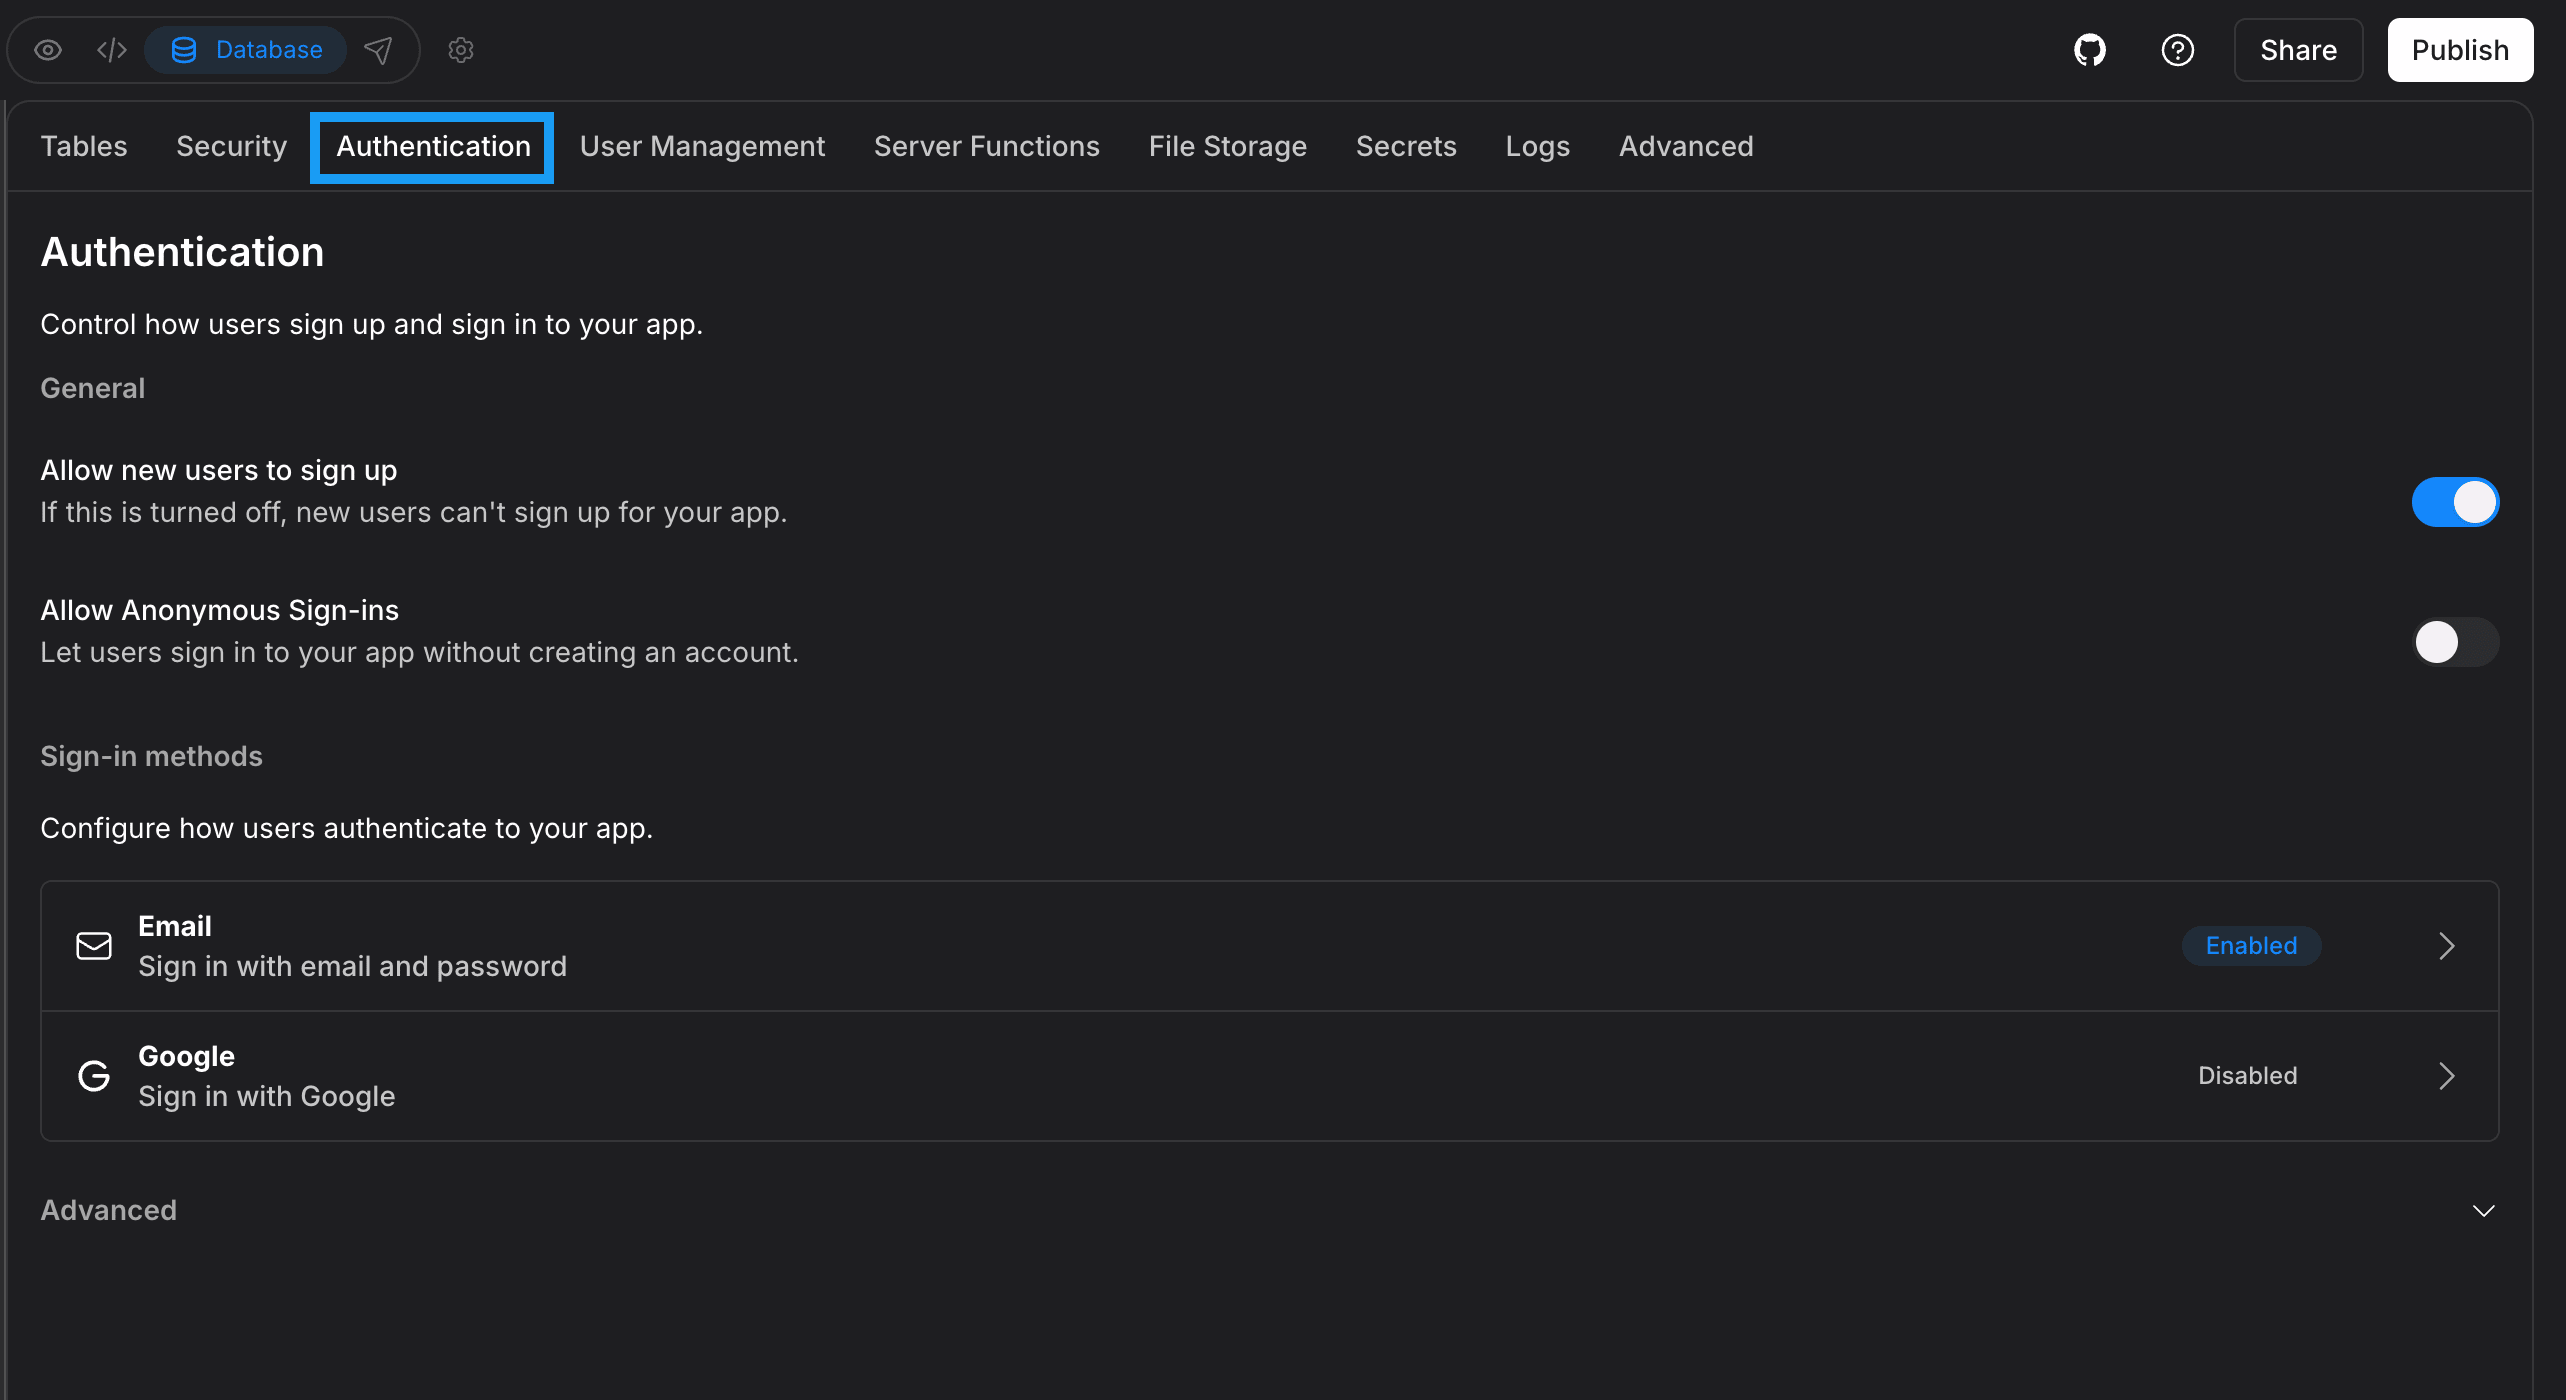
- Log in to your Bolt project.
- Click the database icon in the top center of your screen.
- Click Authentication.
Email authentication
This option allows your project’s users to sign up using their email address. Clicking Email in the Authentication settings opens the Email Provider Settings window, where you can enable or disable the following options:- Allow or block email-based signup and login
- Require users to confirm their email after signing up
- Require confirmation from the old address before changing an email
- Require recent login (reauthentication) before changing a password
- Prevent your app’s users from setting passwords that have appeared in a known data breach (Prevent Leaked Passwords)
Leaked password protection
Leaked password protection prevents your users from signing up or logging in to your site using a password that’s appeared in a known data breach. It’s available on all Bolt plans and is turned on by default when Bolt creates a database. Leaked password protection is powered by HaveIBeenPwned, a service that tracks data breaches and the accounts affected by them. It’s controlled using the Prevent Leaked Passwords setting in your email authentication settings. When Prevent leaked passwords is on and someone tries to sign up or change their password to a password that’s been found in a breach, Bolt asks them to choose a different one. Leaked password protection applies to passwords created or changed after the setting is turned on. It doesn’t check passwords your users have already set. To turn on leaked password protection:- Click the database icon in the top center of your screen.
- Click Authentication.
- Click the Email row.
- Turn on Prevent Leaked Passwords.
- When Bolt creates your database, Prevent Leaked Passwords is on by default.
- When you claim a Bolt database to Supabase, the setting turns off for Supabase free-plan users and stays on for Supabase Pro users.
- When you connect an existing Supabase database to your Bolt project, the setting is off for Supabase free-plan users and on for Supabase Pro users.
Edit email templates
Bolt lets you edit the email templates used to communicate with users. To edit your templates, follow these steps:- Click the database icon in the top center of your screen.
- Click Authentication.
- Click the Email row.
- Click Edit email templates.
- Choose the template you want to edit from the top menu.
- Change the subject line or message body as needed.
Reset email templates to default
If you have updated your email templates and want to return to the original versions, click reset all templates to their default. This link appears in blue at the bottom of the editing window.
Email template terminology
The templating system provides the following variables for use:Bolt Database email templates are powered by Supabase technology. If you want a deeper look at topics like mobile deep linking, email prefetching, routing signups through a server endpoint, or tailoring emails based on signup method, see the Supabase Email Templates documentation.
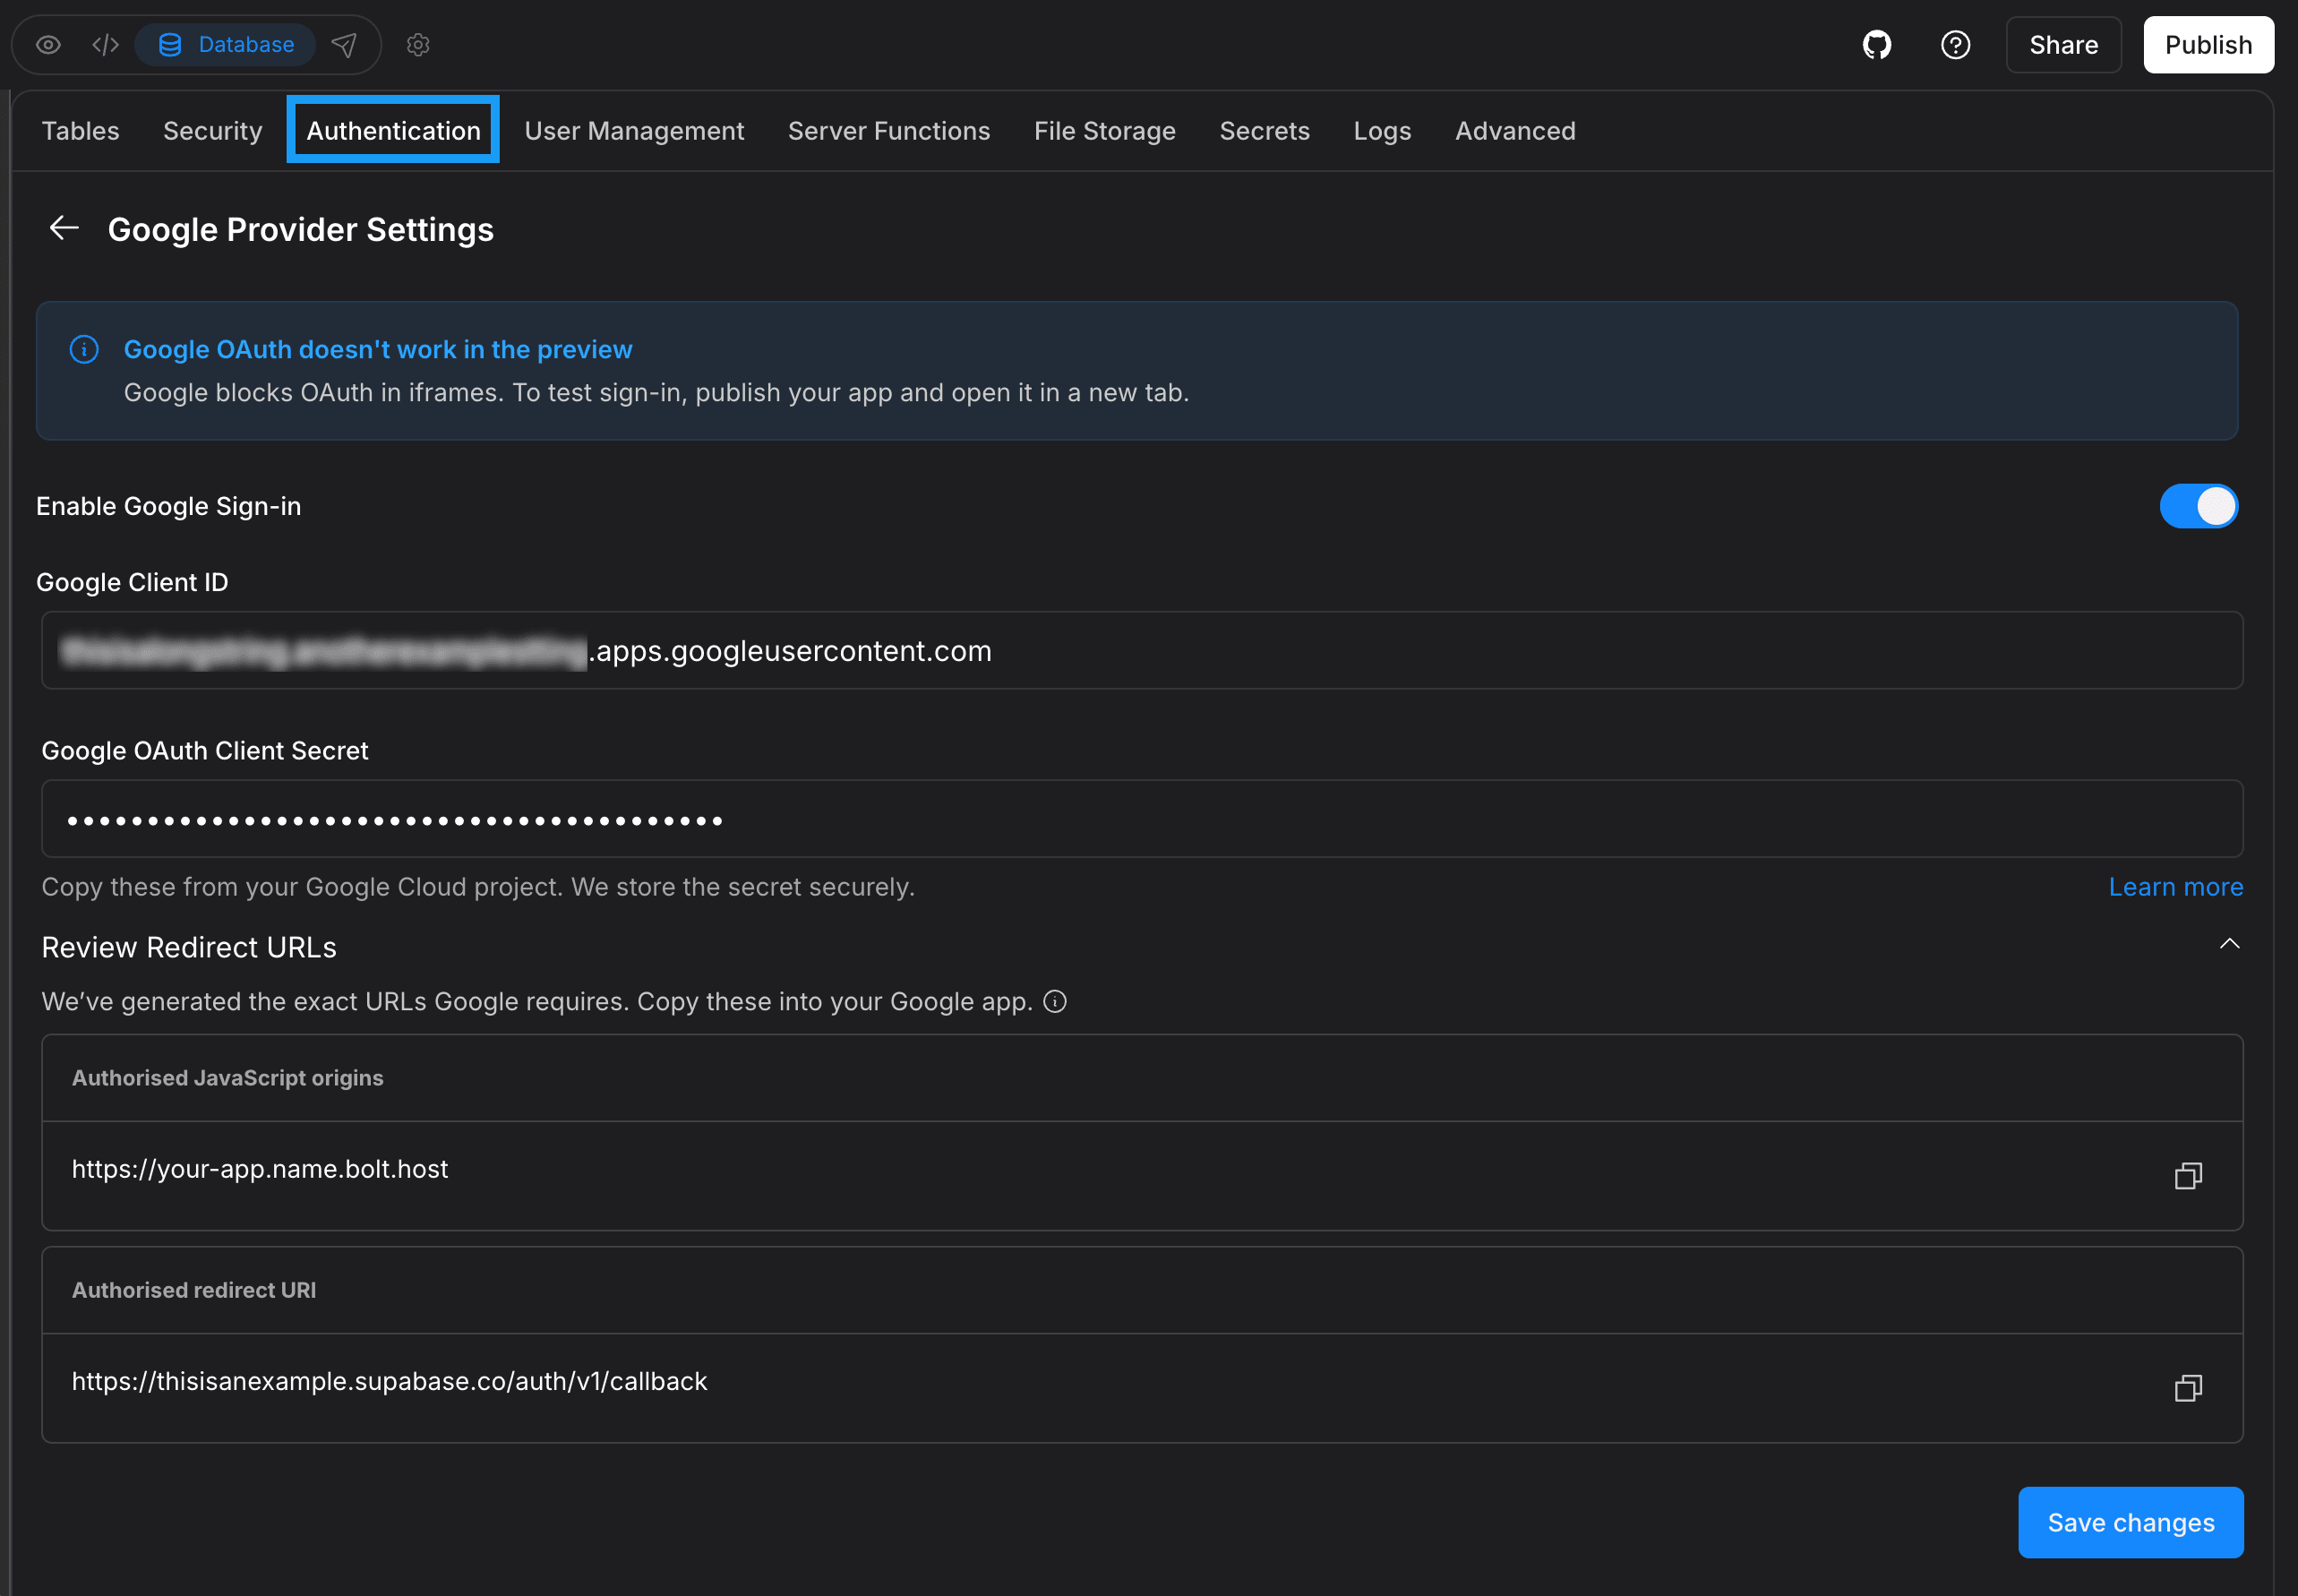
Google authentication
This option allows your project’s users to sign up using Google Single Sign-On (SSO), meaning they can log in with their Google accounts instead of signing up with an email and password.For a full Google SSO setup guide, see Google SSO authentication.
- Allow or block Google sign-in
- Enter your Google Client ID
- Enter your Google OAuth Client Secret
Advanced Authentication options
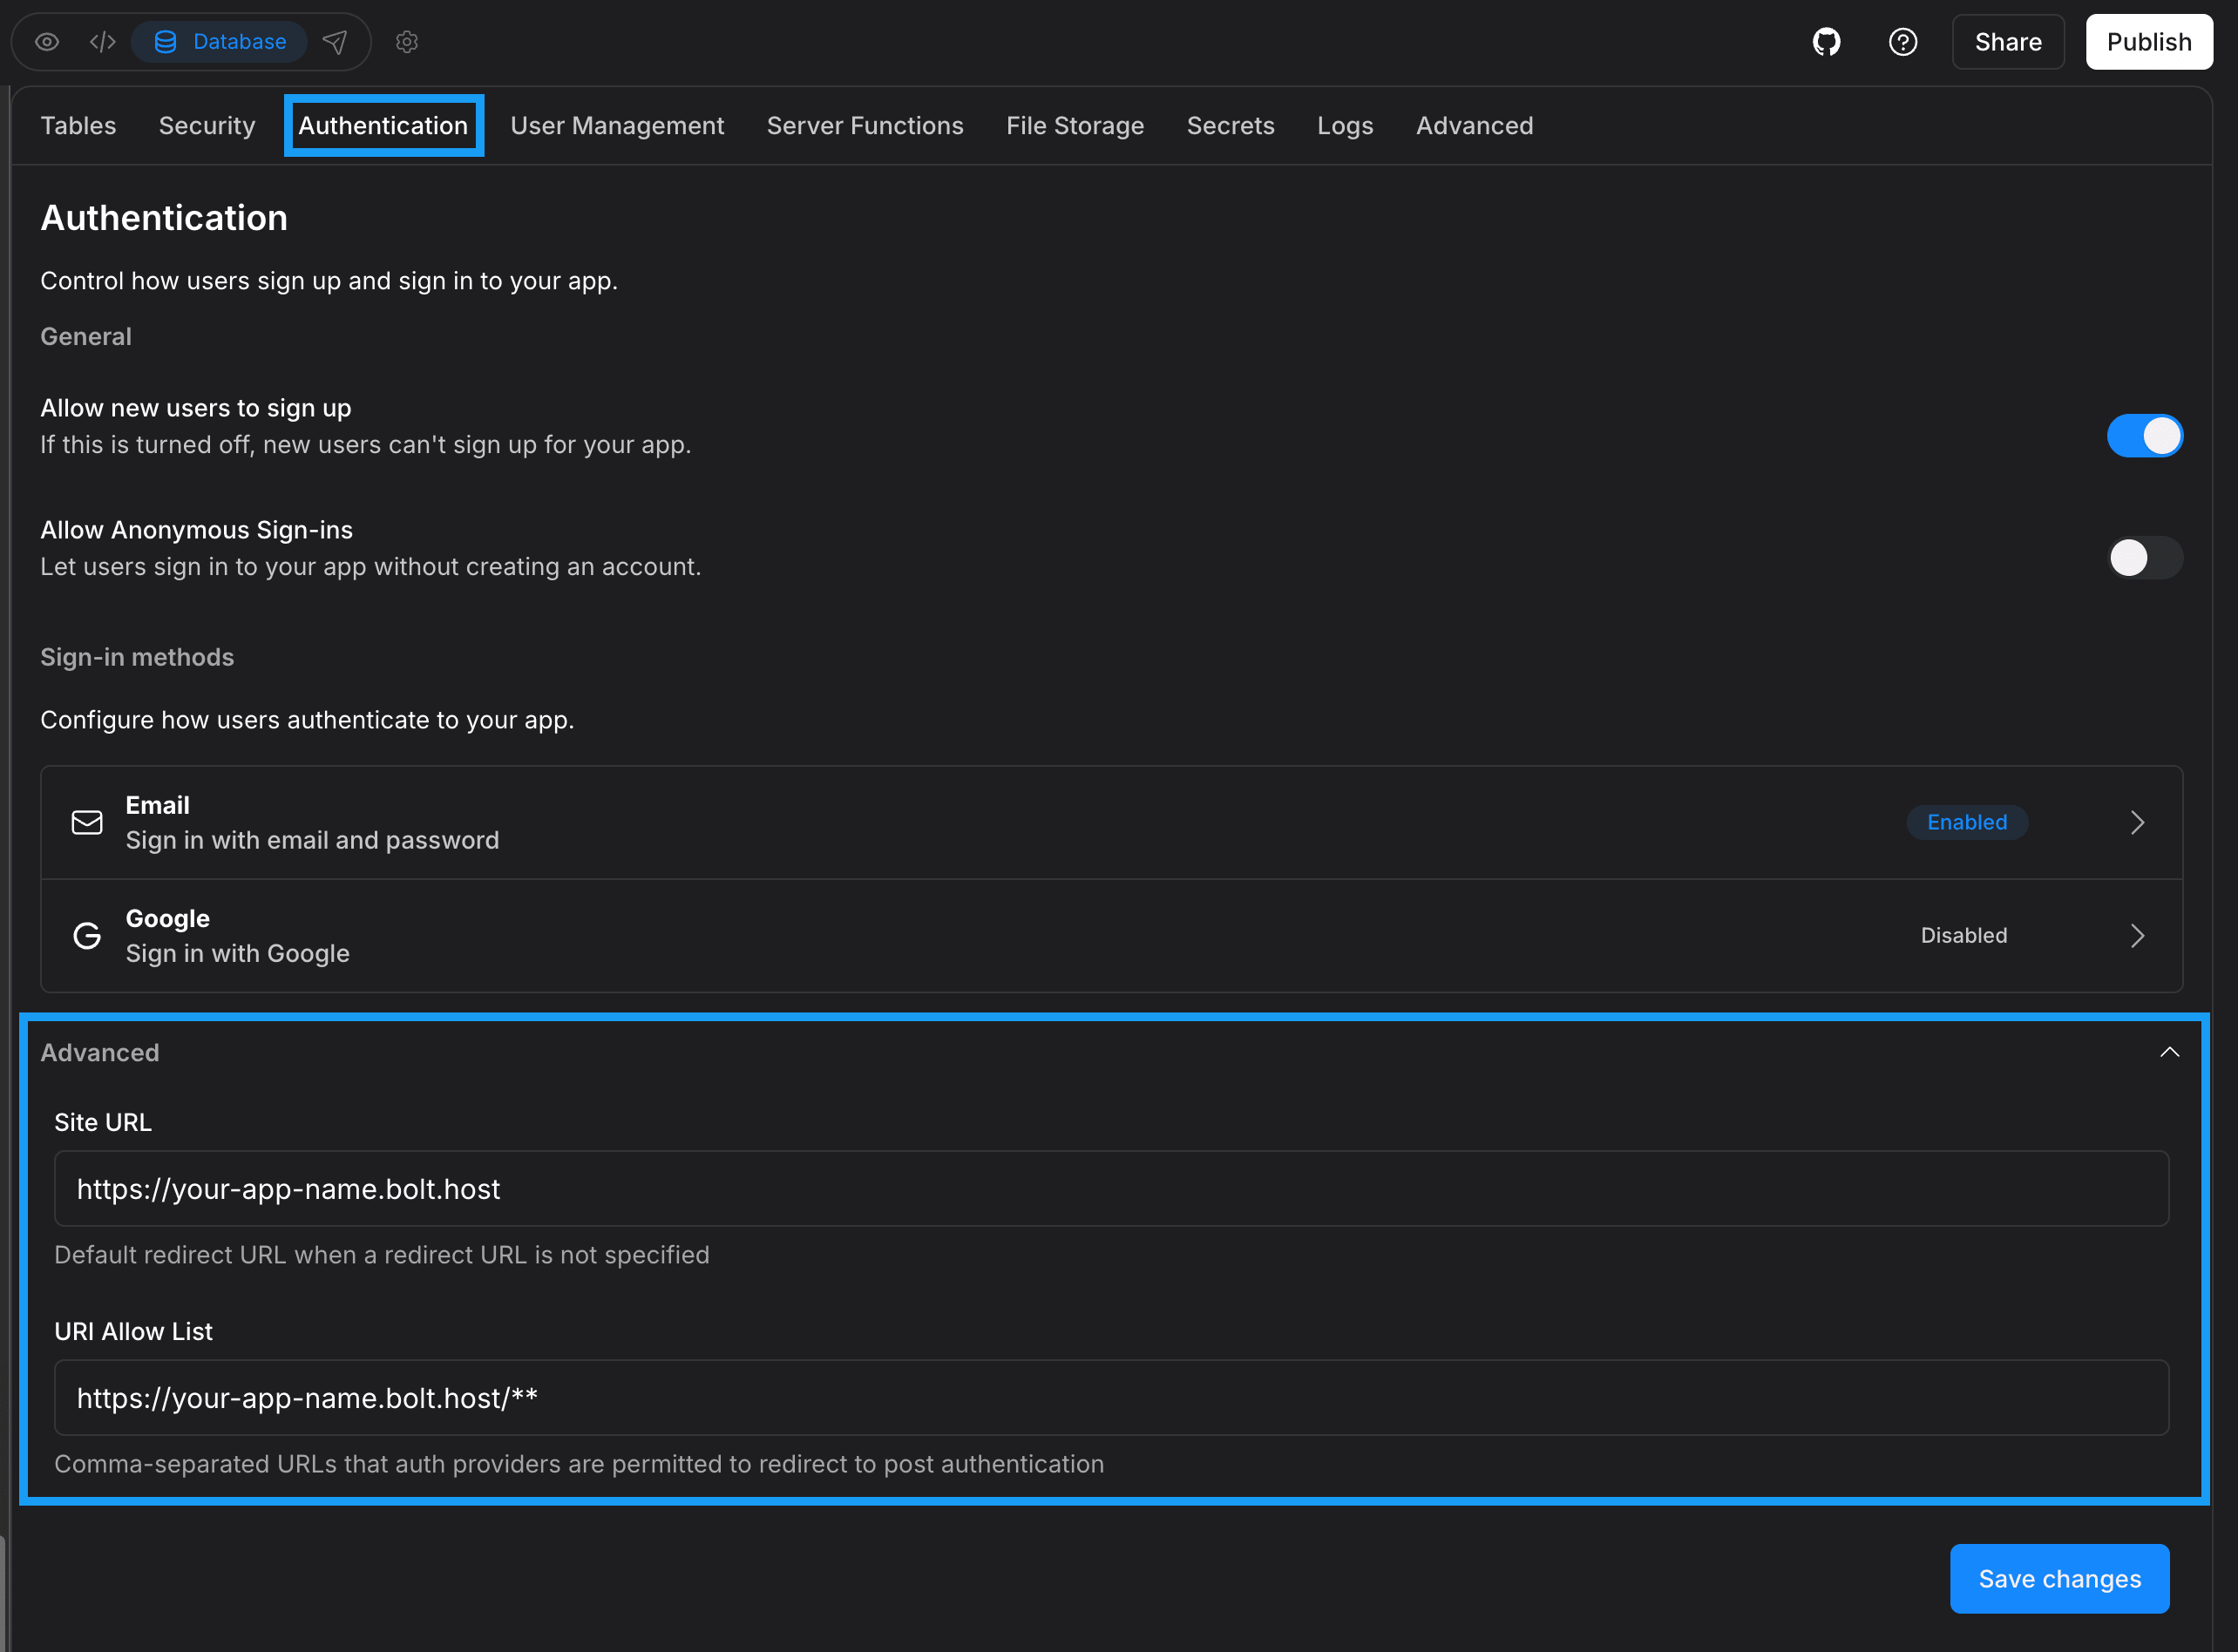
- Site URL: This field represents the main URL for your application. It is used whenever a redirect address is not provided during sign-in or password reset flows.
-
URI allow list: Sometimes, authentication providers need more than one redirect location. The allow list lets you enter a comma-separated list of valid redirect URL patterns for your project. You can use wildcards if you support multiple paths. For example:
https://ecommerce-home-page.bolt.host/**
Set up a reset password flow in your application
Bolt Database and Supabase include built-in password reset functionality. To use it in your application, you need to ask Bolt to add it for you.Requesting reset password support
If your app already has a login screen that uses Supabase or Bolt Database authentication, you can enable password reset by sending Bolt a short instruction. For example:Add reset password functionality to my project.Add a forgot password button to the login screen.
How the password reset link works
The reset email contains a link that sends the user back to your application and automatically authenticates them. Where that link sends the user depends on your authentication settings. Supabase only redirects users to URLs that are included in the URI Allow List. If the original URL is not listed there, Supabase falls back to the Site URL. By default, Bolt projects uselocalhost:3000 as the Site URL. This does not work for live applications.
When you publish a project, Bolt usually updates these settings automatically. In some cases, you may need to edit them manually, especially if your app uses multiple domains.
What to check in authentication settings
Make sure the following are set correctly in your authentication settings:- Site URL
This should be the primary live URL of your app. - URI Allow List
Add all domains and paths that users may return to after authentication, including any reset password routes.
Redirecting users to a reset password screen
By default, users who click the reset link may land on the main dashboard instead of a reset password screen. To avoid this, you can give Bolt more specific instructions. Here is an example prompt you can use:Add reset password functionality. There should be a ‘Forgot password’ button on the login screen that sends a reset password email. When the user clicks the link in the email, it includes #type=recovery in the URL. Use this to redirect the authenticated user to a /reset-password screen.
This ensures users land on the correct screen and can set a new password smoothly.